October 2nd, 2007 in Photoshop Tutorials by Richard Carpenter
Vista Wallpaper Tutorial
Create a new document “1280×1204″ (or your desired screen resolution). Color your background with a gradient using the colors #004061 and #006193.

Select your “elliptical marquee tool” and draw out a circle.

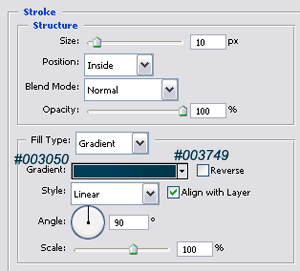
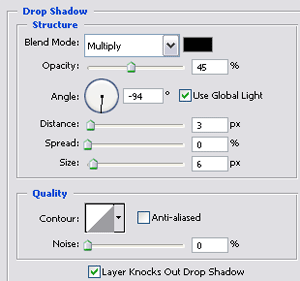
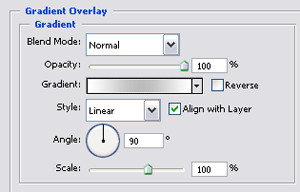
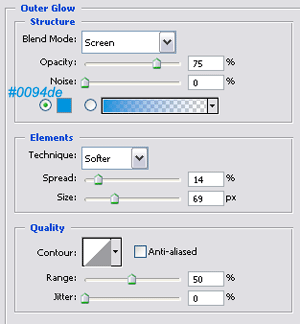
Now add these layer styles.


You should then end up with something like this.

Select your “elliptical marquee tool” again and draw another circle over the top just alittle bit bigger than the 1st one, with it still selected goto “select > modify > contract” and contract it by 50 pixels (depending on how big your resolution is).

Now add these layer styles to it.


You should have something like this.

Now we need a windows logo i got mine from google images. Copy & paste your windows logo onto your canvas and position in the middle of your orb. (If your logo has a white background then just delete it with your prefered tool).

Now add these layer styles to the logo.


You should now have something like this.

Select your “elliptical marquee tool” again and draw out a circle at the top of your orb, color it white. Also set the opacity to 25%, Then mask the layer. You should end up with something like this.

Do the same again but draw out an even bigger circle, and set opacity to 20%. The result is in the image below.

Thats it all finished heres my final result but ive added the text to the orb and some smaller orbs around it.
Be Part Of The Community!
Become part of the hv-designs community.
Subscribe Via RSS or Follow Us On Twitter.


4 Responses to “Vista Wallpaper Tutorial”