Hello, welcome to another tutorial from hv-designs. Today il be showing you how to create a hosting layout with a 3D aspect to it.
Setting Up The Background
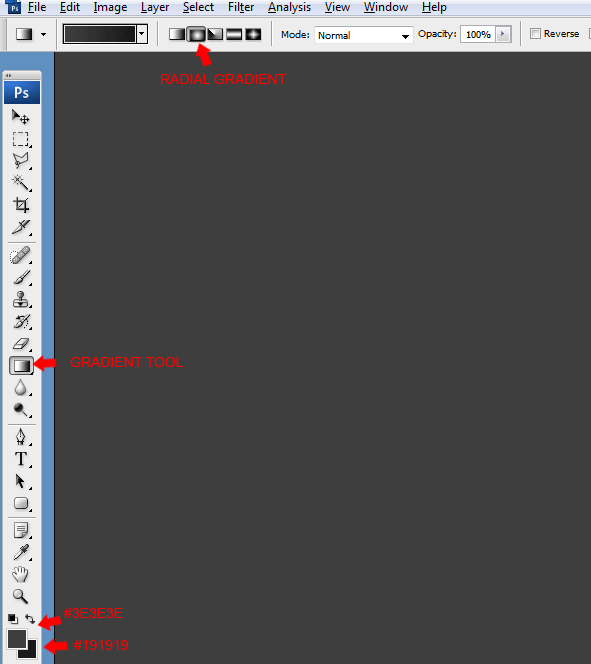
Create a new document 1200 x 1200 pixels, set your foreground color to #3e3e3e and background color to #191919. Select the gradient tool with a radial gradient.
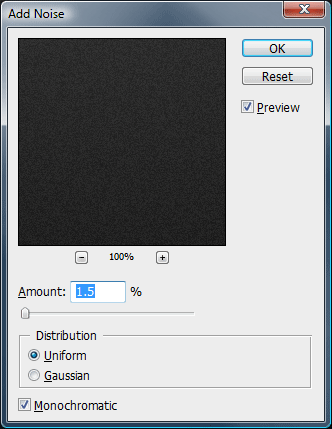
Once you have the radial gradient selected, start from the top middle of the canvas then drag downwards about halfway down. Now go to “filter > noise > add noise”, use the settings below.
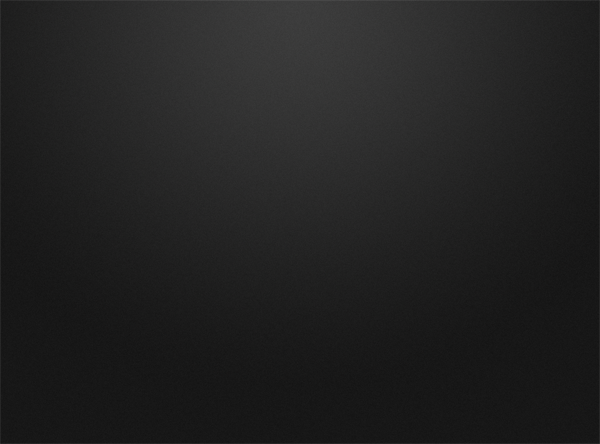
You canvas should now look something like this.
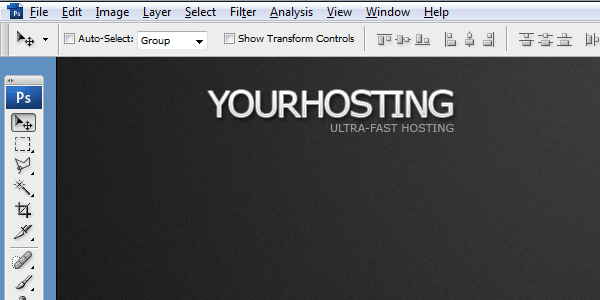
Creating The Website Title
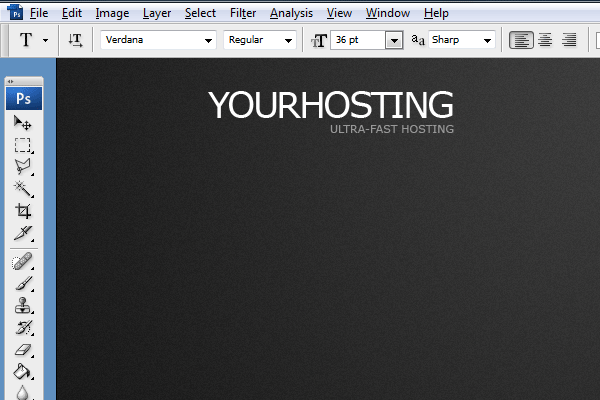
Select the type tool then add your website title to the canvas. I used the font verdana and a font size of 36pt.
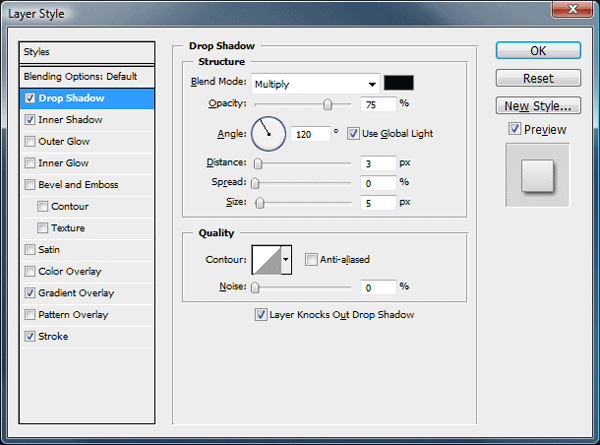
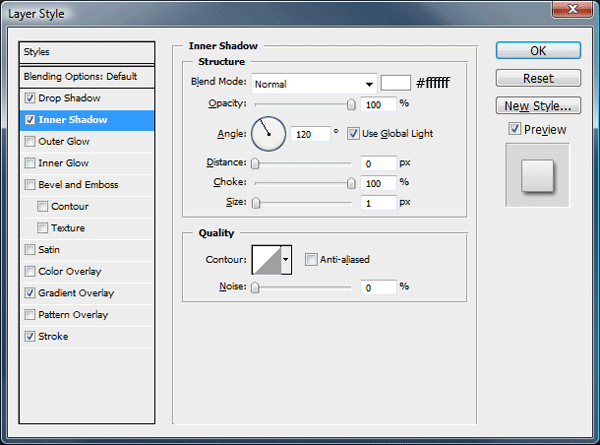
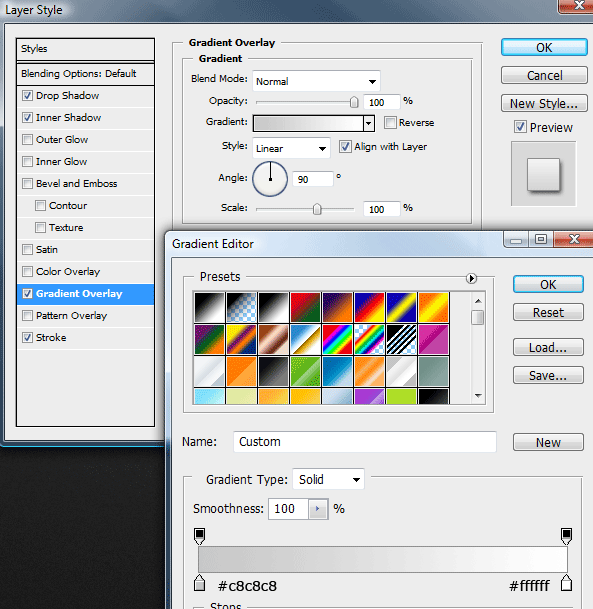
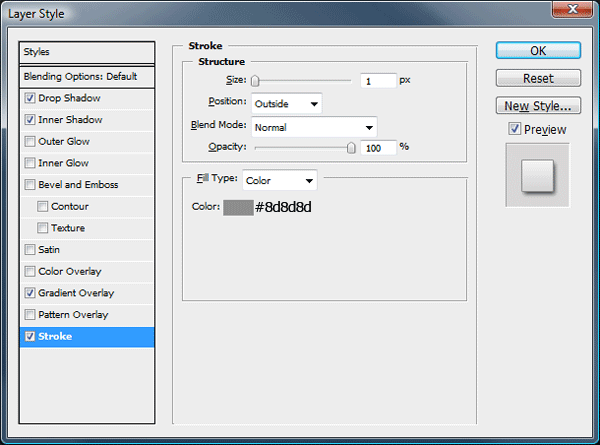
Add these layer styles to your website title text.
You should have something like this.
Creating The Navigation Bar
Select the rounded rectangle tool with a radius of 15 pixels.
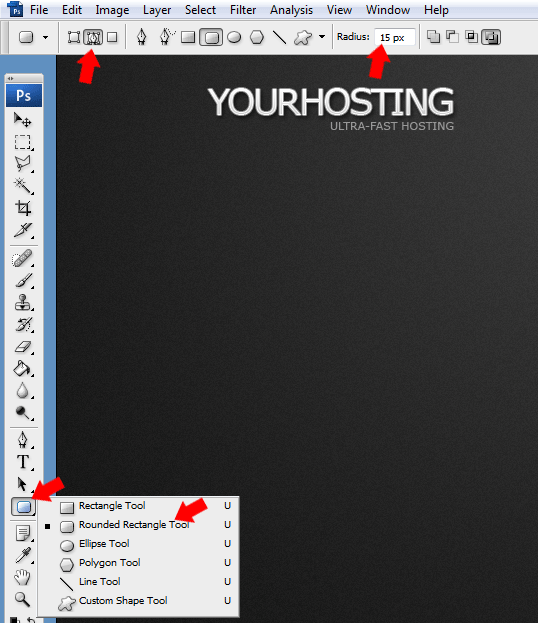
Drag out your path along side the website title, leaving a decent size gap inbetween each element.

Once you’ve dragged out your path select the pen tool. Right-click inside the path and go to fill path.
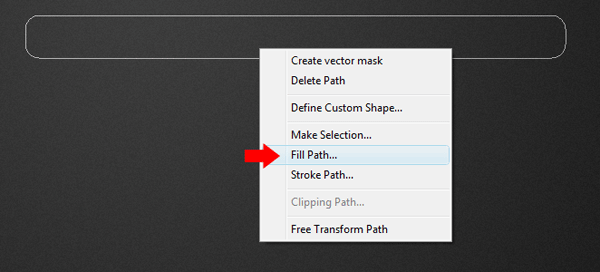
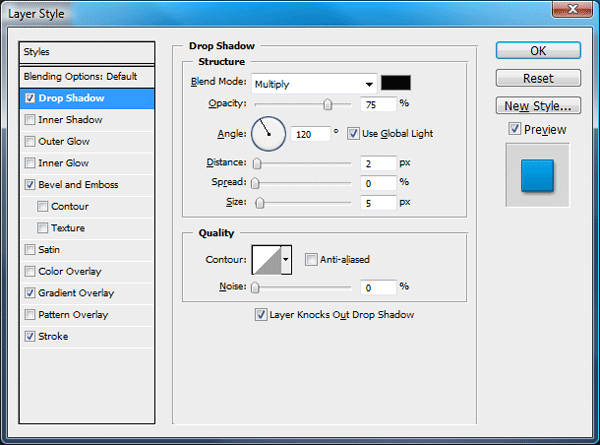
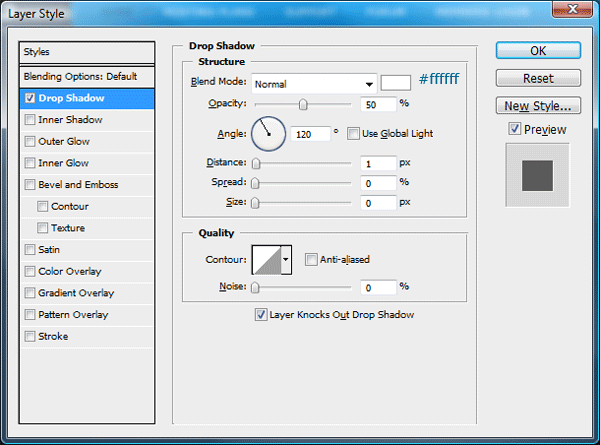
Finally right-click inside the path again and go to delete path. Now add the following layer styles.
You should have something like this.
Using the same method as explained above create another rounded rectangle inside the navigation. Fill the rectangle with the color white.

Now set the opacity of the white rectangle to 8% then add your navigation links.

Inbetween each navigation link add a small circle using the elliptical marquee tool.
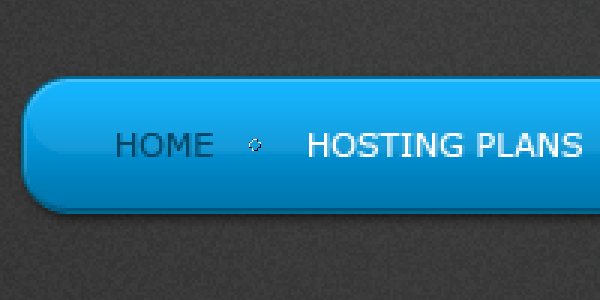
Fill the circle using the color #00688f then add a drop shadow using the settings below.
Your navigation should now look like this.

Creating The Content Area
Underneath the website title and navigation add a catchy sentance of some sort, then using the rectangular marquee tool create a rectangle on the right side.
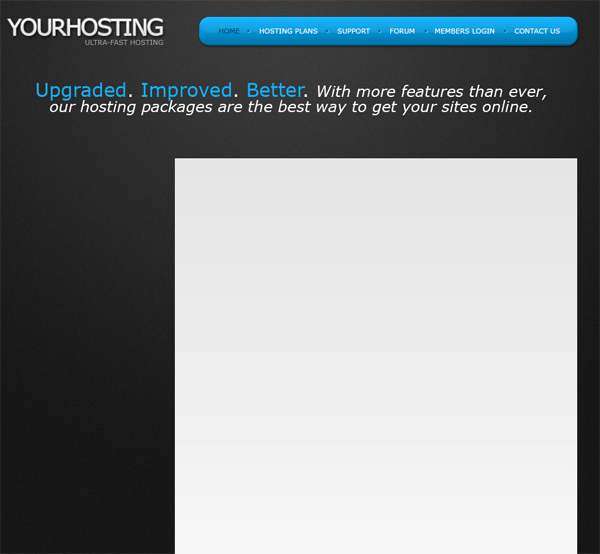
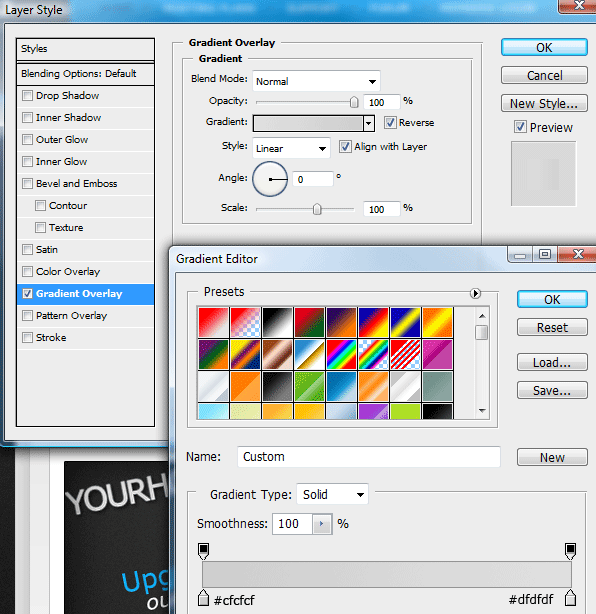
Add a gradient overlay to the rectangle you just created using the settings below.

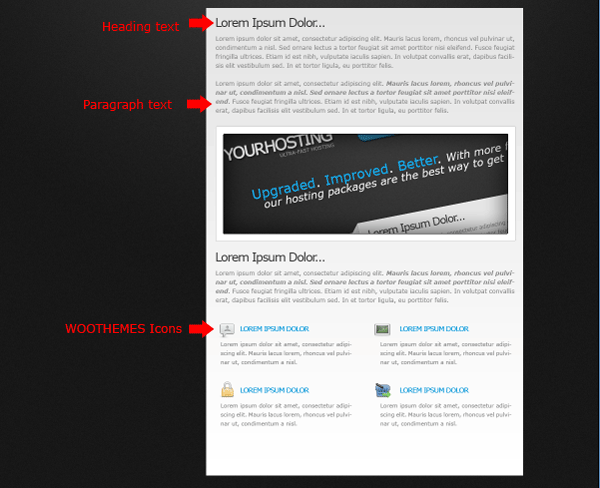
Inside the rectangle add some dummy content. Use the color #373737 for the titles and a size of 14pt, for all paragraphs use the color #898989 with a size of 12pt. Also within the content area throw in some snazzy icons in a nice list form, the icons ive used are from woothemes.
Creating The Sidebar
Duplicate your content rectangle layer, then drag the duplicated layer underneath its orginal. Press “ctrl + t” to free transform the rectangle, resize the rectangle to a thin rectangle, then move it side by side to the content rectangle.
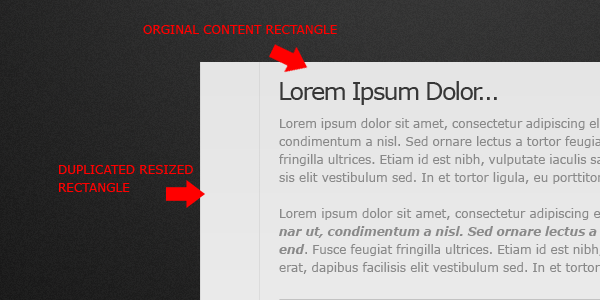
With your duplicated rectangle layer still selected go to “edit > transform > perspective”. Select the top left anchor point and move it downwards whilst holding down the shift key on the keyboard.

Update the gradient overlay on the duplicated rectangle to the settings below.
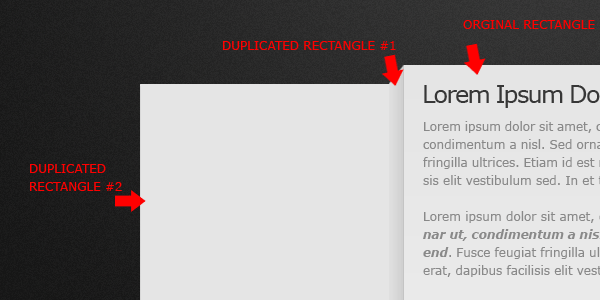
Duplicate the content rectangle once more, resize the rectangle using the free transform tool. The rectangle should be resized to fit side by side the first rectangle we duplicated.
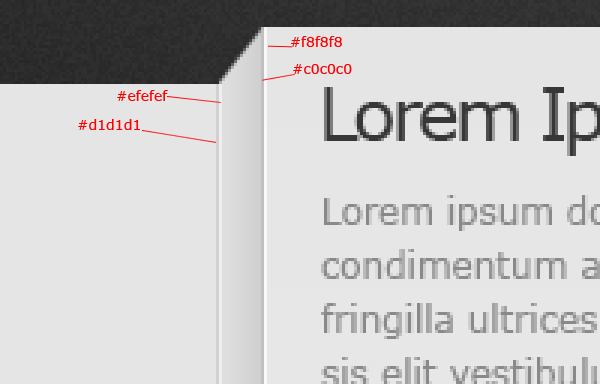
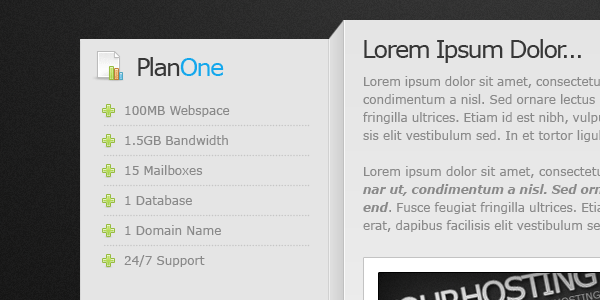
On each crease where the rectangles meet, add a divider using the color’s specified below. The dividers should span the whole height of the each crease.
You should have something like this.
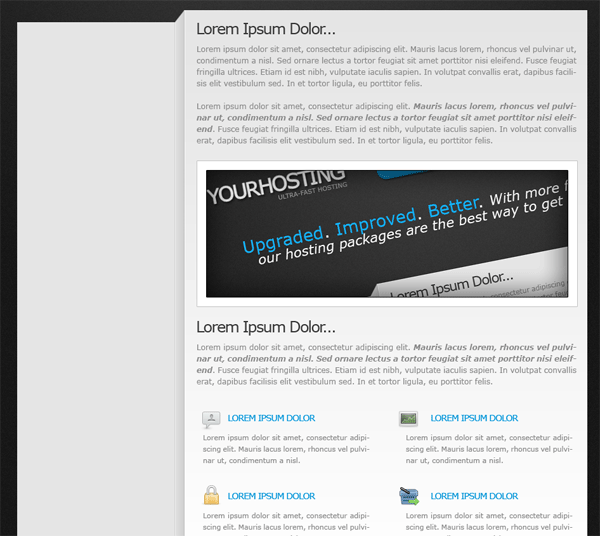
Adding The Sidebar Content
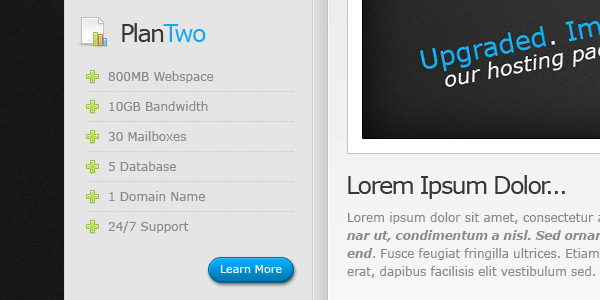
Using the type tool and the plus icon from the woothemes icon set, create a simple list displaying dummy content.
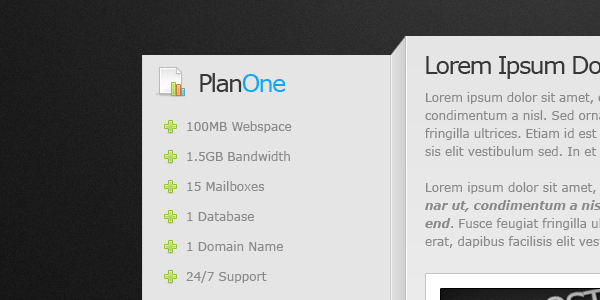
Inbetween each list item add a dotted divider. You can easily create the dotted divider by using the type tool and hold down the full stop key. (………)
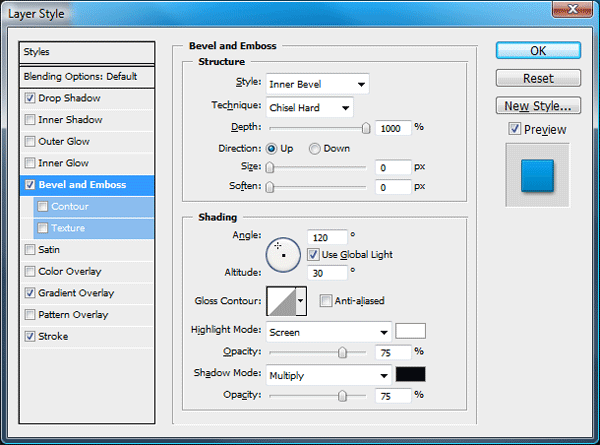
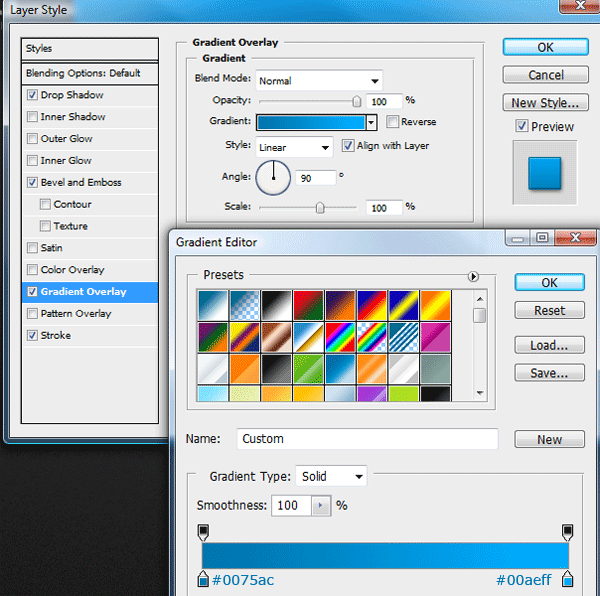
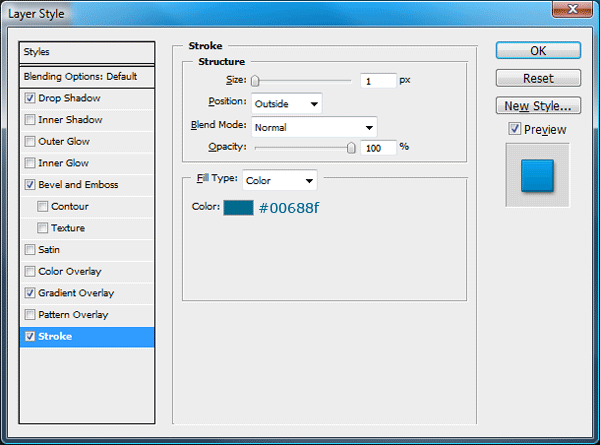
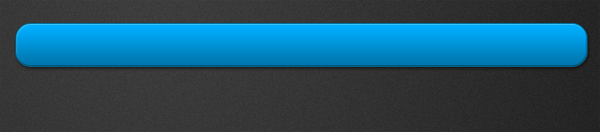
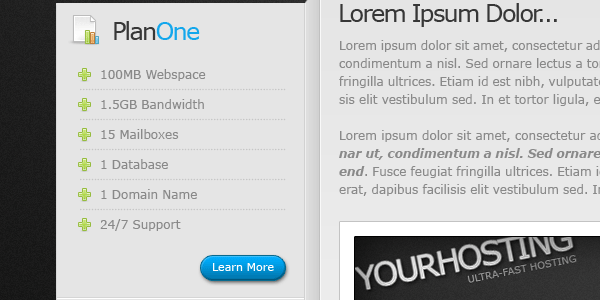
Underneath the list add a simple learn more button. Select the rounded rectangle tool with a radius of 15px same as our navigation bar, drag out a small sized button then fill with any color. Right click the navigation layer and go to “copy layer styles”, right click the learn more button layer and go to “paste layer styles”.
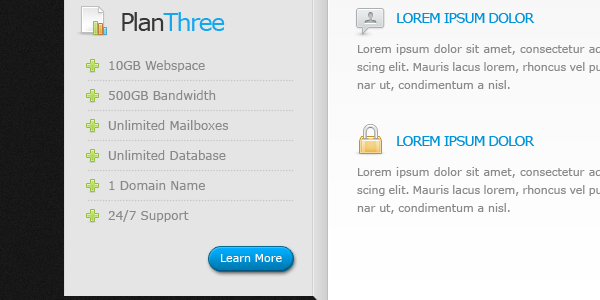
Repeat the steps above to create more plans as needed.
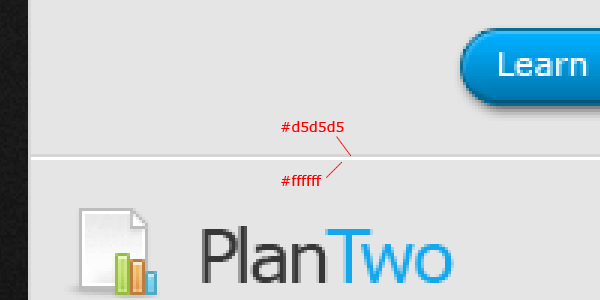
Finally inbetween each plan add a divider to seperate the content. Create two 1 pixel lines using the colors below.
Finally…
Finally add your footer content underneath the content rectangle using the type tool. Thats it all done, hope you enjoyed this tutorial, il look forward to your comments.
Dont Forget
Dont forget to digg and re-tweet this tutorial, your help and support is much appreciated. Thank You.!
Learn To Code This Layout
You can learn to code this layout into a working CSS template by following these two follow-up tutorials. Part #1 and Part #2.
Enjoy