Category Archives: Articles

2008-05-20-psd-htmlcss-

Your ads will be inserted here by

AdSense Now!.

Please go to the plugin admin page to paste your ad code.

CREATING OUR LAYOUT:

Firstly open up photoshop and create a new document 900 x 845 pixels, fill your background layer with the color white if it isnt already. For our background i also want to add some stripes to it so create a new document 4 x 4 pixels with a transparent background. Zoom in 1600%, select the “pencil” tool and a 1 pixel brush, create 4 squares like this.

Now goto “edit > define pattern” label your pattern lines or anything you see fit. close that document and revert back to your first document that you made. Create a new layer above your background layer and label it “background lines” select the paint bucket tool at the top under the menu change forground to pattern. Select your pattern from the list and fill your background with the line pattern, set layer opacity to 10%. Now im going to start designing the general layout of our site starting from the bottom and working my way up. Create a new layer labelled footer. Select the rounded rectangle tool with a radius of 20px draw out your footer, select the rectangle tool and cut off the top.

The layer styles for the footer are.
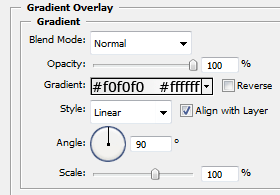
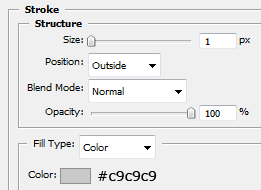
Create a new layer and label it content, select the rectangle tool and draw out our content area, fill with the color white and apply the same stroke as we did in the footer.

Create a new layer above your content layer labelled sidebar select the color #e2e2e2 and create a rectangle like the image below.

Now create yet another layer labelled navigation, select the rectangle tool and create a rectangle above your sidebar and content area, have the bottom of the navigation touch the top of our grey sidebar.

The layer styles for the navigation are.
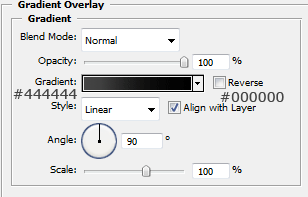
Create a new layer above your navigation labelled navigation shine. On this layer create a rectangle the same width as our navigation but half the size of the width, fill with white and set opacity to 10% this will give the navigation a shiney effect.

Now create another layer labelled header, create the header the same way as we did the footer but make it a little bit bigger, head also uses the same layer styles.

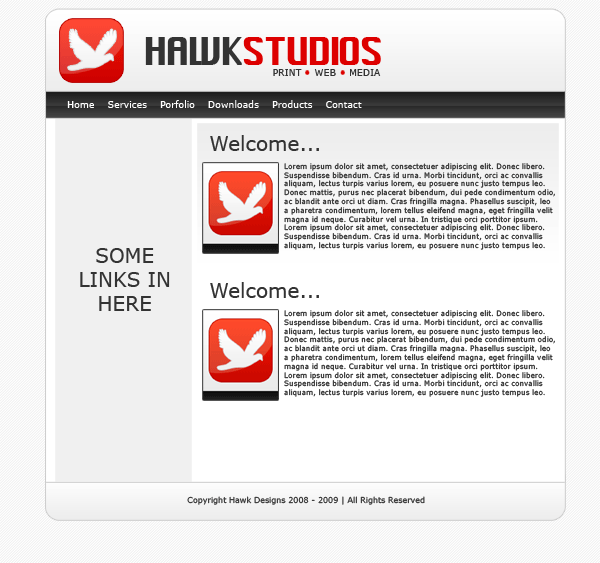
Now select the type tool and add your website title, navigation text and footer text, ive also labelled the grey sidebar box saying links here, you can leave that blank if you wish as the links will be added using html & css.
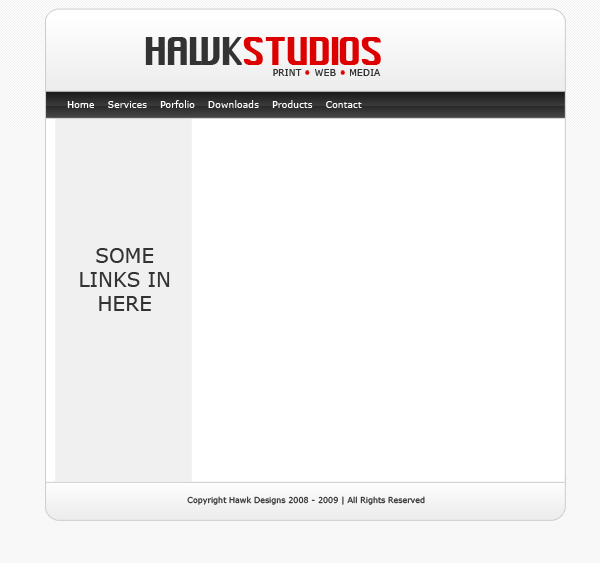
Now add your website logo, i just created a quick one using adobe’s custom shapes, obvisouly you can take more time to develop your own logo.

Now add some example content so we no what our layout will sort of look like, but most of it will be done using css and html which you will see in a moment.
SLICING AND PREPING IMAGES:

Now our website is created we need to slice and prep our images ready to be used in our website, now your going to have to bare with it as your site may be a few pixels wider or higher than mine unless you have downloaded the PSD.

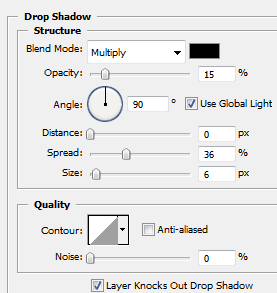
Firstly we’l start with the header, hide ALL layers in your psd file except the header layer(s) create a new blank layer above your header then goto “layer > merge visable” this will then merge our layers corrosponding to our header but keep all the layer styles intact, eles everything goes abit mental. Copy and paste your header, logo etc… which should now be all on one layer to a new document. Under the header layer on your new document add your white background and your stripes, simply by filling with the bucket tool and creating a new layer and filling with your pattern, remember you pattern layer should have a opacity of 10% just like in the psd. Now i want to add a drop shadow to the header so the layout doesnt look flat onto the background when its viewed on the internet. So add this drop shadow to your header.
Your header in your new document should look like this.

Now goto your desktop create a folder called “website” open the folder website and create another folder called “images” save the header as “header.jpg” within the “website images folder” by going to “file > save as” in adobe photoshop. Thats our header done now for our navigation. Our header was 790pixels wide which also included the space around the header for the drop shadow, so our naviagtion should be the same, but without the space at the top and bottom as we only want the drop shadow around the outside of our layout. Following the steps above copy and paste your navigation to a new document, add your stipey background and drop shadow like we did with the header. Heres my navigation.

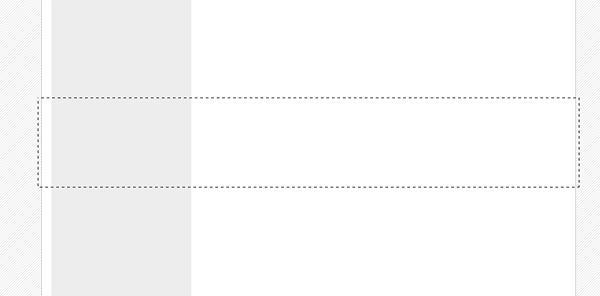
The content will be done in the same way but we dont need all of it, just a section of it as we can repeat it over and over using CSS. Make a selection like this.
Copy and paste to a new document also note that the selection is also 790pixels wide. Once pasted to a new document we need to add our white 7 stripey background again plus the drop shadow. Heres how mine looks.

Notice how small my snippet is, mine is only actually 20pixel high as it will be repeated anyway. Now do the same with the footer.

One last thing, as we want the stripey background we also need to create our background to do this make a screen shot of your psd layout and make a selection 21x21pixels of the background save it as gif in your images folder, or save the small image below.

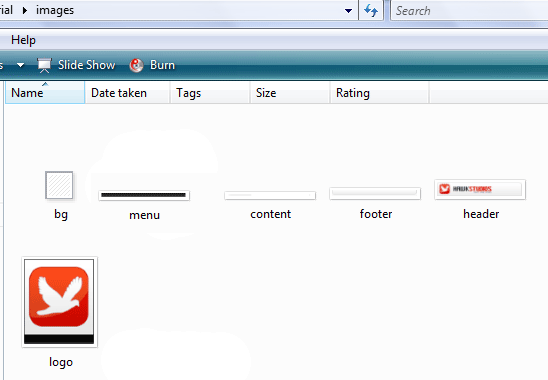
Thats all the images we need. You should have something like this in your images folder.
Your ads will be inserted here by

AdSense Now!.

Please go to the plugin admin page to paste your ad code.

CODING OUR LAYOUT:

Goto your website folder then open notepad, once you have opened notepad just goto “file > save as” then save as a blank css document (see image below).
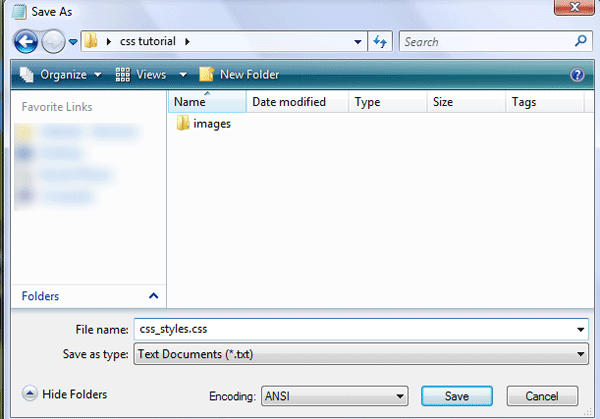
Now open dreamweaver and create a blank HTML page. Click the code button to see the source code of our blank html. Save your html file as index.html in the same directory as your css file.

Firstly lets add all our information which will include our doctype, author details, meta tags and linking of our css file.

 <!DOCTYPE html PUBLIC "-//W3C//DTD XHTML 1.0 Strict//EN" "http://www.w3.org/TR/xhtml1/DTD/xhtml1-strict.dtd">  <html xmlns="http://www.w3.org/1999/xhtml" xml:lang="en" lang="en"> <head>  <meta name="Description" content="Hawk studios, print web &amp;amp;amp; media" /> <meta name="Keywords" content="your, keywords" /> <meta http-equiv="Content-Type" content="text/html; charset=iso-8859-1" /> <meta name="Distribution" content="Global" /> <meta name="Author" content="richard carpenter - [email protected]" /> <meta name="Robots" content="index,follow" />  <link rel="stylesheet" href="css_styles.css" mce_href="css_styles.css" type="text/css" />  <title>HAWK STUDIOS | Print . Web . Media</title>  </head> 

You can pretty much see what some of the things mean, the main two id like to point out you are the stylesheet link and the title, the title being whats displayed in the browser window and the without the stylesheet the layout will look abit of a mess. Now the lets get on with marking up our “divs” for our layout, we’l have 5 main divs “header, naviagtion, content, sidebar and footer”. We mark these out like so.

 <body> <!-- wrap starts here --> <div id="wrap"> <div id="header"> <!--HEADER INFO WILL GO HERE --> </div> <div id="menu"> <!--NAVIAGTION HERE --> </div>  <!-- content-wrap starts here --> <div id="content-wrap"> <div id="main"> <!--MAIN CONTENT HERE --> </div> <div id="sidebar"> <!--SIDE BAR LINKS HERE --> </div>  <!-- content-wrap ends here --> </div> <div id="footer"> <!--FOOTER HERE --> </div>  <!-- wrap ends here --> </div>  </body> </html> 

The arrows are comment codes i cant stress enough how important it is to have these as it will tell us where everything goes. A comment code is basically a snippet of text that can be added to a html document but the browser doesnt render it, there for being invisable when viewed in a browser, you’l only see it when you view the source code. Theres 1 or 2 divs i havent mentioned yet that you might see and thats the wrap and content-wrap divs, these will be styles to keep the layout in the middle of our browser which we’ll get too in a moment. If you view your website now in the browser you wont see nothing even thou you’ve added buckets of code already not untill you’ve added the styles in the css style sheet. Goto “file > open” and open your blank style sheet, the first things we will style will be our websites background image, set the font type and size.

 /******************************************** HTML ELEMENTS ********************************************/ /* top elements */ * { margin: 0; padding: 0; outline: 0; } /*sets no padding or margin around the body of our document*/  body { background-color: #fff; /*website background color (white)*/ background-image: url(images/bg.gif); /*sets the background image, in our case the stripey background*/ background-repeat: repeat; /*repeats our background over and over*/ color: #333333; /*sets our text color for our website*/ margin: 15px 0; /*sets no padding and a 15px margin around the body of our document*/ font-family: Verdana, Tahoma, arial, sans-serif; /*sets the font family for our website*/ font-size: 70%; /*sets the font size in %, you can also use 12px or 14px etc... px stands for pixels*/ line-height: 1.5em; /*sets the height between each line of text.*/ } 

The first thing that most people style is the body. The body is the element that defines the documents’ body. It contains all the contents of the document (like text, images, colors, graphics, etc.). Next lets style our website layout starting with the header and our wrap which looks like this.

 /******************************************** WEBSITE LAYOUT ********************************************/ #wrap { width: 790px; /*width of our wrap*/ background: #CCC url(images/content.jpg) repeat-y center top; /*sets our background color to white and uses our content.jpg as a background, the background is also repeated along the Y axis*/ margin: 0 auto; /*center our margin to auto will center our website*/ text-align: left; /*aligns our text to the left*/ } #content-wrap { clear: both; /*The clear property sets the sides of an element where other floating elements are not allowed.*/ width: 760px; /*width of our wrap*/ margin: 5px auto; /*sets our top margin at 5 pixels and the rest to auto*/ padding: 0; /*sets 0 padding*/ } #header { position: relative; /*An element with position: relative moves an element relative to its normal position, so "left:20" adds 20 pixels to the element's LEFT position*/ height: 131px; /*sets our header height, this should be the same as our header image*/ background: #caced1 url(images/header.jpg) no-repeat center top; /*sets a background behind our header and sets our header image onto the page*/ padding: 0; /*no padding is needed*/ } 

If you view your website now it should look like this.
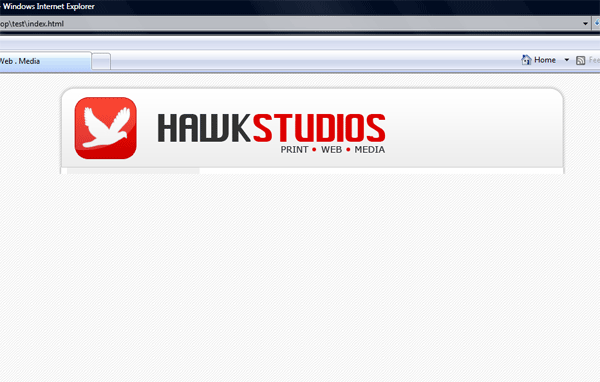
The next part to style is our navigation.

 /******************************************** WEBSITE NAVIAGTION ********************************************/ #menu { clear: both; /*No floating elements allowed on either the left or the right side*/ margin: 0 auto; /*Margins*/ padding: 0; /*Padding*/ background: #81C524 url(images/menu.jpg) no-repeat; /*Our menu background*/ height: 40px; /*The height of the menu */ width: 790px; /*The width of the menu */ font-family: Verdana, Arial, Helvetica, sans-serif; /*The font family*/ font-size: 14px; /*The font size*/ line-height: 40px; /*The line-height property sets the distance between lines.*/ } #menu ul { float: left; /*Floats our menu to the left*/ list-style: none; margin:0; padding: 0 0 0 20px; } #menu ul li { display: inline; /*The element will be displayed as an inline element, with no line break before or after the element*/ } #menu ul li a { display: block; float: left; padding: 0 12px; color: #fff; /*Font color*/ text-decoration: none; } #menu ul li a:hover { color: #E00000; /*Mouseover hover color*/ } 

If you view your website now, you will see you have your naviagtion.

Now its time to add our sidebar, content and footer styles.

 /******************************************** MAIN COLUMN ********************************************/ #main { float: right; /*floats our main content area to the right*/ width: 555px; /*gives our content area a width of 555pixels*/ margin: 0; padding: 20px 0 0 0; display: inline; }  #main h2 { padding: 0; margin-bottom: 0; color: #333333; font-family: Verdana, Arial, Helvetica, sans-serif; font-size: 180%; font-style: normal; font-weight: bold; } #main h2 a { color: #2666c3; text-decoration: none; }  #main p, #main h1, #main h2, #main h3, #main ol, #main ul, #main blockquote, #main table, #main form { margin-left: 25px; margin-right: 20px; }  /******************************************** SIDEBAR ********************************************/ #sidebar { float: left; width: 195px; padding: 0; color: #333333; margin-top: 5px; margin-right: 0; margin-bottom: 0; margin-left: 0; } #sidebar h2 { margin: 15px 5px 10px 5px; font: bold 1.4em 'Trebuchet MS', Tahoma, Sans-serif; color: #333333; } #sidebar p { margin-left: 5px; }  #sidebar ul.sidemenu { list-style: none; text-align: left; margin: 7px 10px 8px 0; padding: 0; text-decoration: none; border-top: 1px solid #A9D4EF; } #sidebar ul.sidemenu li { list-style: none; padding: 4px 0 4px 5px; margin: 0 2px; color: #333333; border-bottom: 1px solid #D2E8F7; } * html body #sidebar ul.sidemenu li { height: 1%; } #sidebar ul.sidemenu li a { text-decoration: none; color: #FF0000; } #sidebar ul.sidemenu li a:hover { color: #333; } #sidebar ul.sidemenu ul { margin: 0 0 0 5px; padding: 0; } #sidebar ul.sidemenu ul li { border: none; }  /******************************************** FOOTER ********************************************/ #footer { color: #333333; background: #caced1 url(images/footer.jpg) no-repeat center top; clear: both; width: 790px; height: 57px; text-align: center; font-size: 90%; } #footer p { padding: 10px 0; margin: 0; } #footer a { color: #FF0000; text-decoration: none; }  /* alignment classes */ .float-left { float: left; } .float-right { float: right; } .align-left { text-align: left; } .align-right { text-align: right; }  /* display and additional classes */ .clear { clear: both; } 

Your website should now look like this.

Now we need to add our content, so save your CSS file and goto the code veiw for your HTML file find the lines “naviagtion”

 <!-- navigation --> <div id="menu"> <ul> <li><a href="index.html">Home</a></li> <li><a href="index.html">Archives</a></li> <li><a href="index.html">Downloads</a></li> <li><a href="index.html">Services</a></li> <li><a href="index.html">Support</a></li> <li><a href="index.html">About</a></li> </ul> </div> 

This bit of code will add the text links “home, archives, downloads, services, support and about” to our navigation. All links point to index.html, this can be changed to what ever address you need to point them to E.G. http://www.hv-designs.co.uk. Your website when viewed in the browser should look like this.
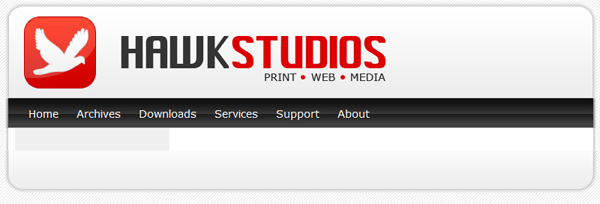
Now find the lines “MAIN CONTENT HERE” and add

 <div id="main"> <h2>WELCOME...</h2> <p><img src="images/logo.jpg" width="100" height="120" class="float-left" /> Lorem ipsum dolor sit amet, consectetuer adipiscing elit. Donec libero. Suspendisse bibendum. Cras id urna. Morbi tincidunt, orci ac convallis aliquam, lectus turpis varius lorem, eu posuere nunc justo tempus leo. Donec mattis, purus nec placerat bibendum, dui pede condimentum odio, ac blandit ante orci ut diam. Cras fringilla magna. Phasellus suscipit, leo a pharetra condimentum, lorem tellus eleifend magna, eget fringilla velit magna id neque. Curabitur vel urna. In tristique orci porttitor ipsum. Lorem ipsum dolor sit amet, consectetuer adipiscing elit. Donec libero<br /> </p>  <hr align="center" width="450" noshade="noshade" /> <h2>SOMETHING ELES...</h2> <p><img src="images/logo.jpg" width="100" height="120" class="float-left" /> Lorem ipsum dolor sit amet, consectetuer adipiscing elit. Donec libero. Suspendisse bibendum. Cras id urna. Morbi tincidunt, orci ac convallis aliquam, lectus turpis varius lorem, eu posuere nunc justo tempus leo. Donec mattis, purus nec placerat bibendum, dui pede condimentum odio, ac blandit ante orci ut diam. Cras fringilla magna. Phasellus suscipit, leo a pharetra condimentum, lorem tellus eleifend magna, eget fringilla velit magna id neque. Curabitur vel urna. In tristique orci porttitor ipsum. Lorem ipsum dolor sit amet, consectetuer adipiscing elit. Donec libero</p> </div>

Now this bit of code has a couple of things
1) H2 tages which are header tags
2) P tages which are paragraph tags
3) its has an image which is an image of our logo, the image also has a class float left meaning our text will wrap around our image.
4) HR tag which is a horizontal ruler.

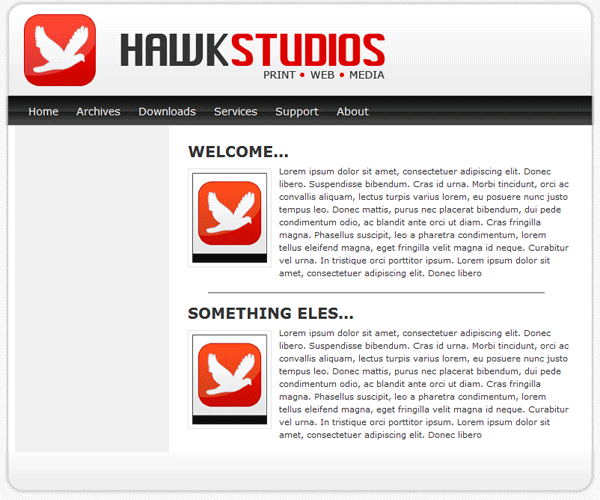
If you view your site now it should look like this.
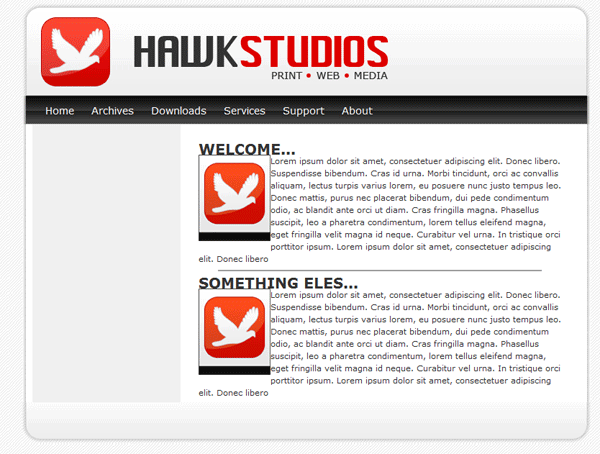
You can see from the image above that we need to set our H2 tags in our style sheet and we need to add some styling to our images so everything is no so cramped up. We do this by adding this into our stylesheet.

 /******************************************** WEBSITE LINKS ********************************************/ a, a:visited { text-decoration: none; background: inherit; color: #FB9233; } a:hover { text-decoration: underline; background: inherit; color: #93C600; }  /******************************************** WEBSITE TEXT HEADERS ********************************************/ h1, h2, h3 { font-family: 'Trebuchet MS', Tahoma, Sans-serif; } h1 { font-size: 180%; font-weight: normal; color: #555; } h2 { font-size: 160%; color: #88ac0b; font-weight: normal; } h3 { font-size: 135%; color: #666666; }  /******************************************** WEBSITE IMAGES ********************************************/ img { background: #fff; border: 1px solid #E5E5E5; padding: 5px; }  img.float-right { margin: 5px 0px 10px 10px; } img.float-left { margin: 5px 10px 10px 0px; }  h1, h2, h3, p { margin: 10px 15px; padding: 0; } ul, ol { margin: 5px 15px; padding: 0 25px; } 

You can now see in the image below we have padding around our title and image.
Now we need to add some content to our sidebar, so find “SIDE BAR LINKS HERE” and add the following code.

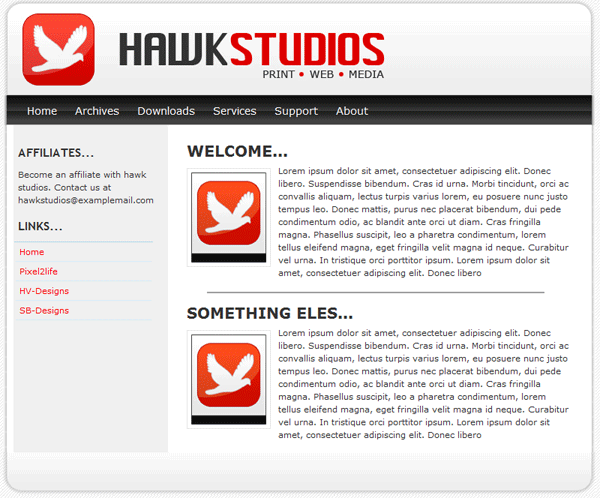
 <!-- sidebar here --> <div id="sidebar"> <h2>AFFILIATES...</h2> <p>Become an affiliate with hawk studios. Contact us at [email protected] </p>  <h2>LINKS...</h2> <ul class="sidemenu"> <li><a href="index.html">Home</a></li> <li><a href="http://www.pixel2life.com">Pixel2life</a></li> <li><a href="http://www.hv-designs.co.uk">HV-Designs</a></li> <li><a href="http://www.sb-designs.co.uk">SB-Designs</a></li> </ul> </div> 

Our sidebar is not that different from our navigation apart from our list goes down instead of across. Our sidebar now looks like this.
All that is left is to add our footer text which isnt alot of code.

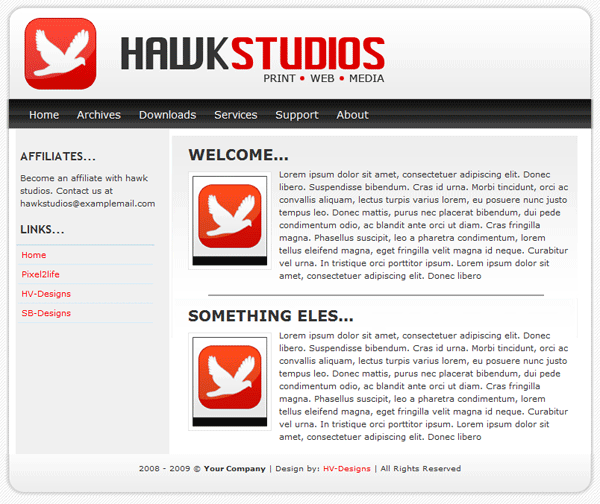
 <!--footer starts here--> <div id="footer"> <p>2008 - 2009 &amp;amp;amp;copy; <strong>Your Company</strong> | Design by: <a href="http://www.hv-designs.co.uk">HV-Designs</a> | All Rights Reserved </p> </div> 

Your website should now be finished, if you click your “design” tab within dreamweaver you should be able to see your website and add more text and images live as you go along. Your finished website should look like this.
Your ads will be inserted here by

AdSense Now!.

Please go to the plugin admin page to paste your ad code.

BLOOpress WordPress Theme

Your ads will be inserted here by

AdSense Now!.

Please go to the plugin admin page to paste your ad code.

Hello welcome to part 3 of the BLOOpress wordpress theme. Today we’ll be converting our CSS template into a working wordpress theme.

PREPARATION

Before we go ahead and start ripping away at PHP code we need to do abit of preparation work. The very first thing to do is download a program called “XAMPP”, this program will allow you to use your P.C as a server. I find its the best way to develop a website as you dont need to be connected to the internet, neither do you use any bandwidth uploading and editing files. You can use your own server if you wish. Il be using XAMPP for this tutorial so assuming you have XAMPP installed and setup to run wordpress, download the “starkers theme” by elliot jay stocks. Place your starkers theme inside your wordpress theme’s directory, then rename it too “BLOOpress Theme”. Delete the folder “style” and its contents as they arn’t needed. Create a new folder called “images” inside your themes folder, then copy all your image files from your CSS template then paste them inside the images folder in your themes folder.

Step1

Open up the “style.CSS” file from within the theme directory, you should be presented with some code which looks like this.

 /* Theme Name: Starkers Theme URI: http://elliotjaystocks.com Description: The totally nude WordPress theme. Phwoar! (Based on the famous <a href="http://binarybonsai.com/kubrick/">Kubrick</a> by <a href="http://binarybonsai.com/">Michael Heilemann</a>) Version: 2 (WP2.6.2) Author: Elliot Jay Stocks Author URI: http://elliotjaystocks.com Tags: starkers, naked, clean, basic */  @import "style/css/reset.css"; @import "style/css/typography.css"; @import "style/css/layout.css"; 

The first chunk of code is very important,its not just abit of code telling you who designed the theme. Its actually what makes the theme recognisable to wordpress. We dont actually need all of the code, i like to use a nice stripped back look. Go ahead and change the details to suit your theme. You can also remove the 3 imported style sheets as we’ve already deleted them. My code now looks like this.

 /* Theme Name: BLOOpress Theme URI: http://www.bloopress.co.uk Description: Just another wordpress theme by hv-designs Version: 1 (WP2.6.2) Author: Richard Carpenter */ 

After you’ve edited the code we need to copy all our CSS styles from our CSS template’s style sheet and paste them inside the theme’s “style.CSS” file. Save your themes’s style sheet and activate the theme in wordpress, view your theme in your browser, you should be presented with something like this.

Step2

MODIFYING THE HEADER.PHP FILE

Open up header.PHP from the theme directory, you should be presented with a bunch of code similar to an ordinary HTML file only with a bit of PHP thrown in. The first chunk of code we can edit is the code between the TITLE tag.

 <title> <?php if (is_home()) { echo bloginfo('name'); } elseif (is_404()) { echo '404 Not Found'; } elseif (is_category()) { echo 'Category:'; wp_title(''); } elseif (is_search()) { echo 'Search Results'; } elseif ( is_day() || is_month() || is_year() ) { echo 'Archives:'; wp_title(''); } else { echo wp_title(''); } ?> </title> 

You can remove all the PHP from within the TITLE tag, replace the code with a simple title for your theme.

 <title>BLOOpress "just another wordpress blog"</title> 

The next thing we need to do is locate this chunk of text right at the bottom of the PHP file.

 <h1><a href="<?php echo get_option('home'); ?>/"><?php bloginfo('name'); ?></a></h1> <p><?php bloginfo('description'); ?></p> <ul> <?php wp_list_pages('title_li='); ?> </ul> 

All of this code can be removed as its not needed. The last tag at the bottom of the PHP file should be an opening “BODY TAG”. All the code we’ll be adding in a moment will go underneath the “body” tag. Open up your CSS template, locate all the code to do with the header, so we need to select our opening container DIV, the top nav, the header, the search box, the logo and the second nav.

Step3

Copy all the hightlighted code and paste into your header.PHP file underneath the body tag. Once you’ve pasted the code save your .PHP file and check the theme in your browser, heres mine.

Step4

When you check your theme in your browser take note of the missing images, you should have two images that dont load up, the logo and the search button. The reason why they dont show up is because direct linking to images within the wordpress themes folder doesnt work its blocked by the htaccess file. The only way to get the images to load up is to either place the files in a directory outside the wordpress installation OR use some PHP code which looks like this.

 <img src="<?php bloginfo('template_directory'); ?>/images/title.png" border="0" alt="BLOOpress" /> 

So in the header.PHP file inside the title DIV, you need to change the img src to the code above. It should looks something like this.

 <div id="title"><!--title image start--> <a href="http://www.hv-designs.co.uk"><img src="<?php bloginfo('template_directory'); ?>/images/title.png" border="0" alt="BLOOpress" /></a> </div><!--title image end--> 

As for the search form we need to get rid of it and replace with a wordpress search form. The one we put on was just an example. Remove the example search fields from within the “search-from” DIV.

 <div id="search-form"><!--search form starts-->  </div><!--search form ends--> 

If you open up the “index.PHP” file and locate the following code.

Step5

The code highlighted in the image above is a PHP include, which basically displays a PHP file within the PHP file but the file is seperated from the rest of the file…. hope that makes sense. Copy the code from the index.PHP file and paste it between our “search-form” DIV.

 <div id="search-form"><!--search form starts--> <?php include (TEMPLATEPATH . "/searchform.php"); ?> </div><!--search form ends--> 

Now we need to alter our PHP file “searchform.php”. Go ahead and open up the file in dreamweaver. You should be presented with a simple form structure some what similar to the one we had before.

 <form method="get" id="searchform" action="<?php bloginfo('url'); ?>/"> <label class="hidden" for="s"><?php _e('Search for:'); ?></label> <input type="text" value="<?php the_search_query(); ?>" name="s" id="s" /> <input type="submit" id="searchsubmit" value="Search" /> </form> 

The first thing we can do is remove line 2, the label class.

 <form method="get" id="searchform" action="<?php bloginfo('url'); ?>/">  <input type="text" value="<?php the_search_query(); ?>" name="s" id="s" /> <input type="submit" id="searchsubmit" value="Search" /> </form> 

Now we can start adding our personnal touches, in the first input type remove the bit of php from within the value attribute and replace with “Search…”. Then on the 2nd input type change the “value” attribute from search to “go!”.

 <form method="get" id="searchform" action="<?php bloginfo('url'); ?>/">  <input type="text" value="Search..." name="s" id="s" /> <input type="submit" id="searchsubmit" value="Go!" /> </form> 

Now add your classes, remember in our CSS template we had two styles one for the button and one for the text field.

 <form method="get" id="searchform" action="<?php bloginfo('url'); ?>/">  <input type="text" value="Search..." name="s" id="s" class="search-field"/> <input type="submit" id="searchsubmit" class="search-button" value="Go!" /> </form> 

We now need to replace our submit button with our picture button to do that we need change our 2nd input type from type to name. Then add another attribute called “type=image”. Next to the “type=image” attribute we need to add our image SRC.

 <form method="get" id="searchform" action="<?php bloginfo('url'); ?>/">  <input type="text" value="Search..." name="s" id="s" class="search-field"/> <input name="submit" type="image" src="<?php bloginfo('template_directory'); ?>/images/submit_bg.png" alt="Submit Form" id="searchsubmit" class="search-button" value="Go!" /> </form> 

Save your header.PHP file and searchform.PHP file and test your theme in your browser. The search should be fully functional and look the same as our CSS template. Now you need to edit the links in the top navigation to point to where you need to.

 <div id="nav1"><!--nav1 starts--> <ul class="nav1-links"> <li><a href="http://www.hv-designs.co.uk">Home</a></li> <li><a href="http://www.hv-designs.co.uk">Sitemap</a></li> <li><a href="http://www.hv-designs.co.uk">Contact Me</a></li> </ul> </div><!--nav 1 ends--> 

Our second navigation is for our wordpress pages which will involve some PHP but if you want to you can add static links to other pages around the web, just use a setup similar to nav#1. To make the 2nd navigation use dynamic wordpress pages you first need to clear all the text we stuck in there when we coded our CSS template. Just leave one empty list.

 <div id="nav2"><!--nav2 starts--> <ul class="nav1-links"> <li></li> </ul> </div><!--nav2 ends--> 

We now need to use a chunk of PHP code to display our pages, the PHP code will get the pages from within wordpress and display each page as our CSS template did. Inbetween the LI tag add this code.

 <div id="nav2"><!--nav2 starts--> <ul class="nav1-links"> <li><?php wp_list_pages('title_li='); ?></li> </ul> </div><!--nav2 ends--> 

Step6

Thats it the header.PHP file is complete.

MODIFYING THE INDEX.PHP FILE

Our next file to modfiy is the index.PHP file, this file relates to the main page of the document, its the first page everyone see’s upon entering your blog. The bit we’ll be modifying now is the post loop, to get more of an idea on how the code works and how it relates to live post check the image below.

Step7

The code above is the part we’ll be editing now, like i said its known as the wordpress loop, everytime you make a post the same code is used over and over. Open up your CSS template and locate our example post. Our post started with an opening DIV of left-content, so copy the first DIV of left-content and paste it under the PHP code “get header”. Our post starts with “post-box” paste our class of post-box underneath the PHP code “have posts”. Add your left-content ending DIV right at the bottom of the file above the “get sidebar” PHP code.

 <?php get_header(); ?>  <div id="left-content"><!--left content starts-->   <?php if (have_posts()) : ?>  <?php while (have_posts()) : the_post(); ?>          <div class="post-box"><!--wordpress post content box starts--> 

Underneath our post loop add the ending DIV for left-content.

 <div class="post-box"><!--wordpress post content box starts-->  <div class="post" id="post-<?php the_ID(); ?>"> <h2><a href="<?php the_permalink() ?>" rel="bookmark" title="Permanent Link to <?php the_title_attribute(); ?>"><?php the_title(); ?></a></h2> <p><?php the_time('F jS, Y') ?> <!-- by <?php the_author() ?> --></p>  <?php the_content('Read the rest of this entry &amp;amp;raquo;'); ?>  <p><?php the_tags('Tags: ', ', ', '<br />'); ?> Posted in <?php the_category(', ') ?> | <?php edit_post_link('Edit', '', ' | '); ?>  <?php comments_popup_link('No Comments &amp;amp;#187;', '1 Comment &amp;amp;#187;', '% Comments &amp;amp;#187;'); ?></p> </div> 

The next part generally involves moving chunks of code around, copy and pasting our DIV’s from our CSS template over to our post loop. We’ll start from the top and work our way down. There is a floating ending DIV above our ending left-content DIV, this needs to be moved up to the begining of our post loop.

Step8

In the loop there is a H2 tag, which is our post title, change the H2 tag to a H1 tag. Then wrap the H1 tag in our post title class from our CSS template. Above the post-title class add our post-thumb class.

 <?php get_header(); ?>  <div id="left-content"><!--left content starts-->   <?php if (have_posts()) : ?>  <?php while (have_posts()) : the_post(); ?>          <div class="post-box"><!--wordpress post content box starts-->  <div class="post" id="post-<?php the_ID(); ?>"></div>  <div class="post-thumb"><!--wordpress post thumbnail starts--> <img src="images/example-thumbnail.gif" alt="EXAMPLE THUMBNAIL" /> </div><!--wordpress post thumbnail ends-->  <div class="post-title"><!--wordpress post title starts--> <h1><a href="<?php the_permalink() ?>" rel="bookmark" title="Permanent Link to <?php the_title_attribute(); ?>"><?php the_title(); ?></a></h1> </div><!--wordpress post title ends--> 

Underneath our post-title class we need to add our post-content class, inside the post-content class you need to add the PHP code for our wordpress content, you can refer back to the post loop image i created ealier.

 <div class="post-content"> <!--wordpress content starts--> <?php the_content('Read the rest of this entry &amp;amp;raquo;'); ?> </div><!--wordpress content ends--> 

Underneath our post-content class we need to add our ending content box DIV then add our footer class. Inside our footer class we need to add the remaining code which is the PHP code for the author, time & date and number of comments. Try and keep the whole thing nice and tidy if you can. The new post loop looks like this.

 <div class="post-box"><!--wordpress post content box starts-->  <div class="post" id="post-<?php the_ID(); ?>"></div>  <div class="post-thumb"><!--wordpress post thumbnail starts--> <img src="images/example-thumbnail.gif" alt="EXAMPLE THUMBNAIL" /> </div><!--wordpress post thumbnail ends-->  <div class="post-title"><!--wordpress post title starts--> <h1><a href="<?php the_permalink() ?>" rel="bookmark" title="Permanent Link to <?php the_title_attribute(); ?>"><?php the_title(); ?></a></h1> </div><!--wordpress post title ends-->  <div class="post-content"> <!--wordpress content starts--> <?php the_content('Read the rest of this entry &amp;amp;raquo;'); ?> </div><!--wordpress content ends-->  </div><!--wordpress post content box ends-->   <div class="post-footer"><!--wordpress posts footer--> <p><?php the_tags('Tags: ', ', ', '<br />'); ?> Posted in <?php the_category(', ') ?> | <?php the_time('F jS, Y') ?> <!-- by <?php the_author() ?> --> |<?php edit_post_link('Edit', '', ' | '); ?>  <?php comments_popup_link('No Comments &#187;', '1 Comment &#187;', '% Comments &#187;'); ?></p> </div><!--wordpress post footer ends--> 

Save your file and test your theme in your browser, mine looks like this. The posts display how we want them to, ignore all the rest, it will loook quite messy still as were yet to add code to the other files.

Step9

Your ads will be inserted here by

AdSense Now!.

Please go to the plugin admin page to paste your ad code.

Thats it for our index.PHP file for now, we’ll come back later and sort out our thumbnail for our posts, as at the minute it still contains our example image, we might also have to do some minor fixes, but we’ll see how it goes.

MODIFYING THE SIDEBAR.PHP FILE

Once you’ve opened up your sidebar.PHP file highlight everything from LINE 4 to LINE 43, and hit the delete key as the code isn’t needed.

Step10

Once you’ve done that copy and paste over all your sidebar code from the CSS template.

 <?php 	/* Widgetized sidebar, if you have the plugin installed. */ if ( !function_exists('dynamic_sidebar') || !dynamic_sidebar() ) : ?>  <div id="right-content"><!--sidebar starts-->  <div id="stay-connected"><!--stay connected box starts--> <h1>Stay Connected...</h1>  <div class="sc-icon"><!--RSS icon--> <a href="#"><img src="<?php bloginfo('template_directory'); ?>/images/rss_icon.png" border="0" alt="RSS" /></a> </div><!--RSS icon ends-->  <div class="icon-text"><!--RSS icon text--> <p class="subscribe">Subscribe via RSS</p> <p class="subscribe2">Updates in your reader</p> </div><!--RSS icon text ends-->  <div class="sc-icon"><!--TWITTER icon--> <a href="#"><img src="<?php bloginfo('template_directory'); ?>/images/twitter_icon.png" border="0" alt="TWITTER" /></a> </div><!--TWITTER icon ends-->  <div class="icon-text"><!--TWITTER icon text--> <p class="subscribe">Subscribe via twitter</p> <p class="subscribe2">Updates on your twitter</p> </div><!--TWITTER icon text ends-->  <div class="sc-icon"><!--EMAIL icon--> <a href="#"><img src="<?php bloginfo('template_directory'); ?>/images/mail_icon.png" border="0" alt="EMAIL" /></a> </div> <!--EMAIL icon ends-->  <div class="icon-text"><!--EMAIL icon text--> <p class="subscribe">Subscribe via email</p> <p class="subscribe2">Updates in your mailbox</p> </div><!--EMAIL icon text ends-->  </div><!--stay connected box ends-->     <ul>  <?php wp_list_pages('title_li=<h2>Pages</h2>' ); ?>  <li><h2>Archives</h2> <ul> <?php wp_get_archives('type=monthly'); ?> </ul> </li>  <?php wp_list_categories('show_count=1&amp;amp;title_li=<h2>Categories</h2>'); ?>  <?php /* If this is the frontpage */ if ( is_home() || is_page() ) { ?> <?php wp_list_bookmarks(); ?>  <li> <h2>Meta</h2> <ul> <?php wp_register(); ?> <li><?php wp_loginout(); ?></li> <li><a href="http://validator.w3.org/check/referer" title="This page validates as XHTML 1.0 Transitional">Valid <abbr title="eXtensible HyperText Markup Language">XHTML</abbr></a></li> <li><a href="http://gmpg.org/xfn/"><abbr title="XHTML Friends Network">XFN</abbr></a></li> <li><a href="http://wordpress.org/" title="Powered by WordPress, state-of-the-art semantic personal publishing platform.">WordPress</a></li> <?php wp_meta(); ?> </ul> </li> <?php } ?>  <?php endif; ?> </ul>  </div><!--sidebar ends-->  </div><!--container ends--> 

Once you’ve pasted in your code you’ll need update your image paths on your icons with PHP, just like we did our blog title image and search submit button. You’ll also need to link your icons to the relivant source, I.E twitter, rss etc… Save your sidebar.PHP file and check your theme in your browser.

Step11

MODIFYING THE FOOTER.PHP FILE

Open up footer.PHP, select all the code and hit the delete key. Open your CSS template and copy all the code for the footer.

Step12

Paste all your footer code into your footer.PHP file. Save the file then test your theme inside your browser. We’ve now modified some of the main files for our theme, its now time to make a start on some of the other files.

MODIFYING THE SEARCH.PHP FILE

The search.PHP file is the file which is called when a search is made, the search.PHP file provides you with the search results, the file is structure pretty much the same as the index.PHP file, which will make things easier to edit. Open up your search.PHP file, underneath the first line of PHP code (get header) add your opening DIV of left-content.

 <?php get_header(); ?>  <div id="left-content"><!--left content starts--> 

Scroll down right to the bottom of your file, just above the get sidebar PHP code add your ending left-content DIV.

 </div><!--left content ends-->  <?php get_sidebar(); ?>  <?php get_footer(); ?> 

Head over to your index.PHP file, highlight and copy your post loop to the clipboard.

Step13

Highlight the post loop inside the search.PHP file and hit delete.

Step14

Paste in your code from the index.PHP file. Save your work and test out the search function on your theme, providing you have some posts you should see your search results display somet what similar to the index.PHP file.

MODIFYING THE PAGE.PHP FILE

The page.PHP file relates to actual pages that you have on your blog. The pages will also be displayed the same as the index.PHP file but instead of being loads of seperate boxes imagine it as one big post box. Inside your page.PHP file you need to add again the left-content DIV, place the opening DIV underneath the first big PHP (get header) and the ending DIV above the get sidebar bit of PHP code.

 <?php get_header(); ?>  <div id="left-content"><!--left content starts-->   <?php if (have_posts()) : while (have_posts()) : the_post(); ?> <div class="post" id="post-<?php the_ID(); ?>"> <h2><?php the_title(); ?></h2> <?php the_content('<p class="serif">Read the rest of this page &raquo;</p>'); ?> <?php wp_link_pages(array('before' => '<p><strong>Pages:</strong> ', 'after' => '</p>', 'next_or_number' => 'number')); ?> </div> <?php endwhile; endif; ?> <?php edit_post_link('Edit this entry.', '<p>', '</p>'); ?>  </div><!--left content ends-->  <?php get_sidebar(); ?>  <?php get_footer(); ?> 

Underneath the DIV CLASS “post” you need to add our “post-box” class.

 <?php get_header(); ?>  <div id="left-content"><!--left content starts-->   <?php if (have_posts()) : while (have_posts()) : the_post(); ?>  <div class="post" id="post-<?php the_ID(); ?>">  <div class="post-box"><!--wordpress post content box starts-->  <?php the_content('<p class="serif">Read the rest of this page &amp;amp;raquo;</p>'); ?> <?php wp_link_pages(array('before' => '<p><strong>Pages:</strong> ', 'after' => '</p>', 'next_or_number' => 'number')); ?> </div> <?php endwhile; endif; ?> 

Underneath the PHP endwhile; endif we need to add our closing post-box DIV. Then simply add our post-fooer class. Inbetween our post footer class add the PHP edit_post_link. The page.PHP file should something like this.

 <?php get_header(); ?>  <div id="left-content"><!--left content starts-->   <?php if (have_posts()) : while (have_posts()) : the_post(); ?>  <div class="post" id="post-<?php the_ID(); ?>">  <div class="post-box"><!--wordpress post content box starts-->  <?php the_content('<p class="serif">Read the rest of this page &amp;amp;raquo;</p>'); ?> <?php wp_link_pages(array('before' => '<p><strong>Pages:</strong> ', 'after' => '</p>', 'next_or_number' => 'number')); ?> </div> <?php endwhile; endif; ?>	  </div><!--wordpress post content box ends-->   <div class="post-footer"><!--wordpress posts footer--> <?php edit_post_link('Edit this entry.', '<p>', '</p>'); ?> </div><!--wordpress post footer ends-->  </div><!--left content ends-->  <?php get_sidebar(); ?>  <?php get_footer(); ?> 

If you have any pages on your blog, save your work and try them out.

MODIFYING THE ARCHIVE.PHP FILE

The archive page again is styled in pretty much the same way as the index.PHP file. We start by adding our content-left class underneath our get header PHP code, then ending it above the get sidebar PHP code. We then have to locate the post loop, add our post-box class underneath the “have posts PHP”.

 <?php get_header(); ?>  <div id="left-content"><!--left content starts-->  <?php if (have_posts()) : ?>  <?php $post = $posts[0]; // Hack. Set $post so that the_date() works. ?> <?php /* If this is a category archive */ if (is_category()) { ?> <h2>Archive for the &#8216;<?php single_cat_title(); ?>&#8217; Category</h2> <?php /* If this is a tag archive */ } elseif( is_tag() ) { ?> <h2>Posts Tagged &#8216;<?php single_tag_title(); ?>&#8217;</h2> <?php /* If this is a daily archive */ } elseif (is_day()) { ?> <h2>Archive for <?php the_time('F jS, Y'); ?></h2> <?php /* If this is a monthly archive */ } elseif (is_month()) { ?> <h2>Archive for <?php the_time('F, Y'); ?></h2> <?php /* If this is a yearly archive */ } elseif (is_year()) { ?> <h2>Archive for <?php the_time('Y'); ?></h2> <?php /* If this is an author archive */ } elseif (is_author()) { ?> <h2>Author Archive</h2> <?php /* If this is a paged archive */ } elseif (isset($_GET['paged']) && !empty($_GET['paged'])) { ?> <h2>Blog Archives</h2> <?php } ?>  <?php while (have_posts()) : the_post(); ?>  <div class="post-box"><!--wordpress post content box starts--> 

Underneath the PHP_the_content tag we need to close our post-box DIV.

 <?php while (have_posts()) : the_post(); ?>  <div class="post-box"><!--wordpress post content box starts-->          <h3 id="post-<?php the_ID(); ?>"><a href="<?php the_permalink() ?>" rel="bookmark" title="Permanent Link to <?php the_title_attribute(); ?>"><?php the_title(); ?></a></h3> <p><?php the_time('l, F jS, Y') ?></p> <?php the_content() ?>  </div><!--wordpress post content box ends--> 

Then underneath our post-box ending DIV we need to start our post-footer class, inside our post footer class we use the META data from the post loop. Then underneath our P tag with the the PHP code for “the_time” add a BR tag. Doing this will space out the post abit so it isnt all muggled together.

 <?php while (have_posts()) : the_post(); ?>  <div class="post-box"><!--wordpress post content box starts-->          <h3 id="post-<?php the_ID(); ?>"><a href="<?php the_permalink() ?>" rel="bookmark" title="Permanent Link to <?php the_title_attribute(); ?>"><?php the_title(); ?></a></h3> <p><?php the_time('l, F jS, Y') ?></p>  <br />  <?php the_content() ?>  </div><!--wordpress post content box ends-->  <div class="post-footer"><!--wordpress posts footer--> <p><?php the_tags('Tags: ', ', ', '<br />'); ?> Posted in <?php the_category(', ') ?> | <?php edit_post_link('Edit', '', ' | '); ?>  <?php comments_popup_link('No Comments &amp;amp;#187;', '1 Comment &amp;amp;#187;', '% Comments &amp;amp;#187;'); ?></p> </div><!--wordpress post footer ends--> 

MODIFYING THE SINGE.PHP & COMMENTS.PHP FILE

These two files ive left untill last because they are the most fiddly especially the comments.PHP file. We’ll start with the sing.PHP file as this wont take too long to do, this file is for out posts, once you click on a post it loads this file. We modify the single.PHP file in the same way we did our other files, we need to add our left content DIV at the top underneath our get header PHP code, then we need to end it at the bottom of the file above the get footer PHP code. If you want the sidebar to be in with the single.PHP file then you need to add the get sidebar PHP tag.

 <?php get_header(); ?>  <div id="left-content"><!--left content starts--> 
 </div><!--left content ends-->  <?php get_sidebar(); ?>  <?php get_footer(); ?> 

We’ll then begin to add our post CSS styles from our style sheet again, this part will be similar to the the page.PHP file we edited earlier. Under the PHP code have posts add our psot-box class then underneath the PHP code the_content add your closing DIV.

 <?php get_header(); ?>  <div id="left-content"><!--left content starts-->   <?php if (have_posts()) : while (have_posts()) : the_post(); ?>  <div class="post-box"><!--wordpress post content box starts-->  <div class="post" id="post-<?php the_ID(); ?>"> <h2><?php the_title(); ?></h2>  <?php the_content('<p>Read the rest of this entry &raquo;</p>'); ?>  </div><!--wordpress post content box ends--> 

The single.PHP file is complete, move onto your comments.PHP file. If you take alook at one of your posts, you’ll see what a mess the comments area is in.

Step15

The first we can do to tidy it up abit is shorten the big text area and add some spaceing between each form field. We’ll start with the big text box, scroll right down to the bottom and locate the form field. The part of code you want to look for is…

 <textarea name="comment" id="comment" cols="100%" rows="10" tabindex="4"></textarea> 

Take note of the “cols attribute” see how it says 100% we need to change that to 72. So the code now becomes.

 <textarea name="comment" id="comment" cols="72" rows="10" tabindex="4"></textarea> 

To align each of the text boxes, underneath each other add opening & closing P Tags either end of the code. After the last P tag add a BR tag.

 <p><input type="text" name="author" id="author" value="<?php echo $comment_author; ?>" size="22" tabindex="1" <?php if ($req) echo "aria-required='true'"; ?> /> <label for="author">Name <?php if ($req) echo "(required)"; ?></label></p>  <p><input type="text" name="email" id="email" value="<?php echo $comment_author_email; ?>" size="22" tabindex="2" <?php if ($req) echo "aria-required='true'"; ?> /> <label for="email">Mail (will not be published) <?php if ($req) echo "(required)"; ?></label></p>  <p><input type="text" name="url" id="url" value="<?php echo $comment_author_url; ?>" size="22" tabindex="3" /> <label for="url">Website</label></p><br /> 

Your comments area should now look something like this.

Step16

The footer could do with being pushed down alittle, open up your style sheet and add “margin-top: 40px;” to the #footer-bg DIV. Now were going to add some styling to our actual comments, your going to need to add new styles to your style sheet but we’ll try and use the ones all ready made. Add these styles into your style sheet.

 .float-right { 	float:right; }  ul, ol { list-style:none; } 

Begin to add some of your styles to the comments loop. Im going to style each comment to look like one of our wordpress posts.

 <!-- You can start editing here. -->  <?php if ($comments) : ?> <h3 id="comments"><?php comments_number('No Responses', 'One Response', '% Responses' );?> to &amp;amp;#8220;<?php the_title(); ?>&amp;amp;#8221;</h3>  <ol>  <?php foreach ($comments as $comment) : ?>  <div class="post-box"><!--wordpress post content box starts-->  <p <?php echo $oddcomment; ?>id="comment-<?php comment_ID() ?>"> <div class="float-right"><?php echo get_avatar( $comment, 72 ); ?></div> <h2><?php comment_author_link() ?></h2> <?php if ($comment->comment_approved == '0') : ?> <br /> <p>Your comment is awaiting moderation.</p> <br /> <?php endif; ?> <?php comment_text() ?> </p>  </div><!--wordpress post content box ends--> <div class="post-footer"><!--wordpress posts footer--> <p><a href="#comment-<?php comment_ID() ?>" title=""><?php comment_date('F jS, Y') ?> at <?php comment_time() ?></a> <?php edit_comment_link('edit','&amp;amp;nbsp;&amp;amp;nbsp;',''); ?></p> </div><!--wordpress post footer ends--> 

Change post-box from post-box to post-box2 and change post-footer to post-footer2. Now paste these styles into your style sheet.

 .post-box2 { 	background-color: #292929; /*adds a background color to our post box*/ 	border: 1px solid #2f2f2f; /*gives our box a 1px border*/ 	padding: 10px; /*adss 10px padding all the way around our box*/ 	float: left; /*floats our box left inside "left-content div*/ 	width: 578px; /*gives our box a width of 580px*/ 	margin-top: 10px; }  .post-footer2 { 	border: 1px solid #0c5b7d; /*adss 10px padding all the way around our box*/ 	float: left; /*floats our box left inside "left-content div*/ 	width: 578px; /*gives our box a width of 580px*/ 	background-image: url(images/post_footer_bg.png); /*adds background image*/ 	background-repeat: repeat-x; /*repeats background horizontally*/ 	height: 20px; /*gives our class a height of 20px*/ 	padding-top: 6px; /*adss 6px padding to the top*/ 	padding-right: 10px; /*adds 10 px padding to the right*/ 	padding-left: 10px; /*adds 10px padding to the left*/ 	margin-bottom: 5px; /*adds a 20px margin between each post*/ } 

While your in your style sheet you can also paste in these styles.

 a:link { 	color: #FFFFFF; 	text-decoration: none; } a:visited { 	text-decoration: none; 	color: #FFFFFF; } a:hover { 	text-decoration: none; 	color: #0099FF; }  h1,h2,h3,h4 { 	color: #0c78a8; }  .post-title h1 a{ 	color: #0c78a8; /*h1 tag text color*/ }  .post-box2 p { 	margin: 5px 0 10px; }  #left-content p{ 	margin: 5px 0 10px; } 

Should clean some of our bad link colors up and some spacing issues. Now finally re-open your sidebar.PHP file, locate all H2 tags and replace with H4 tags. Re-open your index.PHP file and locate your example thumbnail.

 <div class="post-thumb"><!--wordpress post thumbnail starts--> <img src="images/example-thumbnail.gif" alt="EXAMPLE THUMBNAIL" /> </div><!--wordpress post thumbnail ends--> 

Delete your exampple thumbnail and replace with this.

 <div class="post-thumb"><!--wordpress post thumbnail starts--> <a href="<?php $values = get_post_custom_values("url"); echo $values[0]; ?>" title="<?php the_title(); ?>"> <img src=" <?php $values = get_post_custom_values("image"); echo $values[0]; ?>" alt="<?php the_title(); ?>" /></a> </div><!--wordpress post thumbnail ends--> 

This will now allow you to insert you thumbnail and link for the thumbnail through the custom fields part within creating a wordpress post. You should now have something you can use for your own website, dont get me wrong this theme isnt 5 stars, but should learn you some basics on getting started with wordpress.

Thats all from me, hope you’ve enjoy this LONG tutorial. Im sorry some things are abit short and sweet but ive had such little time to get this one out and live. Feel free to ask any questions il be happy to help you in any way i can.

Your ads will be inserted here by

AdSense Now!.

Please go to the plugin admin page to paste your ad code.

CCNP Cisco Certification Exam

Your ads will be inserted here by

AdSense Now!.

Please go to the plugin admin page to paste your ad code.

The Cisco Certified Network Professional certification or the CCNP validates an employee’s ability to implement, plan, troubleshoot and plan with specialists on creating advanced solutions for its customers. Typically an employee obtains their CCNP after acquiring at least one year of hands on experience in the field of networking. These employees are ready to travel on to the next step in advancing their skills. Those who accomplish this status have shown that they possess the skills required to perform such roles as a network technician, or a systems or network engineer.

There are three professional level exams candidates will need to complete order to obtain their CCNP Cisco Certification.

•642-902 ROUTE

Your ads will be inserted here by

AdSense Now!.

Please go to the plugin admin page to paste your ad code.

•642-813 SWITCH

•642-832 TSHOOT

You can prepare for these exams at tests live, where you will find all the information and materials you need to pass.

Interestingly enough, the CCNP certification was listed as number 9 on the list of highest earning technical certifications. The average salary was penned around $84,161. By equipping yourself with a CCNP certification, you are putting yourself on the fast track to managing some of today’s most complex business networks, optimizing infrastructure, working with core technologies and keeping application secure and efficient.

Your ads will be inserted here by

AdSense Now!.

Please go to the plugin admin page to paste your ad code.

Get Polka Collaboration App Review

Your ads will be inserted here by

AdSense Now!.

Please go to the plugin admin page to paste your ad code.

Today I want to share a review with you guys about what I predict as the next big application in web design, Get Polka. A few weeks back I was contacted by the creators of Get Polka asking if I had heard of the application and if I had wanted to do a review of the application. I am always looking to review and beta test multiple applications to see what is happening in the design world, so naturally I jumped at the chance to review another application. When I started the beta version of Get Polka it immediately grabbed my attention, so I began to take greater notice of the application and research its competitors. What I found out about the competitors, and what I gained from the application in the short time I used it, made me want to share this review with our readers so you guys can take advantage of this before it takes off. So let’s begin the review.

The Website

The first thing that you notice about the application is its website. When talking about an application’s website it is basically one big landing page. The application has a very limited time to grab your attention to make you want to read more into it. I think that Get Polka did a very good job on their landing page for what you see.

Right away you see the logo, a feedback bar, and the menu. Now, while this does catch your eye I feel like they fall a little short on getting their product in the spotlight right away. While the giant image will make you want to scroll down just to see what it is a picture of you are not scrolling down to actually learn about the application. If I was to re-design the home page I would place the image off to the right or left with some information on whatever side the image wasn’t on to really explain the application and show it off all ‘above the fold’.

Outside of that issue I think the website itself is very well designed. I love the subtle background and think it fits well with the whole application concept. I don’t like that it fades out into just a mono color background. I would love to see it repeated throughout the entire website, but that is my design opinion rather than an actual falling out regarding the website. The jQuery on the website is done really well and I love the natural scrolling motion and the separation of the different areas. All in all, however, the website is very well done and serves its purpose.

The Dashboard

Get Polka has a very simple sign in process that requires you to simply enter your email address and some bits of information like your name. I love the simple sign up form and then it immediately takes you to your dashboard, where you can begin using the application.

The design aspect of the application is very well done. From the log-in screen all the way into the project you are collaborating on the UI remains the same.

I really like the simplicity of the layout as it doesn’t clutter with unnecessary information and gets straight to the point. The first, and pretty much only, thing that you see when in your dashboard is the projects you are collaborating on. I do feel that they could use more of the screen for the application and maybe put in some thumbnails of the project instead of just the name, but those are all things that can come as the application grows and are aesthetic issues as opposed to usability issues.

Projects

Once you get into your projects area of your dashboard you can see a thumbnail of each design in the project. My project that I used for this review was the re-design of HV-Designs. As I was going through and testing I uploaded each individual page that was designed for the new design. The screenshot below only shows one page, but you can add as many different pages as you need per project

Your ads will be inserted here by

AdSense Now!.

Please go to the plugin admin page to paste your ad code.

.

Now, here is where one of my main usability issues with the dashboard comes into play. When you click the Get Polka logo it should, based on UX principles, take you back to the home page of the dashboard as opposed to the home page of the website. I am sure this is something simple that my friends over at Get Polka will have already taken care of and fixed by the time this review comes out.

Uploading Files

Now we come to my favorite area of the dashboard. The creators over at Get Polka want to simplify your collaboration experience as much as possible, so they do something that I have rarely seen done in an application. The offer a drag and drop service that allows you to drag over your image as opposed to going through the upload steps and finding the right file. While that may not seem like very much work when reading it for someone like me that has literally thousands of files on my computer and hundreds of folders just on my desktop alone that can take more time than I want to dedicate. At first the drag and drop was just as much of a hastle if I was creating older projects, but as I create projects I am currently working on I already have their folder open anyway so I simple shrink screens, drag, drop, and it is uploading and I am ready to rock and roll with sharing.

Of course they do not limit to only a drag and drop service. You can choose to use a standard upload service if that is what you are more comfortable with. Either way you go you retain the same look and feel as the remainder of the dashboard.

The Application

Now we get to the application itself. The application offers so many different options that I am only going to skim through them and show you what they look like. When you guys get into the application you will see just what I mean. So, let’s start with one of the biggest things in the application that make it what it is; the comments. GP offers an amazing comment system and each comment starts its own thread, with its own number. As you delve deeper into the application, with more collaborators, you can hide and view layers/comments based on the individual collaborator. The commenting system was very well done and is definitely a big plus for the application. My only issue right now with the comment system is that the comments do not update in real time, meaning if two people are in there at the same time they will have to close the design and re-open it to see what the other person posted. It’s still a new program to me so I don’t know how often people with be in there are the same time, but I have used it for my last client and during the testing and two people were in there together more often than not. I am curious to see if this is still an issue as I begin using the full version and incorporating it into all my clients.

The next thing to talk about, which I already kind of touched on, is the collaborators. The choice to put each collaborator on what is, essentially , their own layer was a very good choice. This way you can see what each individual person is saying about the design, as well as seeing what everyone is saying about a certain area. When dealing with clients this helps, especially when you are working with a committee that has to decide on the website.

Now you can add other collaborators as well, which was a great option. I do not believe that there is a limit to the number of people you can collaborate on a project with, so go to your heart’s desire. The other great thing is that you add collaborators based on project and not based on design, so you are saving yourself some time. I do hope that they add the ability to add people strictly by design in the future. I know when I work with some clients there are people that I only want to be able to see one page of the design at the moment, or a different version of the page with a watermark when it comes to rough drafts. All in all though the entire application is very well done and can only get better as new versions are released.

I want to give a big shout out to Ajay Mathew, the co-creator of Get Polka and the man that reached out to me to review this design. Thanks for all the hard work Ajay and the entire team! Keep it up and we will keep using the project and watching it grow exponentially!

Visit the Site!

Your ads will be inserted here by

AdSense Now!.

Please go to the plugin admin page to paste your ad code.

Vectorpack Bundle Review

Your ads will be inserted here by

AdSense Now!.

Please go to the plugin admin page to paste your ad code.

I was given the chance by Vectorpack.net to download and review the amazing bundle they have available. For the small price tag on the bundle you get some amazing vector works and an awesome WordPress theme. If you have the extra $37 and want to grab a great bundle be sure to check out the review, what comes in the pack, and then pick it up!

Mega Design Bundle 3 from Vectorpack.net Available for only $37!

As they are aware for your need of great design resources, the guys at Vectorpack.net have created a new Mega Design Bundle which contains over 900 design elements and which is available, for a limited period of time, for only $37, although its real value is that of $550. This great Mega Design Bundle is a collection of all the elements a designer needs in his everyday work, from vectors to PS brushes, from abstract backgrounds to seamless patterns, from web elements to textures and wordpress themes. Check out this Mega Design Bundle and buy now all these incredible resources which are available now for only $37!

As these design elements come from Vectorpack.net, you can be sure to expect top notch quality!

If you are to purchase this Mega Design Bundle, you are to get the following elements:

– 210 PS brushes

– 396 vector elements

Your ads will be inserted here by

AdSense Now!.

Please go to the plugin admin page to paste your ad code.

– 162 web elements

– 66 abstract backgrounds

– 70 seamless patterns

– 30 textures

– 1 wordpress theme

Moreover, you are to get an extended license for these products, and you will get your download immediately after you buy the Mega Bundle. Remember that this is a limited offer, which will be available for you only till the 18th of March. So make sure to purchase this great deal today in order for you not to miss these incredible design elements!

As you already know it, Vectorpack.net makes such incredible deals every once in a while, so, if you don’t want to miss the next Mega Design Bundle, make sure to subscribe to their newsletter!

Some of What’s Included

Download the Bundle Today!

Your ads will be inserted here by

AdSense Now!.

Please go to the plugin admin page to paste your ad code.

The Importance of Social Media and Your Clients

Your ads will be inserted here by

AdSense Now!.

Please go to the plugin admin page to paste your ad code.

Lately I have been working with a lot of smaller businesses, and I have noticed one simple trend with them. As a professional designer I take very few brand new businesses as clients, by personal preference, but I do deal with a lot of re-designs. The main thing that I have noticed with my latest few clients is that their designer did not stress the importance of Social Media in today’s world. Real life experience is the root of ninety percent of my articles/tutorials.

So what is the importance of Social Media Marketing? It is not necessarily an important aspect of a web presence, as much as it is a necessity of your web presence.

It’s Your First Impression

It used to be that your store front was a person’s first impression of your business. Then it graduated to your website being your first impression, and now we have graduated once again to Social Media being your first impression to much of the internet. That’s not to say your website isn’t vital, because it is still the most vital aspect to a web presence, but your social media presence is becoming just as important.

Facebook, Twitter, Zerply, LinkedIn, and a million other social media sites are visited every single day by millions of people. If your friend had a bad experience at Taco Bell you are going to hear about it first via Facebook or Twitter. Knowing that, as a business would you rather be able to talk about that person’s experience or hear about it days down the road when you start losing business.

Now, naturally as a web designer we want what is best for our clients, right? Well, I wouldn’t say we want what is best for them all the time, but we have reputations to uphold. The whole reason your client wanted the website was to build their business, and the more success that they have the more success you will have.

How to Tell Your Clients

I can guarantee that you will get that one client at some point that will want to harass you about adding a Facebook or Twitter. You will get the standard, “That’s too much work” or “we don’t have time” and you have to know how to combat those.  You need examples, both professionally and personally,  to give your clients on the importance of social media.

Your ads will be inserted here by

AdSense Now!.

Please go to the plugin admin page to paste your ad code.

If social media was not that important then why would you see such a big presence by companies like Pepsi, Coke, McDonalds, and even Wal-Mart? Your clients may come back with the fact that they are huge companies and can afford to hire a team dedicated to Social Media, and that may be slightly true. You need to explain to them though that these big companies realize that Social Media is the key to gaining new customers, and the only way to do that is to give them a reason. You can also explain to your clients that these businesses are big enough that if it wasn’t an essential part of business in today’s world why would the big companies waste their time?

Utilizing Social Media for Your Client

Outside the obvious Twitter and Facebook buttons for the website you are designing, how else can you utilize Social Media? First you need you explain to your client that they must offer potential clients a reason to follow their pages. Once you have done that you must incorporate that into your pages and into the various designs.  Having a Facebook and Twitter page is great, but you really want them to stand out.

Once the design is completed you will want to explain to your client how to utilize their Social Media. While Facebook and Twitter are great places to spread the word about your business people are also following you to get some interaction, especially if you are a smaller business. It is essential that you explain to your client that if they only have time to make two posts a week that one of those be interacting with those that follow/like their page.

Personalization of a Facebook or Twitter page will take it to that next level and show customers that you really do care and that you are a real entity instead of just some business wanting their money.

Conclusion

With the importance of Social Media moving forward in the day it is essential that you make sure your clients understand this. What are some tips and tricks that you guys use for your clients to show them how essential Social Media is?

Your ads will be inserted here by

AdSense Now!.

Please go to the plugin admin page to paste your ad code.

Zyma Hosting Giveaway Results Announced!

Your ads will be inserted here by

AdSense Now!.

Please go to the plugin admin page to paste your ad code.

The results of our hosting giveaway are in! I want to first thank all the entrants for their participation and we will be setting up more giveaways to thank you guys for your support! So, now to what you really care about, the WINNER!

Your ads will be inserted here by

AdSense Now!.

Please go to the plugin admin page to paste your ad code.

The winner of our giveaway is Lawrence777. We have replied to your tweet. To claim your prize please send us an email to the admin email on the contact page so we can get you the details of your hosting account! Congratulations again, and be sure to keep watching the site for more excellent tutorials and big giveaways.

Your ads will be inserted here by

AdSense Now!.

Please go to the plugin admin page to paste your ad code.

1 Year Hosting Giveaway From Zyma

Your ads will be inserted here by

AdSense Now!.

Please go to the plugin admin page to paste your ad code.

Zyma.com one of the fastest growing hosting companies in the UK have partnered with hv-­?designs.co.uk to give-­?away 5 lucky winners a web hosting account completely FREE for one whole year! Zyma’s customer base covers over 80 different countries in four different continents, and their unlimited web hosting package is one of the most comprehensive around. This is a give-­?away you simply don’t want to miss.

Hosting Account Features:

• Unlimited Web space
• Unlimited Traffic
• Unlimited Email Accounts
• Unlimited SQL Databases
• Unlimited FTP Accounts
• 99.9% Uptime Guarantee
• Free CDN Service
• Free Google Vouchers
• Free Transfer & Setup
• Free Tech Support
• cPanel Web Hosting
• Fantastico De Luxe
• Softaculous Premium
• Attracta SEO tools via cPanel

How To Enter

Entering the contest is incredibly easy. All you have to do is post a comment explaining why you want to win the hosting account and what you would use it for.  Of course the winner’s will be announced here and on Twitter, so your best bet would be to follow us on twitter and like us on facebook as well.

Your ads will be inserted here by

AdSense Now!.

Please go to the plugin admin page to paste your ad code.

You can also follow us on Twitter and tweet out, “I just entered @hvdesigns hosting giveaway! You should enter to: http://bit.ly/wMmTl1 ” and receive another entry to the contest.

Your third and final entry can come from liking us on Facebook and posting on our wall about your favorite tutorial.

The contest will run from 2/10/2012 to 2/17/2012, with winners being announced on 2/20/2012.

Your ads will be inserted here by

AdSense Now!.

Please go to the plugin admin page to paste your ad code.

The Importance of NOT Using Effects

Your ads will be inserted here by

AdSense Now!.

Please go to the plugin admin page to paste your ad code.

Alright guys, I know that you would love to see another tutorial, and believe me we have plenty for you, but I wanted to take some time out to discuss something very important in the design industry that seems to be lacking lately. I know that part of this is our fault as we have not released a tutorial to date stressing the importance of not using too many effects. Our tutorials are design to teach you the ins and outs of Photoshop yes, but we are also here as a guiding hand for you to make your way into the design industry, and that doesn’t always mean to blow out special effects.

Recently on Dribbble there was an excellent No Effects Challenge posted by the amazing Jonathan Ogden (who we are going to reach out to and see about getting a tutorial from his awesomeness) that really inspired this post. Each and every shot in the challenge was, obviously, created without using any layer styles or effects in Photoshop, just standard graphic talent. They are all amazing, amazing shots, but what is the point of them? Why have the layer styles if you aren’t going to use them? The importance and reason are both one and the same in their answer, because it’s important.

I am not by any means saying that we should just give up effects all together, but I am saying that it is VITAL to practice without them. I find that whenever I am strugling for inspiration on a design or wondering what Typography will look good on this poster, that if I just step back from the effects and put everything into an almost matte like look, that it flows together nicely. Let’s take a look at a few areas that can really benefit from using little to no effects.

Typography

Typography is one of the most important aspects of any design, if not the most important. You can have an excellent looking website, but if the typography sucks that’s all people are going to notice. Believe me on this because typography has to be the weakest aspect to my design and it really sets me back sometimes. Honestly, without the great people over on Dribbble and Forrst I would be lost in the dark when it comes to typography, but the best advice I ever got was to just step back from the effects and play on font and placement only, before bringing any of the layer styles into anything.

Here are a few of my favorite Typographic images from the no effect challenge:

A Very Simple Sports Style Typographic With No Effects

Free Binder Cover by Brad Blackman

Your ads will be inserted here by

AdSense Now!.

Please go to the plugin admin page to paste your ad code.

Berlin Likes Fancy by Julie Ann Horvath

Those are, without a doubt, my top three typographic elements from the No Effect Challenge. Every single submission has been awesome and they just keep building and getting better. If you want to submit a typographic to the No Element Challenge and are a member of Dribbble post it up and let us know in the comments. If you are not a member of Dribbble then post it in our Flickr group so we can see the awesomeness.

Random Elements

Throughout the main challenge there were so many inspiring posts but not really a category to fit them in but I still wanted to show off the most inspiring no effect elements from the challenge, in my opinion.

No Effects Turntable by Alpis Design

NoFX by Jow Fawkes

Rum Runner by Mike Kamanski

I chose those three as my most inspirational because it just goes to show you how versatile design really is and that you can use less effects and still come out with an amazing design, whether all together or just as an element in the design. All three of the above designs can stand on their own as excellent designs or be placed into a project at any point, but most importantly you can then take the basis of what you created, add some effects, and bring your design to the next level, if that is what is required.

Conclusion

Be sure to check out and follow the design contest as I am sure it will continue to grow and post. I hope that what we talked about today helps you guys with any inspirational/technical issues that you might be having. I am interested in hearing what you guys have to say about the subject and seeing some of your no effect work.

Your ads will be inserted here by

AdSense Now!.

Please go to the plugin admin page to paste your ad code.

Ushering In A New Year!

Your ads will be inserted here by

AdSense Now!.

Please go to the plugin admin page to paste your ad code.

Today we usher in a new year, the start of 2012! This year is filled with superstitions of world ending tragedies and new beginnings. For us, at least, we are focusing on the new beginnings portion of this year. This year we have so many plans for you guys and have a new tutorial set up, a new shop, a new design, and plenty more to come this year.

We are going to be revitalizing our Freebies site, Friday Freebies, and making sure that each Friday you will receive a brand new PSD file, for free. You will see a whole new design for the HV-Network, as well as a new addition to our network (details to be released later).

Your ads will be inserted here by

AdSense Now!.

Please go to the plugin admin page to paste your ad code.

While we finalize details for the new design of the network be sure to check out many of our excellent tutorials, our many freebies, and the many premium items we have available from the shop.

Let’s ring in the new year with a brand new wallpaper, specifically for you guys.

Your ads will be inserted here by

AdSense Now!.

Please go to the plugin admin page to paste your ad code.

Interview With Web Design Guru Orman Clark

Your ads will be inserted here by

AdSense Now!.

Please go to the plugin admin page to paste your ad code.

I am proud to bring you a little more information on yet another Web Designer in our community. This man has brought freebies to the design community every day since the inception of his website, and continues to amaze us with his free work. Along with sharing his amazing talents with the rest of the design community he also has released a few Premium WordPress Themes (which can be found below) and they have been a great success.

His Work

Check out some of my favorite works of Orman Clark:

The Interview

Orman, thanks for taking time out of your day to answer a few questions; firstly we would like you to introduce yourself to the readers?

Thanks for asking me to do the interview, I always find it interesting to read about other designers and their processes so hopefully this will be at least mildly interesting to others ;) Well, my name is Orman and I’m a web designer based in the UK. I’ve been involved in design in one way or another for the last 8 years or so and these days I find myself either designing themes for WordPress or creating freebies for designers.

You run two websites, Premium Pixels and your personal website, which website to you think will become more pivotal towards growing as a freelancer?

I’ve had my personal website for about 18 months now (before that I relied on word of mouth) and that did a pretty good job of gaining some interest from potential clients. Fortunately, the first version of the site was picked up by a few design galleries which definitely helped in the early days.

More recently however, Premium Pixels has begun to gain some traction and has put my work in front of both peers and potential clients in a way that a static portfolio site can’t. Overall I think the interactive / conversational element will eventually lead to Premium Pixels being the main driver of any potential client projects.

Was Premium Pixels an idea that you had for a while and then setup or just something you set up one day realizing that you had some extra files laying around?

Actually Premium Pixels was very much a spur of the moment thing and I set it up without any real “plan” or motive. I’ve always toyed with the idea of starting a blog but came to the realisation that my passion for writing is nowhere near as strong as it is for design – all of my early attempts dwindled into nothing very quickly!

Design elements and/or tutorials seemed like the next logical step and so one weekend I set about designing the site and a handful of freebies to start me off. The whole process was very quick, maybe just over a week fitted around client work.

Where would you say that your inspiration for your designs comes from?

Most of my inspiration comes from the oodles of talented designers that share their work on sites such as Dribbble and Forrst. Sites like these are great insights into how other designers not only produce their work but the thought process behind it – often this is a greater lesson than simply viewing the finished product as you can apply the same logic to your own creations.

You have released two Premium WordPress themes so far on Themeforest. Any chance that we can look forward to some more in the near future? What about a freebie WP template?

Absolutely, I intend to release more Premium WordPress themes in the very near future and over the course of the coming year. In terms of freebies, all I can say is watch this space ;)

If your Themeforest sales increase will you focus more on releasing premium templates or will you keep your focus on your web design?

Your ads will be inserted here by

AdSense Now!.

Please go to the plugin admin page to paste your ad code.

It’s no secret to anyone that knows me that I’m a huge fan of WordPress, I love working with the system and so I will always take an opportunity to develop more themes in the future. As for concentrating wholeheartedly on themes, that is something that remains to be decided however it is a strong consideration for the future.

As a prominent member of the design community I am sure you get approached to write tutorials all the time. How do you decide where to write your tutorials for?

Actually I have only ever been approached by Brandon from WebDesigntuts+ in regard to tutorials but I certainly welcome others to get in touch. When I heard what Brandon was trying to achieve with WebDesigntuts+ I decided right there and then that I would love to be involved. It is a perfect addition to an already fantastic network of sites and I’ve thouroughly enjoyed writing for them – hopefully they’ll be more to come in the future.

What would you recommend to the readers as a way to get better known in the design community?

Put simply, get involved. It’s a very cliched response to say “participate in the community” but I think it really is the key. Remember to be yourself, perhaps help out your peers every now and again but ultimately just get stuck in!

Any special plans in the near future that you can let us in on?

Hmmm, I can’t mention any specifics just yet but let’s just say that there are a few interesting collaborations in the pipeline that I’m really excited about.

The lovely debate: Mac or Windows?

Mac, hands down. I made the switch around a year ago and would never go back.

Another debate: Photoshop or Fireworks for Web Design?

For me personally it’s Photoshop simply because it’s what I’m used to and what the majority of other designers tend to use – makes collaboration a much simpler process. I did open up Fireworks recently to give it another go but without the practice simple things tend to take me twice as long which can get frustrating.

And finally; if you could become the lead designer for one company what company would you choose and why?

One that I owned! Right now I love the freedom of being freelance, working for myself and managing my own clients – I’m not sure I could go back to agency life just yet!

Thank you again for the interview Orman, it was great to get to know you a little better.

Well, there you have it, that’s Orman Clark. Keep reading on for links to his Social Network, his Premium Files, and his websites.

Keep In Touch

Some More Work

Conclusion

There you have it. If you have any questions leave them in the Comments and I am sure that Orman will be happy to answer them as soon as he can. Thanks for reading and stay tuned for a more interviews, freebies, and tutorials.

This interview was brought over from my old personal blog to HV-Designs because I did not want to lose such a valuable interview and insight into such a great design mind.

Your ads will be inserted here by

AdSense Now!.

Please go to the plugin admin page to paste your ad code.

The Pros and Cons of Using Illustrator

Your ads will be inserted here by

AdSense Now!.

Please go to the plugin admin page to paste your ad code.

I recently started using Adobe Illustrator in addition to my main program Adobe Photoshop. This has gotten me thinking of an age old debate, Photoshop or Illustrator? Now, you can never do all the things in illustrator that you can in Photoshop and likewise in Illustrator, but what about for the every day things that you work on like icons or characters?

The Pros of Illustrator

With Adobe Illustrator all graphics that you create a vector graphics. This means that you can re-size the image to be as large or as small as you want while still retaining the proper styling and definition. You can also use Adobe Illustrator to create your business cards or any print media because by default Illustrator is set up to work in the proper printing color format. This means that you won’t create a design that will look completely different once it is printed.

Being able to re-size any image, no matter what size you designed it at, and still retain the right quality was the biggest draw to my for Illustrator. I wanted to be able to design an icon at icon size but still be able to offer a larger size. I can not do this in Photoshop and still get the styling I want, so I decided to head over to Illustrator and try it out. So far I am very happy with the majority of the results I have achieved with icons and character creation the last few days.

Having Illustrator already set up for print media is another great thing for me. I have found myself several times halfway through a print design in Photoshop, its looking fantastic, and I forgot to turn in from RGB to CMKY. This means that I either have to change right away and fix the mistakes that with inevitably pop up or start all over and try to achieve the same result after being immediately put in a horrible mood. With Illustrator I don’t have to worry about that anymore which is a huge load off of my back.

My final favorite thing about Illustrator so far is the ability to save as an EPS document where I can open the vector in Photoshop. The EPS file automatically opens in CMKY so no worries there. I have found myself, already, working on a document in Illustrator and getting it right where I want it so it looks great and I want to use it. Then I will open it up in Photoshop to re-size it and give it a nice background (which I could do in Illustrator but I prefer PS). Then I will start playing with the character or icon and it will just go from there until I have added or tweaked just little things but it makes the character 100 times better. The only thing I don’t like is that you can’t maintain the vector styling if you add things in Photoshop (unless you can and then I would love it even more) but it is easy to bring the styles over to Illustrator and recreate them.

The Cons of Illustrator

I am still pretty new to Illustrator but I have found several cons already. The first thing I have to say is that if you are an Illustrator user from the start and not originally a full time PS user than most of these will probably not bother you. One of my biggest pet peeves about Illustrator is the Gradient Tool. I use Gradients in a little over half of all my work and the gradient tool in Illustrator just does not jive with me. I don’t like the color selector at the bottom, I don’t like having to manually enter in the angle for my gradient, and I don’t like the way it renders gradients.

Your ads will be inserted here by

AdSense Now!.

Please go to the plugin admin page to paste your ad code.

Like I said the first two are just pet peeves because I have worked in Photoshop for so long that I am used to the way they have you set up your gradients and colors. That being said however I do not think it is just my personal feelings for Photoshop that make the gradients in Illustrator render so strangely. The gradient lining is the worst that I have seen in any image editing program. The edges are rough and once you get past three colors it just renders more and more gradient lines rather than a clean overlay. This may just be my inexperience with Illustrator, and if it is please let me know how to correct it.

Another thing I have found that I don’t like with Illustrator is that you have to manually create a new layer. If you don’t all your paths will be on one layer and if you don’t keep up with the names of your paths then you will eventually get lost in what you are doing. Now, it is set up pretty much like Photshop in that a layer is like a PS Group and the paths are like PS layers, but it just comes from working in Photoshop for so long. My PS use is not the only reason that I have an issue with this, however. I also have a big problem with the fact that you can not create groups with any keyboard shortcut. You can create groups with the pathfind section, but then you have to isolate to see each individual path. It just seems like too much work for something so simple.

So What’s Better?

To be honest I have to say that no matter what Illustrator has to offer if it ever came down to making a choice of keeping Photoshop or Illustrator then I would choose Photoshop without a second thought. I do love Illustrator and everything that is has to offer, and I am sure that as I work a little more with it I will come to love it even more, but there is just something about Photoshop that makes it feel like the better program to me.

Sure, there are something things that Illustrator does better (the vector graphics) but I try not to do too much print and logo work, so if I didn’t have that ability it wouldn’t be very detrimental to my business. If I started working more on print and logos than I would probably change my mind and say I need to keep both of them, but I don’t see that anywhere in my near future. Since my main focus is Web Design, and Illustrator isn’t meant for that, I feel that I can easily say that in a battle of Photoshop vs Illustrator the clear victor would be Photoshop.

Conclusion

So, if the world of Adobe was ending and they said you had to choose just one image editing program, Photoshop or Illustrator, what would you choose? Would Photoshops superior styling trump Illustrator, or will you choose Illustrator’s amazing ability to render in whatever size over Photoshop’s lack of vector abilities?

The time has come for you to choose and post a comment about what you choose!

Your ads will be inserted here by

AdSense Now!.

Please go to the plugin admin page to paste your ad code.

A Brief Guide to Getting Started in Identity Design

Your ads will be inserted here by

AdSense Now!.

Please go to the plugin admin page to paste your ad code.

This isn’t going to be your typical tutorial in the sense that it’s not so much about technology as it is about design itself. It really doesn’t matter if you know how to use Photoshop or Illustrator if you are doing the wrong things with them. Tools are just tools, and they only ever obey their master’s bidding.

As designers, we’re tasked with crafting the very reputations of the companies, organizations, and individuals that entrust their work to us. That’s a tremendous responsibility, and one I feel most designers tend to take much, much lighter than they ever should.

When you set out to create an identity for a client, you must first understand that client and their customers or the people they work with. What makes them tick? What makes their customers tick? What factors drive the decisions and thought processes of their customers? Why are their customers buying or not buying their goods or services in the first place? To understand these things, you need to spend some time extensively interviewing your client and, if possible, his or her customers.

I cannot possibly stress enough that designing logos and identities has nothing to do with technology. People who know how to use Photoshop or Illustrator are a dime a dozen. Design has absolutely nothing to do with how proficient you are with Photoshop or Illustrator. Anyone can use a hammer. Very few can design the Empire State Building or the Statue of Liberty. Design has everything to do with being able to deeply understand the company or individual who has placed their trust in you to forge their reputation and their image. As such, it’s critical that you not treat this job lightly. Don’t read this tutorial and then go out and create an identity for a company without putting in the due diligence to become great at your craft. It takes years of dedication, discipline, experience and expertise to do that job well. For now, just focus on honing your craft and getting better at what you do. When you become great at what you do, the work will come.

Getting Started

Once you have a crystal clear picture of what type of people you’re working with, and what type of people they want to attract, you can begin the design conceptualization process. The fun part. The brainstorm.

For this stage of the project, I typically turn to paper. You may even want to take a walk, go for a run, or take a hot shower or something. You need to really think about what’s going to best express the very essence of your client in logo form, and that requires equal parts concentrated focus and creativity in the same act.

Once you have your concept, or at least the general direction you want to take your identity project in, it’s time to start sketching. Start with a pen or pencil and a notebook. I use several different Moleskine notebooks for sketching and writing down my ideas, but anything will work. You can even use a napkin, a whiteboard, or a sheet of blank printer paper. Just speed sketch anything that comes to mind. Don’t worry about the art. It’s not a competition. The goal is to express your concept as clearly and simply as possible. You’ll need to iterate through several different variations on your ideas, and for this, paper is key. If you try to do this stage on a computer, or even an iPad, you’ll focus too much on the tool and the implementation of it and nowhere near enough on what you are drawing. You need absolute freedom. You need to be able to quickly draw over top of a sketch, or scribble it out. You need to be able to quickly create ten different versions of a shape in a matter of seconds. That’s not happening on a computer screen.

My actual sketches of the Ministry Rocket Logo (please pardon the terrible iPhone photo)

If you have the opportunity to do this stage with the client present, more power to you. This is a great stage to get their feedback on what concept most closely fits the company’s goals. However, don’t feel like they need to be present by any stretch of the imagination. You may even focus a lot better without them. I know I do.

Once you have your concept whittled down, it’s time to bring it into the digital realm. For this, I typically use a scanner, but even a digital camera would work. You can even use the camera on your phone in a pinch. Keep your sketches well lit and on a flat surface if you opt to use a camera.

Once you get the sketches into the computer, import them into Illustrator, Photoshop, or any tool of your choosing. I cannot stress enough how little importance falls on the tool. I use VectorDesigner, Pixelmator, Acorn, and others all the time. I also use Photoshop and Illustrator. It really doesn’t matter. What matters is that you understand how to use your tool fluently and that you can use it with strong confidence. For the sake of illustration, I’ll be using Illustrator in this tutorial.

You do want to create your logo in a vector app (like Illustrator), as opposed to a raster app (like Photoshop). For that, Illustrator or another vector illustration app is needed. If you create your logo in Photoshop, it won’t be scaleable and editable in the same way it would be if created in a vector app. Logos, by definition, should ideally be infinitely scaleable, and able to be printed on any material in color or black or white.

With your original sketches imported, depending on the complexity of your drawings, you have two choices. You can trace over the sketches to create vector illustrated versions of them, or you can simply re-create them from scratch. For most logos, you may not even need to scan your sketches in at all. Instead, just re-create the graphic using your original sketch as a faithful guide, sitting right there on your desk. This will encourage perfection and symmetry, while trying to stay true to a tracing will often result in imperfection and asymmetry (of course, if this is the goal, then trace by all means).

What I typically do is create only half of the icon, using the pen tool, with no stroke and a fill color, if it’s a symmetrical design, and then ever so slightly overlap the two images so that the two halves are just touching with no background whatsoever visible between the two. Then, I merge the two halves using the “Merge” command in Illustrator’s “Pathfinder” palette, which creates one perfectly symmetrical shape. If it helps you, you can leave the stoke turned on while you’re drawing, and later turn it off before merging your two halves.

This is how the rocket was created.

Typefaces and Fonts

Just to clarify the terminology going in, the word “typeface” is used to describe a family of fonts. For instance, “Helvetica” is a typeface. It is not a font. Referring to it as such is improper and makes you sound like an amateur. “Helvetica Neue Ultralight Extended 23, 48PT” is a font. The “font” is the exact pairing of typeface, variant, weight, and size as used in a design.

Your ads will be inserted here by

AdSense Now!.

Please go to the plugin admin page to paste your ad code.

The typeface you choose is critical to your design. In some cases, you’ll even need to create custom lettering. However, for the sake of illustration and sanity, I’m going to stick with finished typefaces here.

It’s absolutely vital that you have a healthy library of typefaces installed and available for use in design projects. You cannot rationally expect to create great work with terrible resources. Garbage in = garbage out.

There are a number of fantastic foundries out there, producing great new typefaces every day. Many of my personal favorites come from Hoefler & Frere-Jones Foundry. The typefaces used in the Ministry Rocket logo are Knockout (Bantam Flyweight, in all caps) and Leviathan, both by HFJ.

If you’re coming up short on great typeface ideas, or if you are simply in need of some new ones and have no idea where to get started, I cannot possibly recommend Dribbble enough. Anyone can browse the work there, and many of the design pieces submitted there cite which typefaces were used in the design. You’re going to see a ton of Hoefler typefaces there, but there are a lot from other foundries, such as Linotype and others as well.

The typeface you choose should accurately reflect the nature and goals of your client. Fonts say a lot about a design. As Massimo Vignelli said, “You can say ‘I love you!’ in Helvetica, and if you want to be really fancy, you can say it in Helvetica Light. You can say, ‘I hate you!’ in Helvetica, and if you want to say it really loud, you can say it in Helvetica Bold.”

If you were designing a logo for a very conservative investment firm, and you used a really modern, slick typeface, you’d be lying. They aren’t a design firm, they are an investment firm. That should be obvious from the typeface you choose for their logo. Something like Hoefler Text or Baskerville, or even Trajan or Bank Gothic might be appropriate, but surely not Helvetica Neue Ultralight or Avant Garde.

Likewise, you should never use typefaces just because they are trendy, or because you like them. For instance, it would be inappropriate for you to use a vintage typeface for a grocery store just because you thought it looked cool. Using typefaces based sheerly on personal preference is an telltale sign of a designer who doesn’t know how to relate with his or her clients, or who lacks experience in choosing typefaces appropriately. Make those letters count!

Feedback

Yes, you can and should get feedback from your clients. But what are you to do if designing a logo on your own time? What if you’re working on something without a client at all? Or, what if you want to get feedback from skilled people, as opposed to someone who wouldn’t know good design if it hit them in the face? Great feedback is helpful in almost all situations. These are all realistic everyday problems, and fortunately there are many great solutions available.

Dribbble & Forrst

Both of these are invitation-only communities of designers. Forrst tends to be easier to get into, but if you’re already on Dribbble, more power to you. If you don’t already have an account on each of these sites, go set one up right now. I’ll wait. Got em? Great. Let’s continue. In the case of Ministry Rocket, I posted my early comps on Forrst, and was able to get incredibly valuable, precise feedback in mere minutes.

Real-world Feedback

I cannot possibly tell you just how valuable this is. If you are in the middle of nowhere, in the middle of the night, sitting at your Mac, you can get feedback on a design from world-class designers from around the world in mere minutes. You’d be fairly insane not to take advantage of that fact. The design community is here for you, and they are incredibly helpful people.

After feedback.

Client Feedback

It should be your goal to create the perfect design on the first try. This whole idea of designing iterations is a sheer waste of your time and the client’s time as well. Imagine if Walmart asked their contractors to build them three versions of every store, so they could choose their favorite. That would be ridiculous. Yet, somehow, people think this is acceptable behavior in the design contracting profession. It isn’t. This isn’t 3rd grade art class. It isn’t a competition, either. It’s a problem, and there is an ideal solution. It’s your job to find the best one as efficiently as possible.

Paul Rand, one of the greatest designers of our time, who had Steve Jobs as a client, is a champion of this philosophy. When Steve Jobs asked him for three iterations of a logo, Paul told him,

“No. I will not give you three options. I will give you the best solution to your problem, and you will pay me for it whether you like it or not.”

You’d think this would have been considered rude. It wasn’t. Steve was so astonished at the Paul’s professional confidence and design prowess that he gladly accepted the solution, and the two became great lifelong friends. People want to hire someone who knows exactly what they are doing, and why they are doing it. They want someone who can take a job from inception to completion with confidence, skill and professionalism, not some amateur that they need to babysit every step of the way.

If you must use iterations for one reason or another, never give the client a bad option. I’ve tried that route before of giving the client one great choice, a less great choice, and a so-so or even bad choice, hoping they would choose the obvious best one. It doesn’t work. Clients always, without fail, choose the worst option you give them. They aren’t designers, and may even lack the taste needed to create a successful logo altogether. That’s why they hired you in the first place. You are being paid for your skill, experience, and creativity. If you fail to use these things properly, and give the client a bad choice to choose as a result, that’s on you. For this reason, give the client two or three equally fantastic designs, and suggest the best one to them, but make sure you don’t have an inferior option on the table.

Conclusion

Now that you’ve successfully learned how to draft a series of logo comps on paper, move to the digital space and create your initial versions, choose typefaces, and get feedback from other designers and clients, you have the basic elements of knowledge needed to get started. Be patient, and do great work. Constantly seek new inspiration, and above all, never lose your passion!

Your ads will be inserted here by

AdSense Now!.

Please go to the plugin admin page to paste your ad code.

Welcome to the Team – Justin Lowery

Your ads will be inserted here by

AdSense Now!.

Please go to the plugin admin page to paste your ad code.

Today I am proud to introduce another full time member of the HV-Team, Justin Lowery, who will be writing photoshop and illustrator tutorials for us. Justin has a new tutorial for us coming this next week but I wanted to start off letting our readers get to know him a little bit with this interview. Read on, ask questions, and enjoy!

Justin, thanks for taking time out of your day to answer a few questions; firstly we would like you to introduce yourself to the readers?

Sure. I’m Justin Lowery, and I’ve been working as a professional graphic designer, web designer / front-end developer, photographer, and writer for over a decade. I work with people, organizations, and companies from all over the United States and around the world. I have a tremendous passion for helping people, changing their lives, and shaping the way they view themselves and the world around them.

How do you find the creativity to keep pumping out your amazing work and tutorials?

I read obsessively. In a typical day, I consume probably a few hundred articles, and countless hundreds of images and design pieces in a constant search for inspiration, knowledge, and ideas. You need to “stay hungry, stay foolish,” as they say. Learn constantly from the work and writing of others.

Also, participating in the design community is key. I’m on Dribbble, Forrst, BeHance, Cargo Collective, Flickr, Deviant Art, and pretty much every other community I’ve ever heard of. There are some absolutely brilliant designers and artists out there, and in the communities you can find a never-ending flow of ideas and inspiration.

What would be your favorite piece of work that you have designed so far?

That’s a very hard one. I’m not sure I even have a favorite. I like my own site, because I have total design freedom with it. Also some of the 3D and motion design pieces I’ve built with Cinema 4D and AfterEffects came out pretty well. A few of my recent identity projects have really come together nicely as well. It’s nearly impossible to choose a favorite, however.

You have signed on to be a member of our HV-Team, what made you want to join the team and write tutorials?

Well, I actually went to college for education, believe it or not. I figured there really wasn’t much I could learn from going to school for design, because I literally would teach the design professors things all the time while I was there. (I actually ended up doing design and consulting work for the college before I graduated, and worked in the advertising department for two years as well.) Instead, I figured teaching was something that would never lose its value, and could be applied to nearly anything imaginable. So I took that, and graduated with a double major in secondary education with two teaching fields. I love helping people unleash their potential. Writing and teaching both accomplish that. Tutorials combine those two of my passions.

Your ads will be inserted here by

AdSense Now!.

Please go to the plugin admin page to paste your ad code.

What made you want to get into the Graphic Design business?

Well, it’s more design in itself than the business. I actually do pro-bono work all the time for charities, ministries, and other non-profits that I think have worthy causes. Design changes the way people perceive the world around them, and in turn affects people’s behavior towards these causes. If you have bad design representing your organization, people are going to think poorly of it, and that’s going to show in the way they treat it. They’ll give less, volunteer less, care less, and sometimes even ignore the organization entirely.  The end result is that these organizations don’t have the money or manpower they need to change the world, and that’s wrong. I wanted to change that. The business side of design came about as a mere necessity of life. I love design, and it happens to pay the bills, so I decided to use it do that while I work on more meaningful things in my spare time. Of course, I try to choose meaningful paid projects as well, and have been blessed with the opportunity to work with some truly incredible clientele over the years.

What would you recommend to our readers as the best way to build their career?

Do awesome work. Put your heart and soul into it. Show people. Get dramatically better at what you do. Do better work. Show more people. Rinse and repeat. Use your work to do good for others and for the world. When people see those things in you, they’ll want to work with you. People like people who have passion for what they do, and who do it well. I handle the work of a small agency as a result of this. It does work.

In a practical sense, get your work out there. Follow a ton of designers on Twitter, Dribbble, Forrst, BeHance, Cargo Collective, and Flickr. More importantly, get your work on all these sites and more. Show only your best work. It’s more important what you don’t show than what you do. Less is always more. I try to show only a dozen pieces in my portfolio at any one time. Talk about what you do. Be super passionate about it. People will want to work with you when you’re glowing with enthusiasm and energy for what you do. If you love what you do, it should show, and people will be able to see it. When you nail those things, the work will take care of itself.

And my last question; If you could work with one company and head their design department who would it be? Why?

I would most likely start my own company. I probably have too much passion for what I do to work under someone elses limitations for very long. That said, if I had to choose, hmm…that would be hard. Apple is always a good choice as companies go. I love the work they do.

Realistically, though, I doubt I’d ever work for a corporation per se. I’d much rather do something more meaningful. Perhaps something like the Red Cross or another large-scale charity organization. I really have a passion for helping people, and getting people to help each other.

If I had to choose a realistic organization that I actually have qualifications and a solid chance of working for, I’d probably work with an small to medium-sized agency that strictly services charities, ministries, and other non-profits, like churchmedia.cc or something similar. I really can’t stand the whole money-at-the-expense-of-people mindset that most companies have, so it would definitely be a non-profit-oriented agency that does truly meaningful work on a regular basis.

Well, thanks again Justin and we look forward to seeing your tutorials in the coming months!

Your ads will be inserted here by

AdSense Now!.

Please go to the plugin admin page to paste your ad code.

We’re Back — Freebie to Celebrate

Your ads will be inserted here by

AdSense Now!.

Please go to the plugin admin page to paste your ad code.
Hey guys, we are finally back up and running. After almost a month of being down and having issues with our database/plugins we are finally back and ready to start running full speed again! I had this puppy ready for Friday Freebies (which was also down) but decided that I was going to release this as our back online surprise to celebrate coming back.

Before we get to the fully awesomeness of our freebie I want to fill you in on our plans for the next few months. The biggest thing that we have coming your way is our complete re-design of the website and how our blogs are laid out. Now, there wasn’t very much good feedback on the idea of adding a premium feature to the site, so we have decided to hold off on that for now, but we will be entering into re-design mode in the next week or so and hopefully have a new design out to you guys in a month or two.

The other main thing that we will be doing is re-designing the HV-Shop as well, in order to have it flow smoother with the rest of the site/network, which will also include a re-design of Friday Freebies, BestPSTuts, and the other two network sites we will be releasing. As you can tell already we will also be releasing two new network sites for the HV-Network by the years end, though details of those sites are still in planning stage. When I get some more information on how those will work I will let you guys know right away.

Our final thing that we have planned to start after the re-design is with the shop. The shop will now offer tutorials, photoshop files, fully coded sites, and android apps. At this point the shop is limited to HV-Network writers only. We will be offering a few new packages in the shop though that include a certain amount of downloads per package and things like that, which will help you really get the files we need. You will also see us releasing various Tumblr, WordPress, Joomla and other themes on Superhug in the coming months.

Your ads will be inserted here by

AdSense Now!.

Please go to the plugin admin page to paste your ad code.
I am sure I have bored you guys enough with reading our plans, but I do hope you are a little excited about them. If there is anything else you want to see be sure to leave a comment or follow us on Twitter (@hvdesigns). Now, on to what you really clicked on this post for: FREE STUFF

This freebie is a 3D Google Plus icon that you can use for any of your sites, both commercial and personal, free of attribution (though attribution is nice and will get you a high five). This freebie was created by HV-Network author Josh Laincz, of Zohf Design.

Download PSD File CLick Here.


Your ads will be inserted here by

AdSense Now!.

Please go to the plugin admin page to paste your ad code.
Friday Freebies – 2 Months Strong

Your ads will be inserted here by

AdSense Now!.

Please go to the plugin admin page to paste your ad code.
When I started up Friday Freebies as part of the HV-Network I was worried that there are too many freebie areas out there and that we would just be jumping on the bandwagon. After two months and eight freebies (Nine today!) I figured out that though we have jumped on the bandwagon you guys are still supporting us and downloading our freebies. That’s why, as a thank you, we decided to release our first three packaged freebie sets on FF absolutely free.

That’s right, as our ninth freebie release we decided that it was time for a freebie package. Our idea was to pull all the download into one package and charge a buck for the download, but we decided that since you guys have supported our site we want to continue supporting you with freebies. Until we hit our sixth package (1 year) the packages will remain absolutely and 100% free.

Each package will contain all new downloads, as well as the previous package. So, our package #2 will contain 8 freebies we released as well as the ZIP file of the first package so you are getting every freebie available on the site in one quick and easy zip file. So, head on over to the site and download the packages and also welcome the newest member of our team @_DomW

Your ads will be inserted here by

AdSense Now!.

Please go to the plugin admin page to paste your ad code.


ENjoy

Your ads will be inserted here by

AdSense Now!.

Please go to the plugin admin page to paste your ad code.

HV-Designs to Add a Premium Feature?

Your ads will be inserted here by

AdSense Now!.

Please go to the plugin admin page to paste your ad code.

Alright guys, we have been thinking about things a lot lately and what direction we want to take the site. Thanks to you guys for helping us get to a point where we can take the time out to make these decisions. As we started talking about different things that we want to do with the site we got on the topic of the HV-Shop and what we want to do with it. The shop is doing great, but we were thinking of giving our users something a little bit better.

While we were talking this weekend about the shop the idea of a premium membership came up. Instead of just moving the site in that direction we wanted to see what you, our readers, thought about a premium membership area. We have been churning out tutorials at least twice a week lately and are starting to build up more and more tutorials.

However, we have a lot of items in the shop and were just getting ready to release a bunch of premium tutorials in the shop. Again though we wanted to give our readers access to all the files they need, as well as the source files for every tutorial, and we are thinking about doing $5.00/mo or $45.00/yr for access to the premium area. This would be implemented via PayPal and probably be set up in a few months, but we wanted to see if you guys are interested in this or if you would rather just keep the shop and have access to individual files?

Your ads will be inserted here by

AdSense Now!.

Please go to the plugin admin page to paste your ad code.

The entire site would not go premium like Grafpedia has done. We would still have the same amount, and quality, of tutorials that we have now on the site. We would just be adding a premium area where you can get certain files and templates, as well as access to the PSD files of every tutorial, as not all our tutorials come with the PSD file.

The rest of the site would remain the same. It would basically be having the shop, but with a monthly fee, more items, and integrate more within the community/site. Like I said though the main portion of the site would remain the same.

Let’s hear from you guys as it is you that will be supporting this and you that this will effect.

Your ads will be inserted here by

AdSense Now!.

Please go to the plugin admin page to paste your ad code.

Introducing: Friday Freebies A New Network Site

Your ads will be inserted here by

AdSense Now!.

Please go to the plugin admin page to paste your ad code.

Today we are pleased to introduce a new site to our network started up by our General Editor. The new site will consist of free Photoshop files released each week on Friday, if you couldn’t have guessed that. It has been going strong for two weeks now and is out of final testing phase, so there are already two awesome PSD’s up there for you to get your hands on.

Your ads will be inserted here by

AdSense Now!.

Please go to the plugin admin page to paste your ad code.

Friday Freebies will be releasing a free PSD every Friday free of any license. You are free to use the work however you want and no attribution will be required.  The PSD files will be totally separate from any tutorials on the site, which means that between the site and Friday Freebies you will always be getting awesome PSD files for inspiration/use. The theme for Friday Freebies is the Folio Tumblr Theme by John Tidey, which is available in the DoD Bundle we posted about earlier this week. Check back each week or follow us on Twitter to be notified what the next PSD release is.

Your ads will be inserted here by

AdSense Now!.

Please go to the plugin admin page to paste your ad code.

Designer on Duty Bundle :: Over 15 Resources Only $3

Your ads will be inserted here by

AdSense Now!.

Please go to the plugin admin page to paste your ad code.

Today we are proud to be a sponsor of the Designer on Duty Bundle. The DoD Bundle was put together to help out a designer that is undergoing a serious, and unexpected, eye surgery. The bundle includes over 15 resources, updated every day, for only $3. That makes the resources around .18 cents per resource and getting lower every day. Check it out and get yourself some awesome resources for a great price.

If you purchase the bundle be sure to leave a comment on this post as we will be giving away a couple prizes to random purchasers and every one that purchases will also get a credit for one item out of the HV-Shop. This is a super awesome bundle that is updated daily and definitely worth the three dollars to get the resources and any time the bundle is updated you get the updates automatically.

Get the Bundle Today


Your ads will be inserted here by

AdSense Now!.

Please go to the plugin admin page to paste your ad code.


Your ads will be inserted here by

AdSense Now!.

Please go to the plugin admin page to paste your ad code.

HV-Shop Item of the Week

Your ads will be inserted here by

AdSense Now!.

Please go to the plugin admin page to paste your ad code.

Today we are starting a new series where we will detail the Item of the Week from the HV-Shop. This weeks Item is our WordPress Layout #6. This design features character illustration and very rarely seen widgets on the right hand side. The widgets include Flickr and Advertising. You will love everything about this layout, especially the price.

Your ads will be inserted here by

AdSense Now!.

Please go to the plugin admin page to paste your ad code.

Get this weeks custom theme for only 2.50 (Euro). Use the link below or search using Product Code: WOR42. Also with this weeks featured purchase we at HV-Designs will turn this into a WordPress Theme for only $25.00, that is 50% off. All you have to do is leave a comment on this post with your name (make sure to add your email in the field) and we will send you an email to get started.

Your ads will be inserted here by

AdSense Now!.

Please go to the plugin admin page to paste your ad code.

Amazing Flickr Submissions

Your ads will be inserted here by

AdSense Now!.

Please go to the plugin admin page to paste your ad code.

I was going through the submissions to the Flickr group today and found some amazing artwork was submitted there. I wanted to showcase a few of my favorites from recent submissions. I will be trying to go through at least once a month and post on the recent submissions or general submissions overall. Anyway, take a look at the amazing artwork this time around.

Hands by willianmatiola

iPad 2 Icons by DirceuVeiga

The Poison by davidpst

Love You by willianmatiola

Nerdiabos by willianmatiola

Your ads will be inserted here by

AdSense Now!.

Please go to the plugin admin page to paste your ad code.

The Impossible by Ricardo FX

Tetris Trashcan by Viktor Hertz


Enjoy

Your ads will be inserted here by

AdSense Now!.

Please go to the plugin admin page to paste your ad code.

Top 5 Design Articles and Tutorials — March ’11

Your ads will be inserted here by

AdSense Now!.

Please go to the plugin admin page to paste your ad code.

Today we are starting a new series that will give you guys a chance to view the top five posts throughout the design community each month. These posts will come from various sources, including large design blogs, and individual design blogs. This month was a great month for articles and roundups, which make up most of this months top posts.

Your ads will be inserted here by

AdSense Now!.

Please go to the plugin admin page to paste your ad code.


Your ads will be inserted here by

AdSense Now!.

Please go to the plugin admin page to paste your ad code.

The Ultimate Designer Toolbox

Your ads will be inserted here by

AdSense Now!.

Please go to the plugin admin page to paste your ad code.

While browsing across the internet today I stumbled across an amazing resource, that I immediately got a subscription to, WeGraphics. The site is full of amazing resources, tutorials, and tons of great articles.

The site recently underwent a super awesome re-design which added some awesome illustrations to their site and a couple super awesome buttons. If you are looking to see how to take textures and turn them into something amazing then take a look at the site and see how they have utilized the textures, it blows my mind away (which to be honest, doesn’t happen that often).

Head on over to WeGraphics and get rid of one starbucks a month to get a membership for some super awesome resources. You won’t regret it, and you will be seeing a lot of resources from there used in our tutorials coming up. Come on, its only $7.00 a month for over 3,000 resources!

Your ads will be inserted here by

AdSense Now!.

Please go to the plugin admin page to paste your ad code.

Premium resources for designers

Awesome Free Resources

Your ads will be inserted here by

AdSense Now!.

Please go to the plugin admin page to paste your ad code.

Design Bundle For Japan Plus Giveaway

Your ads will be inserted here by

AdSense Now!.

Please go to the plugin admin page to paste your ad code.

The awesome people behind 365psd and Designmoo put together a growing set of awesome design resources to raise money for the recovery efforts in Japan. 100% of the proceeds go to the Red Cross. Please help us raise support by purchasing this awesome bundle, sending out a tweet, or both.

We will be giving away one design bundle to a lucky user who spreads the word around on Twitter or even on Facebook.

Your ads will be inserted here by

AdSense Now!.

Please go to the plugin admin page to paste your ad code.

If you are going to use Twitter please use this message: The Design Bundle for Japan is live. Help support a nation in turmoil. http://cot.ag/gBCam2  #365bundle #GiveBack #Community cc:/@hvdesigns

If you want to use Facebook to spread the message all you need to do is Like our Facebook page and send us a Facebook Mention. One lucky user will receive a free bundle, chosen by random tomorrow morning.

Thank you everyone for your generosity and support.

Your ads will be inserted here by

AdSense Now!.

Please go to the plugin admin page to paste your ad code.

HV-Designs Design Competition :: NOW OPEN

Your ads will be inserted here by

AdSense Now!.

Please go to the plugin admin page to paste your ad code.

Today we at HV-Designs are proud to release the opening of our Design Competition. We are all excited that this competition has begun and hope that you will all enjoy the competition as much as we do! This competition will take place from today, March 1st, through the end of the month, March 31st.

So you think you can design huh? well now is your chance to show us. HV-Designs is proud to be hosting the HVPSD2HTML Site Design Competition! We are going to be opening up a PSD to HTML based company website, in addition to the blog, and want to see what you can do with the site design. If you think you can handle it then jump in the competition by heading over to the competition design site and see what you need to do.

How To Enter

Entrance into the competition is very simple. Any of our readers may enter the competition by simply following the guidelines for phase one on the competition design site and then submitting your design to our Facebook Page. To submit your design to our Fan Photos simply head to our page and click the photo link when posting, instead of the Wall, and submit your photo.

Please be sure to follow all the submission guidelines as outlined in the design site.

Current Phase

Your ads will be inserted here by

AdSense Now!.

Please go to the plugin admin page to paste your ad code.

We are currently in the Preliminary Phase. The preliminary phase of the Design Competition will start March 1st, 2011 and will continue through to March 11th, 2011. The preliminary phase will require contestants to design a Coming Soon Page for the new HV PSD to HTML site.

You can see all the current designs here: Current Design Submissions

Prizes

The winning design and the remaining pages will be taken and converted by Aaron Nichols of Custom Power Designs. The winner will, however, be offered the chance to design and convert the remaining pages, with the guidance and final approval of the HV-Designs staff. The winner will also be offered the chance to take a PSD, chosen by the HV-Designs staff, and convert that document to a working HTML file. Should the winner choose to accept this chance a panel of two judges will score the conversion and, using those scores, the staff at HV PSD to HTML will decide whether or not to offer the winner a freelance position with HV PSD to HTML, or a semi-regular tutorial writing job with HV-Designs, either way.

The remaining prizes are still to be updated and rounded up for all winners. You can still, however, view the grand prize by checking out the Design Competition Website to see what the Grand Prize is.

Sponsors

Custom Power Designs

Sponsorship is still available. If you are interested in becoming a sponsor please view the sponsorship page for more information.

Your ads will be inserted here by

AdSense Now!.

Please go to the plugin admin page to paste your ad code.