All posts by admin

Funky/Grungy Dj/Music Layout

Your ads will be inserted here by

AdSense Now!.

Please go to the plugin admin page to paste your ad code.

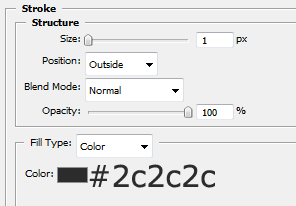
Create a new document 900×900 pixels with a background color of #262626, With a groovy font (font is used “bleeding cowboys”) of your choice add some text, when adding the text try and use a range of sizes and angles. The colors i used for the text are white, #d90056 and #9abb16. Once you have written and placed your text add a “6 pixel black stroke”. You should have something similar to this.

For this next part you may want to download some grunge brushes and circle brushes. (included in PSD) Alternatively make your own. Select your circle brushes and add some cirlces around your text, again add a 6 pixel black stroke.

Now add a logo for yourself, maybe some DJ decks or something like that.

Now selec the pen tool and make a selection similar to the picture below. The idea is to fill the background behind the text and images.

Fill with the color black.

Your ads will be inserted here by

AdSense Now!.

Please go to the plugin admin page to paste your ad code.

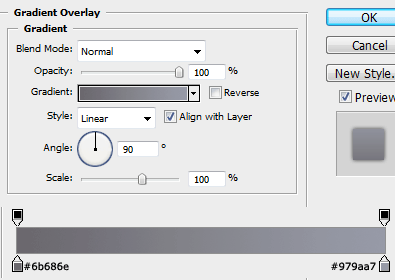
Select the color black along with some grunge brushes, add some grunge text behind the text and logo. Now select the rectangular marquee tool and create a big horizontal rectangle across the canvas behind the logo and text. Fill with a linear gradient using to shades of grey. Now added these layer styles.

You should end up with something like this.

Now create a 45 degree line pattern or industrial lines even and fill over the top of your rectangle, set layer opacity to 6% and blending mode to soft light. If you dont no how to create the pattern you can use a different pattern or you can download the PSD which contains the pattern file. Would be a go time to also add some navigation text.

Now its time to create our content boxes, select the rounded rectangle tool and create these boxes as follows. (next image is an animated .GIF so watch closely).

Once you have all your content boxes in place add your content.

Your ads will be inserted here by

AdSense Now!.

Please go to the plugin admin page to paste your ad code.

Fun With Lines Tutorial

Your ads will be inserted here by

AdSense Now!.

Please go to the plugin admin page to paste your ad code.

Your ads will be inserted here by

AdSense Now!.

Please go to the plugin admin page to paste your ad code.

Your ads will be inserted here by

AdSense Now!.

Please go to the plugin admin page to paste your ad code.

WordPress Mockup Layout

Your ads will be inserted here by

AdSense Now!.

Please go to the plugin admin page to paste your ad code.


Create a new document 850×800, fill your background layer with the color #272727. Create a new layer, select the rectangular marquee tool and draw a thin rectangle at the top of you canvas, fill with the color #121212.

Add your wordpress title and slogan, and any additional information you want in your header.

Select the elliptical marquee tool and draw 5 white circles all on there own layer.

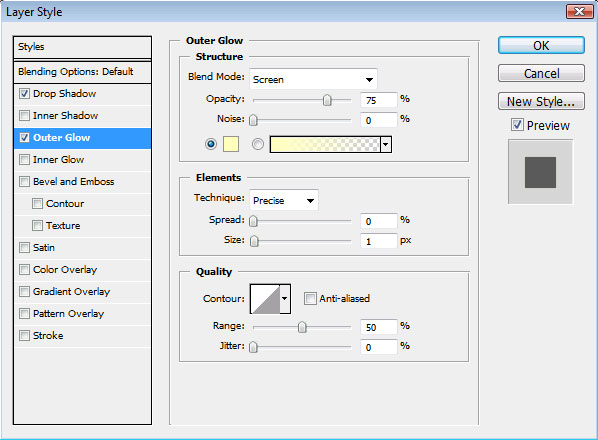
Goto “filter > blur > guassian blur” and blur each circle by around 3-4 pixels. Now add this outer glow to each circle.

Place the circles layers underneath your header rectangle, space them out evenly and place them slightly under your header.

Underneath your circle layers draw out 5 rectangles using the rounded rectangle tool. Fill each rectangle with the color #1a1a1a.

Now add your navigational text and some little arrows to complete the button.

Select the pen tool and two shades of grey, draw two 1 pixel lines next to each other about the same height as your button. Duplicate the line and place inbetween your navigation buttons. Merge all your “line layers” together as one. Add a layer mask to the layer then select the gradient tool with a “reflected gradient”, drag the gradient over half of the lines. Now add this layer style.

You should end up with something like this.

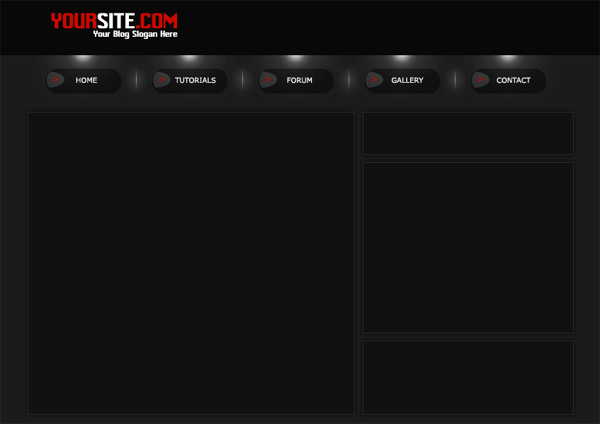
Select the rectangle tool and draw out 4 content boxes keep each box level and dont move them to far apart, fill them with the color #1e1e1e.

Add these layer styles to each of your content boxes.

Your ads will be inserted here by

AdSense Now!.

Please go to the plugin admin page to paste your ad code.

Select the rectangle once again and create a big rectangle at the bottom of your canvas, fill with the color #121212, and add a 2pixel black stroke to it.

Add your footer content to your footer box. My footer contains the same title and slogan as in the header, ive also added some example postable data.

In your main content box add a small rounded rectangle using the rounded rectangle tool.

Add these layer styles to your box.

This is now our calender icon and should look something like this.

Now add your day and date to the icon. Under the month bit add a white rectangle over the top then just make the selection, inverse it and hit delete. Lower the opacity to 10%.

Now continue to add your content for each box.

Your final image could look something like this.

Your ads will be inserted here by

AdSense Now!.

Please go to the plugin admin page to paste your ad code.

Iphone Light Beams

Your ads will be inserted here by

AdSense Now!.

Please go to the plugin admin page to paste your ad code.

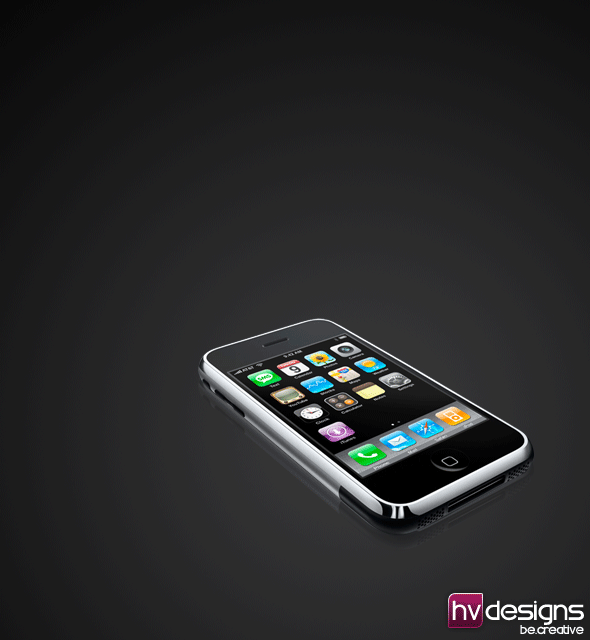
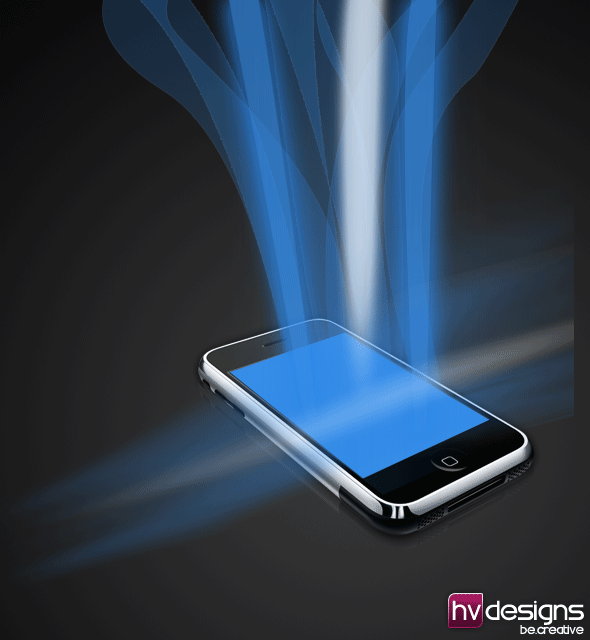
In this tutorial il show you how to create light beams coming from within an iphone. The inspiration behind this tutorial is from a wallpaper i found on devantart, you can view the wallpaper HERE.

Before i continue with the tutorial you will need this image of the iphone. GRAB IT HERE.

Create a new document 600×650 pixels OR however big you want the effect to be, i shall be using the pixels specified. Select the color #393939 as your forground and the color black for your background. Select the gradient tool, using a “radial” gradient drag it onto your canvas.

Open your iphone image in photoshop, using your favourite cutting tool, cut the phone from background and copy/paste onto your canvas.

(Ignore the slight difference in the gradient background its due to the image being saved as a .gif) Label your phone layer “iphone”. Layer labels are really important in this tutorial so i suggest you label all layers relating to the object on that layer. It can get very confusing at times. Duplicate your iphone layer and drag it underneath the orginal, label this “iphone reflection”. Move the object down using the arrow keys on the keyboard. Were looking for something like this.

See how i didnt actual flip the object but it still looks like a reflection. Set the reflection layer opacity to 50% then add a layer mask. Using the colors black as your forground and white as your background, select the gradient tool with a linear gradient. Drag from the bottom of the reflection layer half way up.

Once your happy with the result, right-click the reflection layer and goto apply mask. do the same as above but to the other side. Were looking for this result.

Duplicate the iphone layer once more then drag it between the orginal layer and the reflection layer. Label this layer iphone shadow. Were going to make an old school drop shadow. Move the drop shadow layer down a couple of times then add a “BLACK COLOR OVERLAY” to the layer. Goto “filter > blur > gussian blur” Blur by about 2 – 3 pixels. You should have something like this.

Now select the polygonal lasso tool or the pen tool and draw around the screen of the iphone.

Fill the selection on a new layer called iphone screen using the color #368de7.

Using the color #368de7, select the pen tool and create a big tenticle like shape, fill the shape with the color #368de7.

Your ads will be inserted here by

AdSense Now!.

Please go to the plugin admin page to paste your ad code.

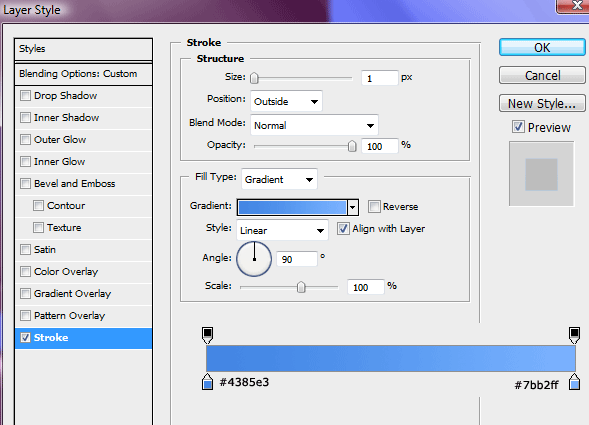
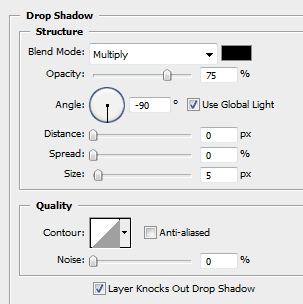
Set the layer opacity to 20% then add this stroke layer style to the shape.

You should have something like this.

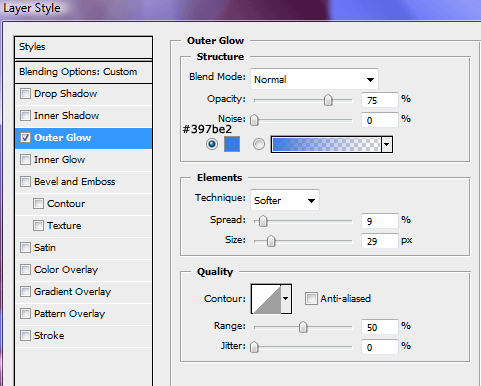
Repeat the process explained above, make as many tenticle shapes as you want all on there own layer, might be a good idea to place them in a group folder in your layers pallette, make them different widths and directions, change the opacity of some of the layers dont keep them all at 20%. I have a total of 9 layers. Once you have all your tenticle shapes, pick one ore two and add this layer style.

Heres how mine looks.

Duplicate one of your tenticles preferbly one of the thin ones. Fill it with the color white instead of blue. Goto “filter > blur > guassian blur” blur by 6.8pixels. Now add this layer style.

Add a layer mask to the white tenticle shape then drag a linear gradient over it from the bottom upwards. Finally set layer opacity to 80%. Were looking for this effect.

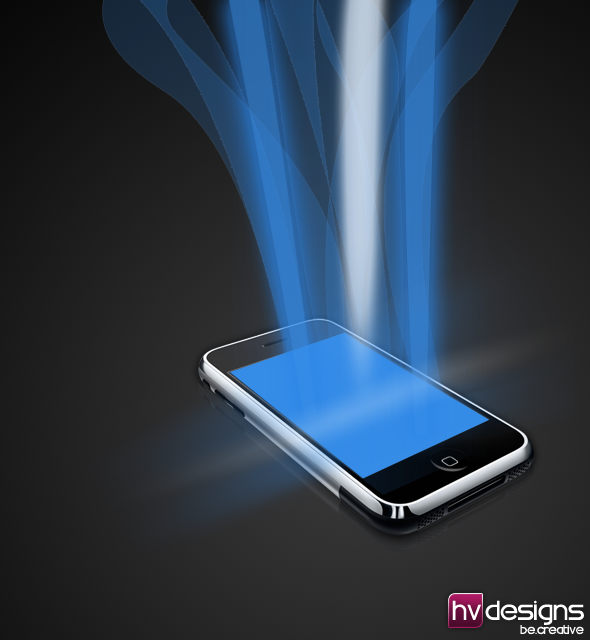
HIDE all your tenticle shape layers so your just left with this.

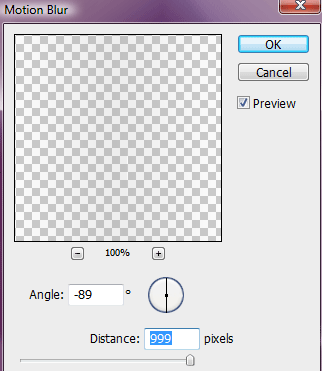
Duplicate the blue screen layer, then drag it right to the top of layers pallette so its above everything. Goto “filter > blur > motion blur” use the setting below.

Make a selection around the bottom half of the motion blur where it goes towards the bottom of the phone and delete it. You should have something like this.

UNHIDE all your tenticle shape layers, Select them all and duplicate them. Leave them selected in your layers pallette, right-click the little eye and goto “show/hide all other layers” ALL layers should be hidden apart from the duplicated tenticle shape layers. Goto “layer > merge visable” then unhide everything. Move the merged layer down and rotate it so it lies horizontally across the blue screen.

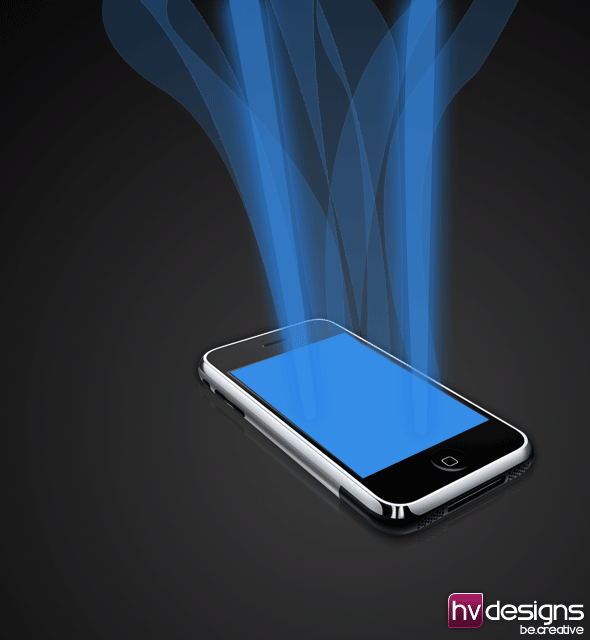
Set layer opacity to 50% then add a layer mask. Drag i reflected gradient from the middle outwards. Make sure you have the color white as your forground and black is your background. Once you have done that your end result should be something like below. Hope you enjoyed this tutorial.

Your ads will be inserted here by

AdSense Now!.

Please go to the plugin admin page to paste your ad code.

BLOOpress WordPress Mockup

Your ads will be inserted here by

AdSense Now!.

Please go to the plugin admin page to paste your ad code.

Good evening everybody, its that time again…… time to enduldge into some wordpress. In this tutorial we’ll be creating a wordpress theme called “BLOOpress”.

The tutorial will again be split in to parts like the last one was, only this series will be slightly longer and in-depth. Too keep track of thr whole series i strongly suggest taking 2 seconds and subscribe to our RSS feed or follow us on twitter as these two services will be notifyied within 2minutes of the parts being released. The first part of course will be mocking up our wordpress theme in photoshop. So go ahead and load up photoshop, create a new document 900 x 1115 pixels. Fill your background layer with the color #202020, for this next part your going need a diagonal lines pattern. Create a new document 25px x 25px with a transparent background, select the pencil tool with a 1pixel brush and duplicate the image below.

Step1

Once your done duplicating the pattern goto “edit > define pattern” then label the pattern appropriatly. Close the pattern document and head back over to your orginal document, select the rectanglular marquee tool and create a small rectangle spanning the width of your document, fill with any color then add these layer styles.

Step2

Step3

Step4

You should have something like this.

Step5

Using the rectangular marquee tool once again draw another rectangle over the top spanning the width of the canvas and only half the height of the 1st rectangle, fill with the color white.

Step6

Set the layer opacity of the white rectangle to 3%. Label your blue rectangle nav and the white rectangle nav shine. Click your blue rectangle layer (nav) whilst holding down the CTRL key, this should load a selection, create a new layer directly above it labelled nav pattern. Select the paint bucket tool then at the top change forground to pattern and select the pattern from the drop down box.

Step7

Once you’ve selected your pattern fill the empty layer with your pattern. Double click your pattern layer and add a white “color overlay” then set opacity to 2%.

Step8

Underneath your nav layer create a new layer labelled header, select the colors #323232 and #212121. Select the rectangular marquee tool and create a selection underneath your navigation.

Step9

Select the gradient tool with a reflected gradient, drag the gradient from the middel outwards towards either the left or right. Double click your header layer and add a 1 pixel stroke using the color #292929. You should have something like this.

Step10

On your blue rectangle at the top add a small navigation mainly for important links you dont want in the main navigation. Ontop of the header add the wordpress title and slogan, on the word BLOO in the wordpress title apply the same layer styles as the top nav, including the lines pattern and the shine. You should have something like this.

Step11

On the right side of the wordpress title and slogan add an example search field with a go button. Add the same layer styles as the top navigation to the go button including the lines pattern and the shine. Fill your search field with the color #262626 and add a 1 pixel stroke using the color #323232. You should have something like this.

Step12

Using the rectangular marquee tool again draw another rectangle underneath your header, this will be our 2nd navigation in which will hold the buttons for a wordpress pages.

Step13

Fill the selection with any color then add these layer styles.

Step14

Step15

Place the navigation right underneath the headers stroke so you get this bevelled look.

Your ads will be inserted here by

AdSense Now!.

Please go to the plugin admin page to paste your ad code.

Step16

Add the white half rectangle over your 2nd navigation just like we did with the top navigation, then add some dummy navigation text. You should have something like this.

Step17

Using the rectangular marquee tool create a rectangle 600 px wide and about 230 px high, fill the rectangle with any color then place it underneath your 2nd navigation. Add these layer styles to your rectangle.

Step18

Step19

You should have something like this.

Step20

At the bottom of the rectangle,add another rectangle the same width, apply the same layer styles as your very 1st blue navigation that we create at the start of the tutorial. Also add the lines pattern and the half white rectangle shine.

Step21

The image above will be the basis of our wordpress posts that will be displayed on the mainpage of our theme. All’s we need to do now is add some dummy post text. We’l start with a blue title with white text at the bottom underneath it. We’ll also add some post meta data in the blue rectangle at the botom. Leave a space in the main area for your thumbnail.

Step22

Too spice up our thumbnails abit we’ll be adding a nice border to them, to do this 1st create a square using the rectangular marquee tool. Fill with any color then add these layer styles.

Step23

Step24

Open up your desired example thumbnail, copy and paste it to your wordpress mockup, Make sure your thumbnail is about 6 pixels smaller all the way around than your thumbnail background image, you dont really need to get it that spot on at this stage as it will be done in CSS once we code it. You should have something like this

Step25

Duplicate your post and post content and place them underneath one another to simulate a wordpress theme. Underneath the last post add two buttons, for next post and previous post. Use the rounded rectangle tool with a radius of 10px for the buttons, then copy and paste the layer styles from your top navigation.

Step26

While were at the bottom of our canvas lets quickly add our footer. Duplicate your top navigation (the blue one), duplicate the pattern and the shine then drag them to the bottom of your canvas. Add your desired footer dummy text.

Step27

Now for the sidebar, on my last hv-designs wordpress theme i had a pink box in the sidebar with all my RSS feeds and follow me on twitter stuff. Were also going to be incorporating that into this wordpress theme. Select the rectanglular marquee tool or the rectangle tool and simply create a box in the sidebar area. Again copy and paste the layer styles from the blue navigation at the top.

Step28

Were now going to lighten up the box abit, select the elliptical marquee tool, draw out a fairly big ellipse. Fill the ellipse with the color white, then goto “filter > blur > gussian blur”. Blur by around 48pixels. Place the cirlce over the top half of the blue rectangle. Click your blue rectangle layer whilst holding down the CTRL key, this should load a selection. Click your white circle layer and goto “select > inverse” then hit the delete key.

Step29

Simply set your white circle layers blending mode to overlay. Now add your box title and an icon for each item, RSS, twitter and e-mail. Im using the the icons from the free icon pack from wefunction.

Step30

I then finished off my sidebar by adding a few of hv-designs sponsors. I didnt add to much into the sidebar as we’ll be doing that when we code it into wordpress. Your finish mockup should look like this.

Final Mockup

Thats it all done, you’ve completed part one of this series. Like i say after all my tutorials, dont forget to subscribe via RSS and twitter.

Your ads will be inserted here by

AdSense Now!.

Please go to the plugin admin page to paste your ad code.

Xampp & WordPress

Your ads will be inserted here by

AdSense Now!.

Please go to the plugin admin page to paste your ad code.

Good evening everybody today il be doing a quick tutorial on install wordpress to use with XAMPP.


New Screencast

Written Tutorial

When developing websites or wordpress themes i always use xampp as it makes life so much easier. Basically the program allows you to use your computer as a server, saving you time & bandwith uploading to servers online. Firstly your going to need xampp and a fresh copy of wordpress, you can get wordpress from wordpress.org and xampp from apachefriends.org. Once you’ve downloaded both, extract wordpress to a folder on your desktop and install xampp. After xampp has installed open up your hard drive and locate the xampp folder, inside the xampp folder there should be a folder called “htdocs”.

Step1

The “htdocs” folder is where you’ll place your wordpress installation, website ,script etc… Copy your wordpress folder into the htdocs folder make sure the wordpress folder aint a wordpress folder within a wordpress folder. The contents of the wordpress folder should be on the next level. Open your wordpress folder and rename the file “wp-config-sample.php” to “wp-config.php”. Open the “wp-config.php” file you should be greeted with some PHP, the only chunk of code you need to edit are listed on the image below.

Your ads will be inserted here by

AdSense Now!.

Please go to the plugin admin page to paste your ad code.

Step2

You need to enter a database name, username and password. Make sure you remember them, save your file then start up xampp, when you load xampp you’ll be greeted with a box like this.

Step3

The only two functions you need running are the first two. “apache & mysql”, press start on the two services. Your computer is now running as a server using the “htdocs” folder as your main server directory. Open your web browser and type “http://localhost”.

Step4

You should get a big orange website come up called xampp, in the sidebar under tools click “phpmyadmin”. In phpmyadmin you need to create a new database, the database has to be the same as what ever you put in your wordpress config file.

Step5

Once the database has been created click the privilages tab and create a new user. Make sure the username and password are the same as your wordpress config file. Point your browser to “http://localhost/wordpress” you should get the wordpress installation page, enter your blog title and e-mail address. Take note of the username and password that comes up on the next screen its wise to change the password to something more rememberable. Your wordpress installation is complete. You can now start adding your themes into the normal theme directory as you would if you were on a server online. You can also look at any offline webpages you might have, just create a folder called “what ever” inside the “htdocs” folder, place your index.html file inside the “what ever” folder. Point your browser to “http://localhost/what ever folder/index.html.

Many thanks for reading, dont forget to subscribe via rss and twitter, your support is much appreciated. See you soon.

Your ads will be inserted here by

AdSense Now!.

Please go to the plugin admin page to paste your ad code.

Gaming Layout #4

Your ads will be inserted here by

AdSense Now!.

Please go to the plugin admin page to paste your ad code.

Learn how to create stylish web2.0 style gaming layout from scratch using photoshop CS3.

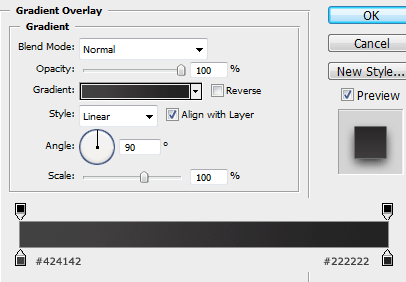
Create a new document 850 x 850 pixels, fill your background layer with the color #27252a. Select the rectangular marquee tool and create a rectangle the width of your canvas and about 120pixels in height. Fill with any color then add this gradient overlay.

You should have something like this.

Next select the rounded rectangle tool and create a rectangle, dont make it the whole width of the canvas, leave about 30-40 pixels either side. Also chop off tjhe bottom half so the bottom half the rectangle isnt rounded. The rectangle itself need to align perfectly with the bottom of the 1st rectangle we created.

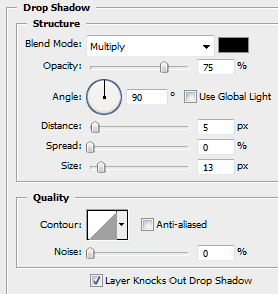
Add these layer styles to your rounded rectangle to match mine above.

Add your website title, logo and slogan to your header part of the website, the logo ive used is a shape from adobe’s custom shape libary. To the far right of the header add a simple search field with a search button.

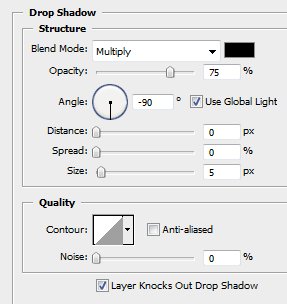
On the header text add this drop shadow.

Select the rectangular marquee tool again and create a thinner rectangle underneath the 1st rectangle we created, also make sure the layer is underneath all other layers apart from background layer obviously.

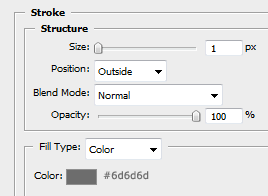
Add these layer styles to complete the effect.

You image should now match mine. On a layer above the one you just created create another rectangle using the rectangular marquee tool, make it the same width as the header, and same height as the rectangle we just created.

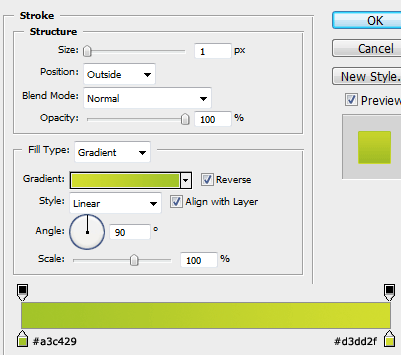
Add these layer styles to complete the effect.

Add your navigation items to your nav bar, then add a divider between each item. The divider is made with two 1pixel lines next to each other.

Now were to create our content boxes, the first one we’l create will be a featured box where there will be a featured game. Select the rectangular marquee tool, on a new layer create a big rectangle underneath everything eles.

Your ads will be inserted here by

AdSense Now!.

Please go to the plugin admin page to paste your ad code.

Add these layer styles to your content box.

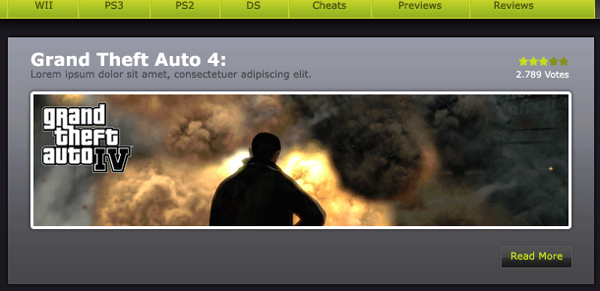
Add your featured game, im going to be using GTA4. Add these layer styles to your featured image.

Crop your image to fit inside your box, also add your game header and some descriptive text. Ive also added a readmore button and a star rating system.

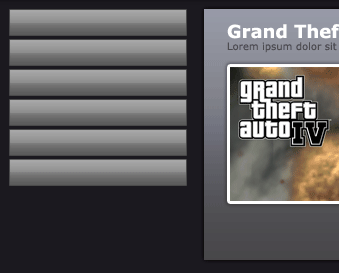
On the left side of the featured box create 6 smaller rectangles, these will be our side bar menu buttons.

Use these layer styles for your menu buttons.

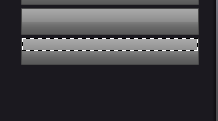
Once you’ve added your layer styles make them glossy by adding a smaller white rectangle over the top with an opacity of 12%.

Using a little arrow shape from adobe’s custom shapes libary, add the arrow to the menu buttons also add your menu text. The color of the arrows is #cee01f.

You should have something like this.

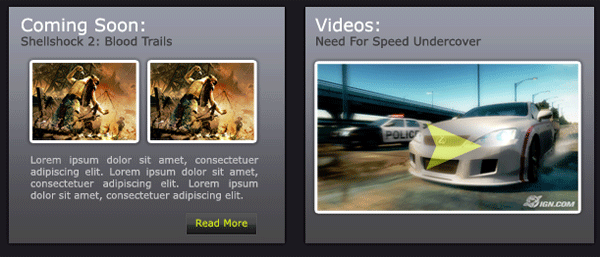
Using the rectangular marquee tool create three more boxes (shown in green), add the same layer styles as your featured box.

Label them using the type tool. The two boxes underneath your featured box are going to display videos and upcoming releases. Add your content to these two boxes.

The little box that we created on the left under our menu items will be our news and articles. Create a box with the color #19171c underneath the box you previously created. Add this drop shadow.

Then add your news and articles.

Using the same tecniques and layer styles mentioned above, complete the layout with two more boxes, a login box and your footer.

You should have something like this.

Your ads will be inserted here by

AdSense Now!.

Please go to the plugin admin page to paste your ad code.

Article Submission

Your ads will be inserted here by

AdSense Now!.

Please go to the plugin admin page to paste your ad code.

Your ads will be inserted here by

AdSense Now!.

Please go to the plugin admin page to paste your ad code.

Your ads will be inserted here by

AdSense Now!.

Please go to the plugin admin page to paste your ad code.

category-articles-page-3-

Your ads will be inserted here by

AdSense Now!.

Please go to the plugin admin page to paste your ad code.

Your ads will be inserted here by

AdSense Now!.

Please go to the plugin admin page to paste your ad code.

Your ads will be inserted here by

AdSense Now!.

Please go to the plugin admin page to paste your ad code.

HV-Designs Layouts VOTING (ended)

Your ads will be inserted here by

AdSense Now!.

Please go to the plugin admin page to paste your ad code.

The voting is now open…

Your ads will be inserted here by

AdSense Now!.

Please go to the plugin admin page to paste your ad code.

On APRIL 6th i asked everyone to to submit the web layout they wanted to see coded as a 5 page template. (view the post here)

The submissions have been collected and counted. TWO layouts were submitted the most, and have equal amount of submissions. You can now vote for either one of the layouts using the poll in the SIDEBAR.

VOTING ENDS 24th April

Your ads will be inserted here by

AdSense Now!.

Please go to the plugin admin page to paste your ad code.

3D Photo Tutorial

Your ads will be inserted here by

AdSense Now!.

Please go to the plugin admin page to paste your ad code.


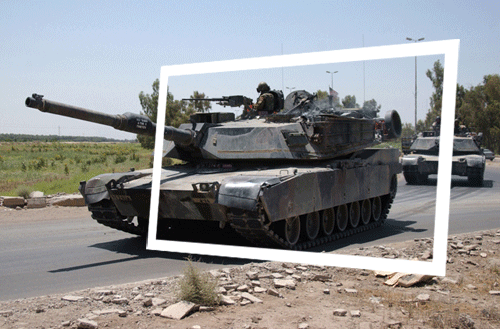
Open up a photo in photoshop, make a new layer, then select the “rectangular marquee tool” and draw a rectangle over your photo fill it with the color white, with the rectangle still selected goto “select > modify > contract” and contract by 15-20 pixels, then hit the delete key. Goto “edit > transform > perspective” transform the photo frame like the image below.

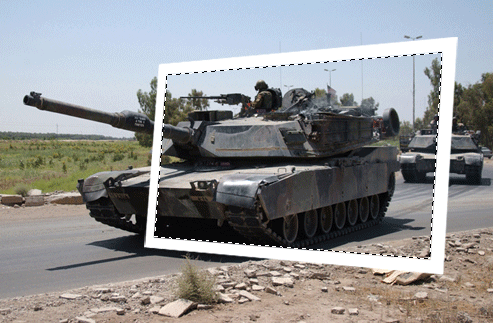
Select the “magic wand tool” and select the inner part of the photo frame.

Select your background layer while it is selected then press “ctrl + c” then “ctrl + v”. Hide your background layer ensuring your photo frame layer is ontop of the of the bit you just copied and pasted. You should have something like this.

Your ads will be inserted here by

AdSense Now!.

Please go to the plugin admin page to paste your ad code.

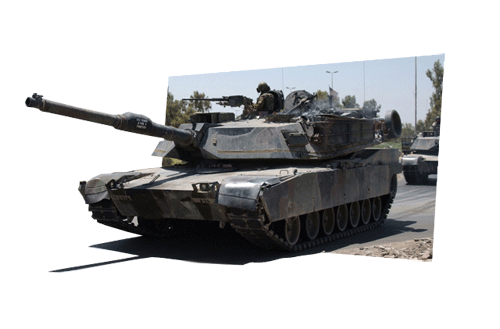
Set your opacity on your photo frame layer to 50% to make it easier to do the next step. Unhide your background layer and cut out the other half of the image that will be jumping out of the picture. ive also cut out the shadow to save me making my own.

Once selected goto “select > inverse” and hit the delete key. Now move this layer ontop of your photo frame. layer you should have something like this.

Now its just a case of creating a new background to finish the image. Heres mine

Your ads will be inserted here by

AdSense Now!.

Please go to the plugin admin page to paste your ad code.

Gaming Layout #2

Your ads will be inserted here by

AdSense Now!.

Please go to the plugin admin page to paste your ad code.

Create a new document 900×1000 pixels with a black background. Head over to your favourite stock images site and grab yourself a picture of the earth, drag your picture onto your canvas.

Lets make our image more lighter, duplicate your photo and set layer blending mode to screen.

For this next part your going to need some “tech” brushes. Carefully add your tech brushes around your earth image, dont over do it though.

Once you’ve done that select the rectangular marquee tool and add a rectangle at the top of your canvas fill with the color #cfd0d2. Add these layer styles.

Set the opacity of the rectangle to 90%, you should have something similar to this.

With the rounded rectangle tool add 2 buttons. Add these layer styles to your buttons.

Your ads will be inserted here by

AdSense Now!.

Please go to the plugin admin page to paste your ad code.

Now add some text to your buttons.

Select the rectangular marquee tool and make a selection on the left for your sidebar, fill with the color white, then set layer opacity to 15%. Finally add a layer mask then drag a linear gradient over the bottom of the rectangle.

Control click on your rectangle to load a selection, click your one of your earth image layers then goto “filter > blur > guassian blur” blur by about 3 pixels. Do the same again for the other earth layer. You should have something similar to this.

Now begin to add some sidebar content. Also add your website logo and title.

Select the rounded rectangle tool and create a white content area next to the sidebar.

Now add your main content in the white box.

Finally add your footer.

Layout inspired by “fee3r

Your ads will be inserted here by

AdSense Now!.

Please go to the plugin admin page to paste your ad code.

p-2502

Your ads will be inserted here by

AdSense Now!.

Please go to the plugin admin page to paste your ad code.

Hi there! Most recipe sites tend to be unique in their set up. Like other user-submitted content sites, they thrive on the right content management system. Unlike most other user-submitted content sites, visitors to these sites aren’t often treated to personal insights about the recipes they seek. Personality and individuality are portrayed solely through the recipes themselves along with the pictures that accompany them. This site is designed to complement the recipes and let them shine through in all their glory.

What We’ll Be Creating

Click image for full view.

Resources Used In This Tutorial

Lets Get Started

To begin, I set my background color to #E0C3B1 and then created a new file in Photoshop:
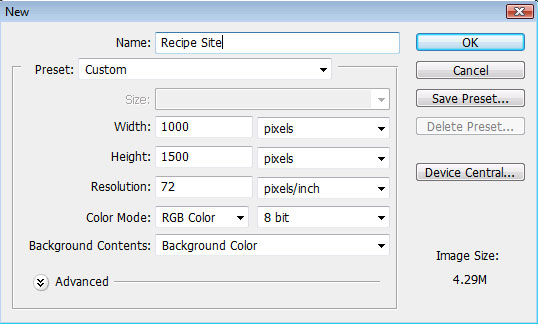
step1-create-new-document

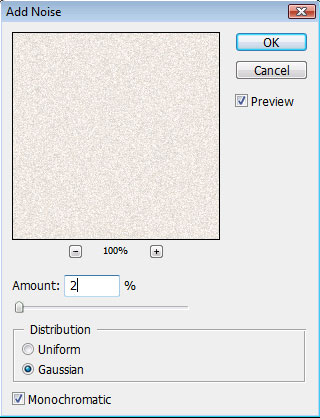
Then I added some noise to give the background a little bit of a grainy look:

step2-add-noise

step3-noise-settings

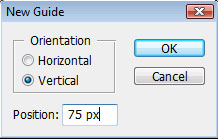
My next step was to set vertical guides to make sure that the layout stayed within the right margins:
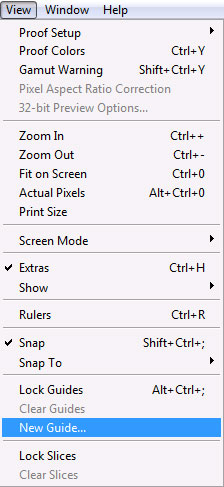
step4-new-guides

step5-first-guide

step6-second-guide

With the guides set, you should see something like this:
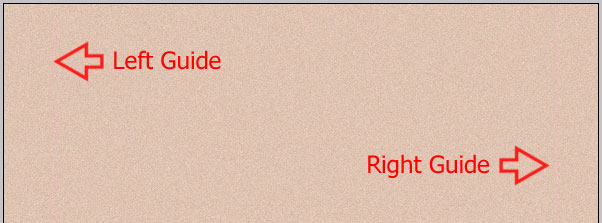
step7-view-of-guides

Next, I used the Rectangle Tool to create the shapes for the Navigation bar and the banner:
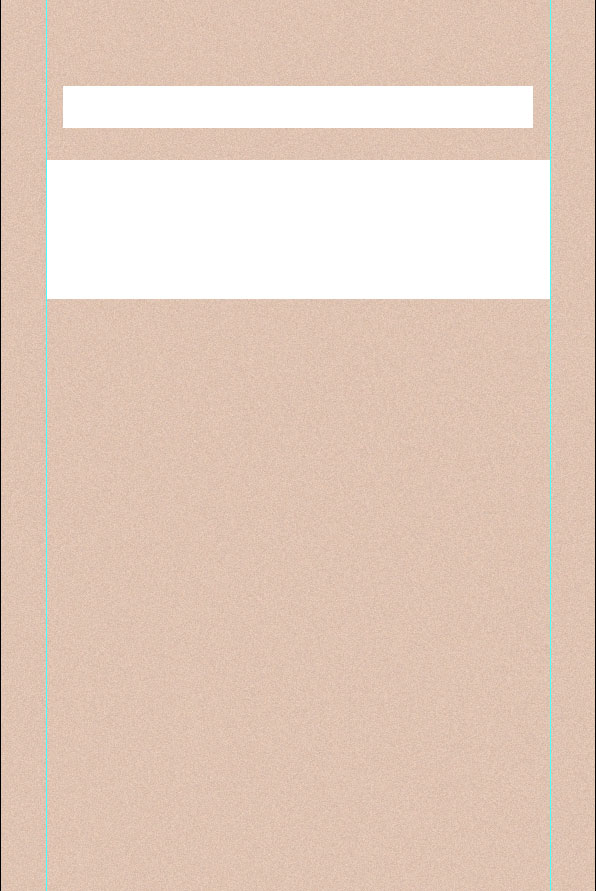
step8-create-shapes

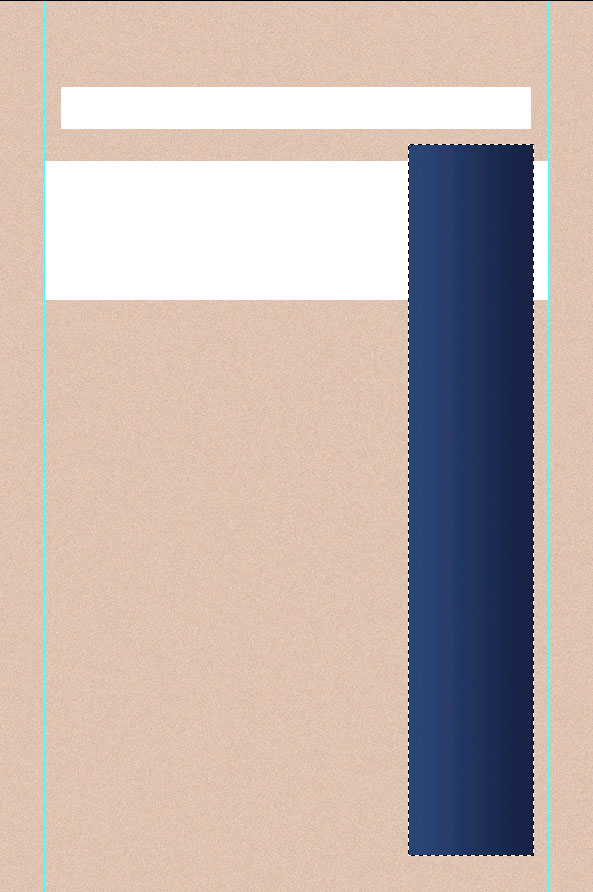
I created these first so I had a good reference for placing my ribbon – which also serves as the right sidebar. Now I started with the ribbon. On a new layer, I used the Rectangular Marque tool to make a long selection:
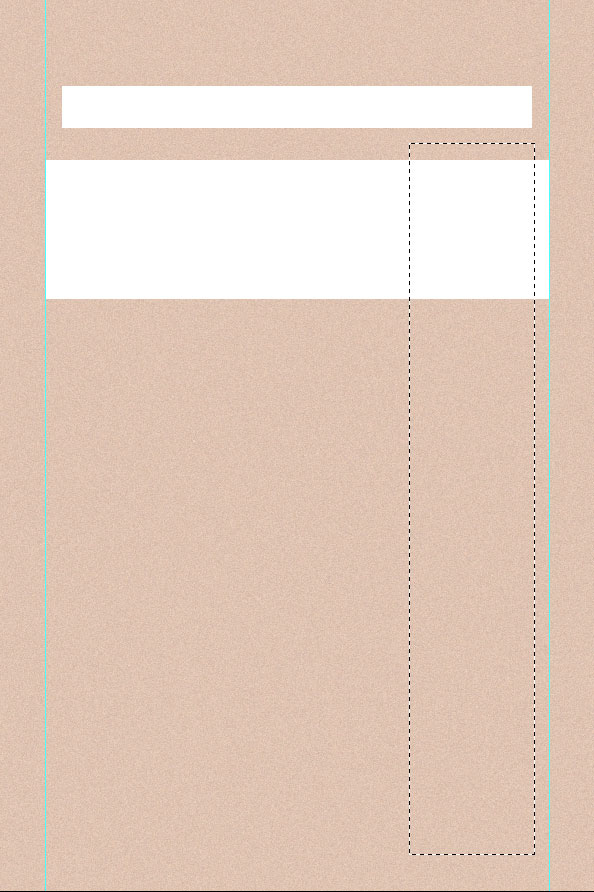
step9-select-area-for-ribbon

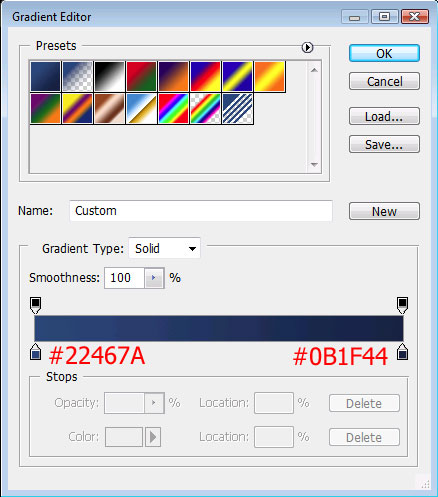
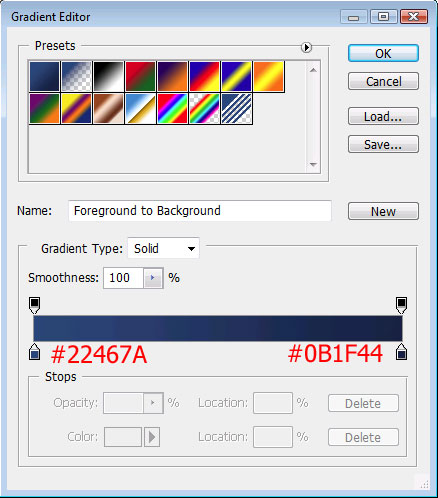
Then I set my foreground color to #22467A and my background color to #0B1F44. Using the Gradient Tool, I filled in my selection:

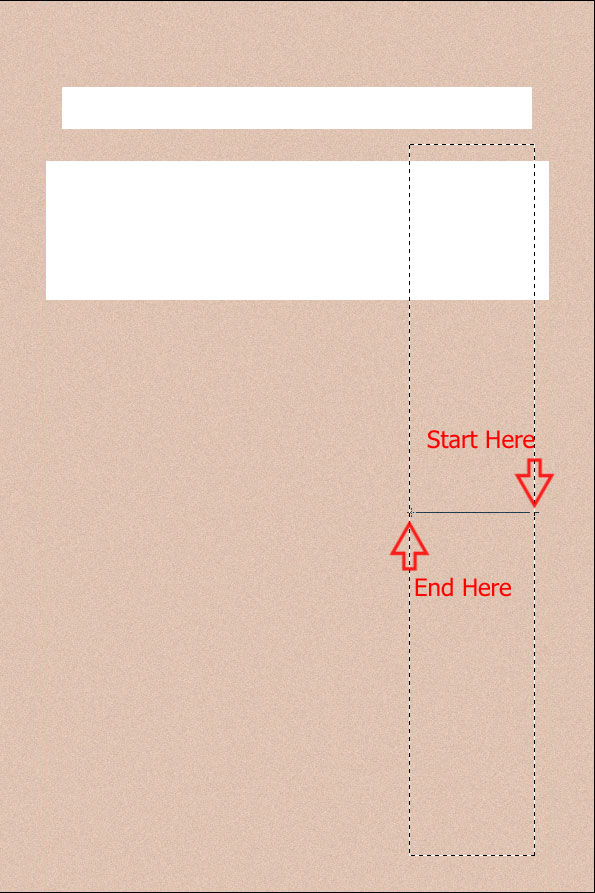
step10-gradient-settings

step11-apply-gradient

step12-finished-gradient

Next, I cleared my selection (CTRL D) and used the Polygonal Lasso Tool to select a new area at the bottom of my ribbon:
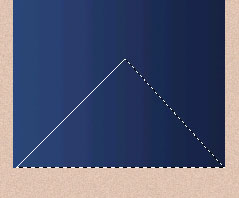
step13-select-triangle

And then deleted the selected area by pressing the delete key on my keyboard:
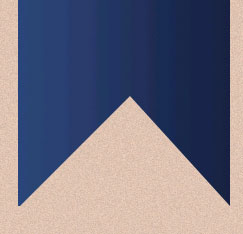
step14-delete-selection

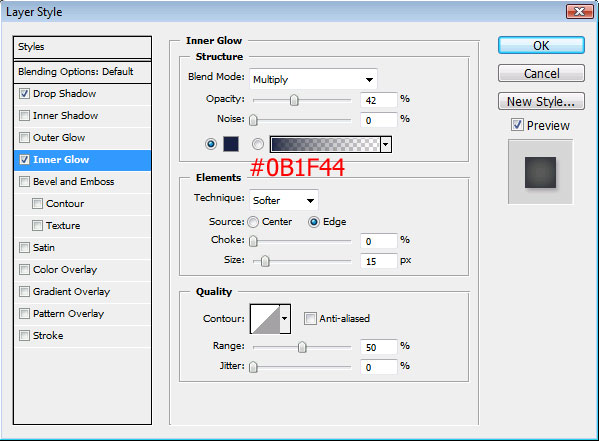
Next, I applied these layer styles to the ribbon:
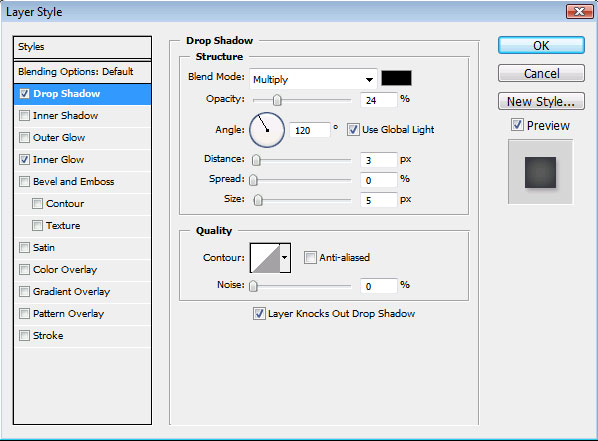
step15-ribbon-drop-shadow

step16-ribbon-inner-glow

For a little more added depth, I used the Burn Tool:
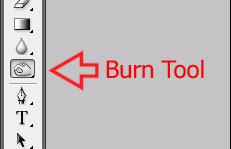
step17-burn-tool

step18-burn-tool-settings

And brushed on just a few lowlights:

step19-brush-on-burn

Then I switched over to the Color Dodge Tool:

step20-color-dodge-settings

And filled in some highlights:

step21-brush-on-color-dodge

Next, I created a new layer over my ribbon and set my foreground color to white and my background color to black. Then I rendered some clouds by going to Filter > Render > Clouds:
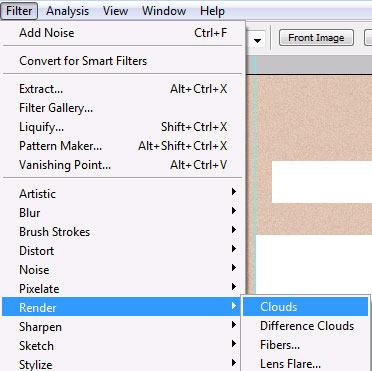
step22-render-clouds

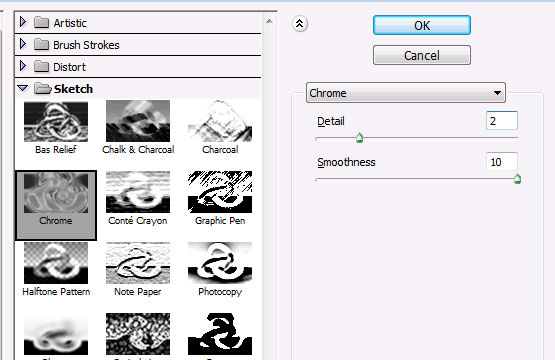
Once the clouds covered my layout, I applied the chrome effect:
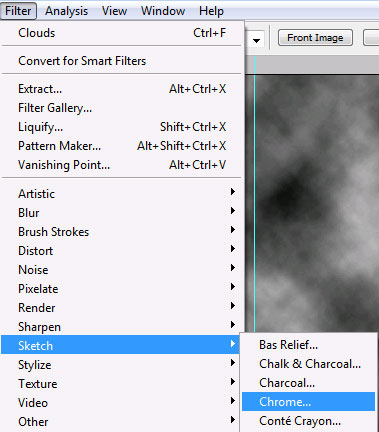
step23-chrome-clouds

step24-chrome-settings

With the clouds layer still selected in my layer palate, I selected my ribbon’s pixels by holding down the CTRL key and left-clicking on the ribbon’s thumbnail:

step25-select-ribbon-area

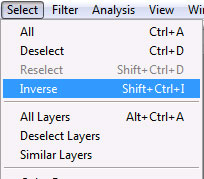
Then I inverted this selection:

step26-inverse-selection

And hit the delete key on my keyboard so that my chromed clouds only cover my ribbon at this point:
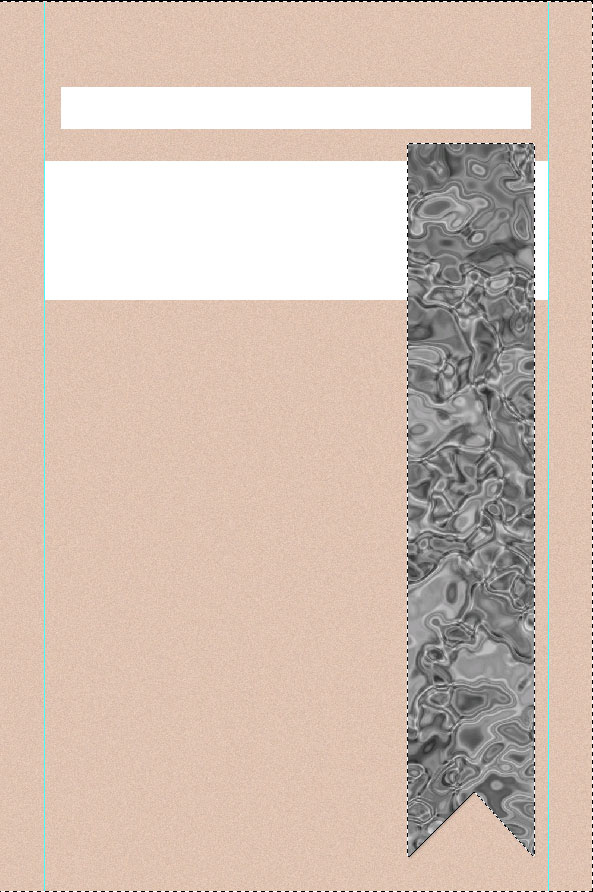
step27-delete-selection

Then I set the blending options for this layer:

step28-clouds-blending-options

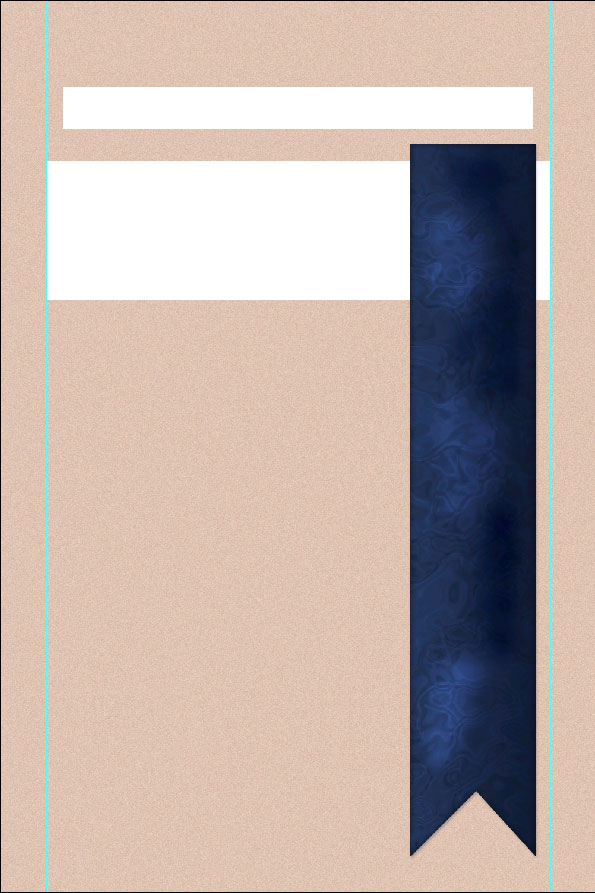
Here is how my ribbon looks so far:

step29-ribbon-so-far

Now that the ribbon is almost complete, we’re going to warp it to add a slight wave:
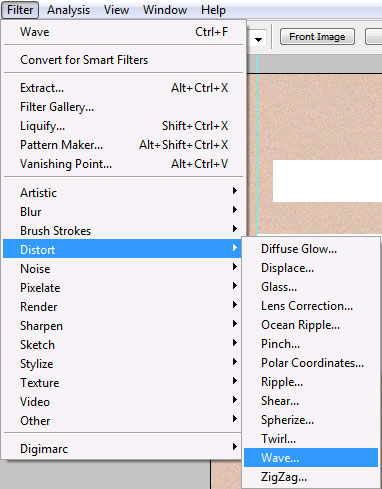
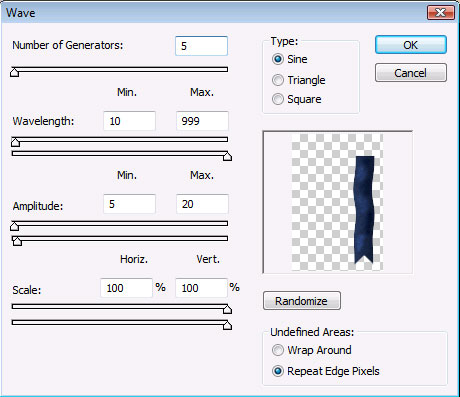
step30-filter-wave

step31-wave-settings

Take a moment to use the Move Tool to re-position the ribbon into a good spot, since the wave will seem to adjust the margins a bit. Then use the Polygonal Lasso Tool to make a small selection at the top left corner of the ribbon:

step32-select-top-corner

Once I made my selection, I hit the delete key on my keyboard to get rid of it. Then, I moved onto the top right corner. Again, using the Polygonal Lasso Tool, I made a small rectangular selection:
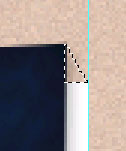
step33-select-top-right

This selection I filled in with black, leaving the top of my ribbon looking like this:
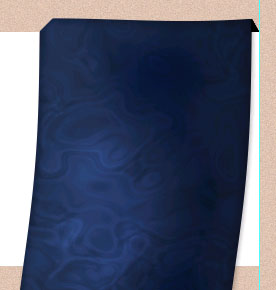
step34-finished-ribbon-top

Finally, I added a drop shadow to my finished ribbon:
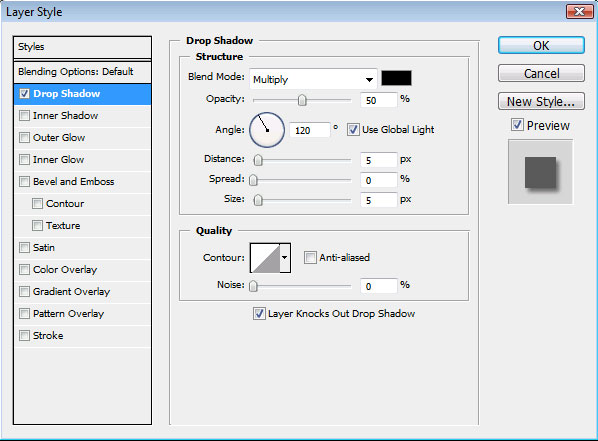
step35-ribbon-drop-shadow

Here is how my layout looks so far with my completed ribbon:
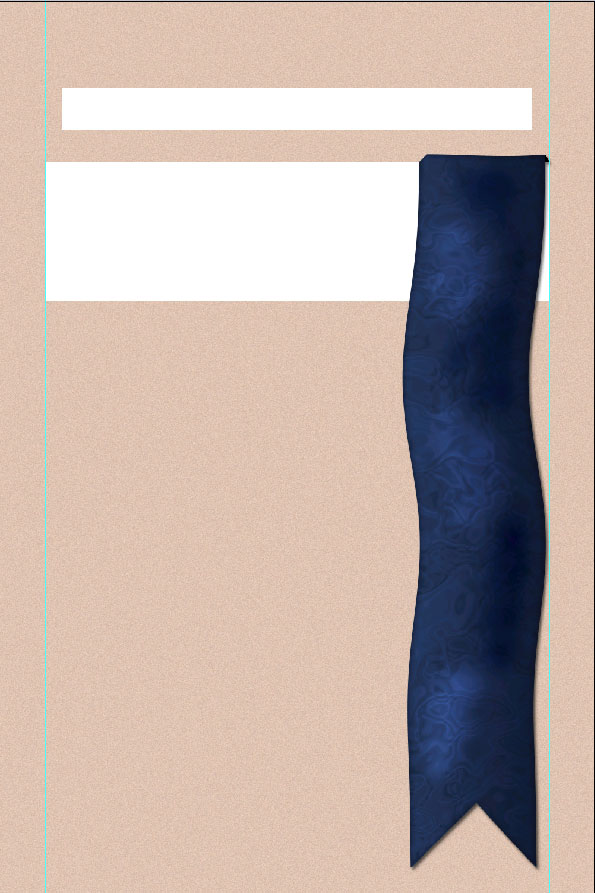
step36-layout-so-far

Now that the ribbon is complete, I can start adding in the other elements around it. This is a little backwards for me, since I usually like to start at the top of a layout and then work my way down. But because the ribbon on this site helps to serve as such a focal point and because of the wave effect, I wanted to make sure that it was set up first so I could fit everything else around it. So, back to the top for the login and register links. First, I used color #0B1F44 and the Rectangle Tool to create this shape along the top of my layout:

step37-login-bar-shape

Next, I switched to the Ellipse Tool and created this shape:

step38-ellipse-shape

Then I used the Move Tool to place the Ellipse exactly where I wanted it to line up with the bar and merged the two layers together:

step39-merge-login-bar-shapes

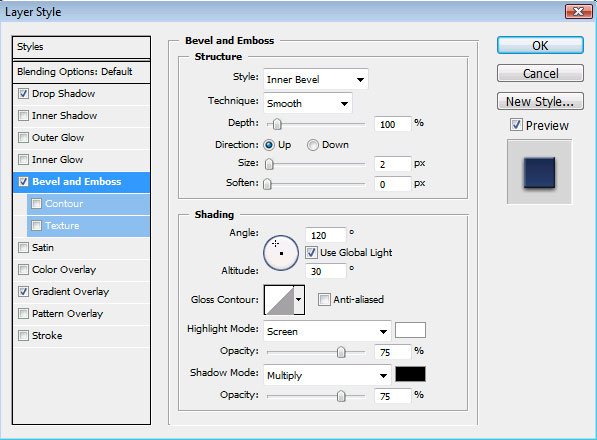
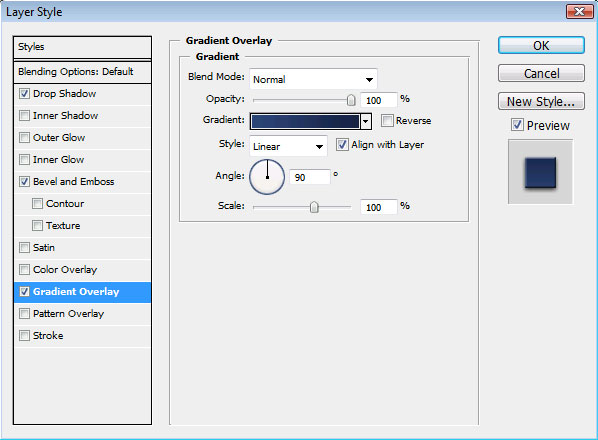
Finally, I applied these layer styles to my login bar:
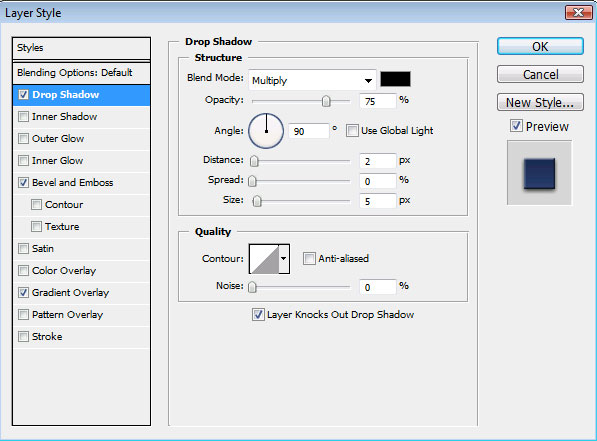
step40-login-bar-drop-shadow

step41-login-bar-bevel

step42-login-bar-gradient

step43-login-bar-gradient-settings

Once my layer styles were applied, I used the Type Tool with color # E0C3B1 and Tahoma Font to fill in my login links and then applied this drop shadow to those links:
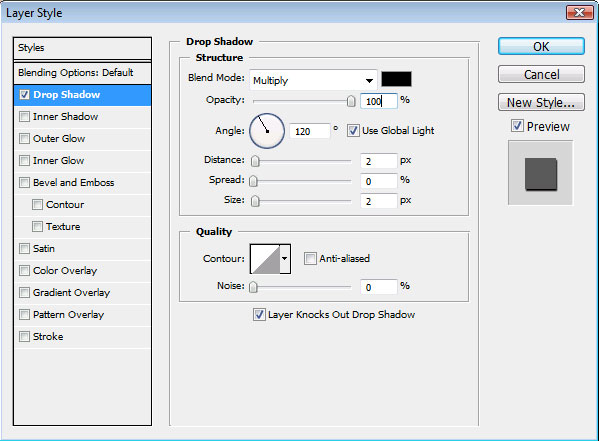
step44-login-links-drop-shadow

Your ads will be inserted here by

AdSense Now!.

Please go to the plugin admin page to paste your ad code.

Here is how my login bar looks once it’s finished:

step45-finished-login-bar

Next, I used Cooper Black Font to type in my Site Name:

step46-site-name

Now, I’ve actually typed the site name using two different layers:
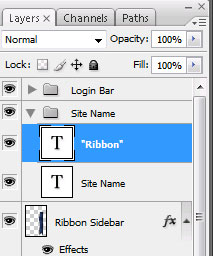
step47-site-name-layers

So you’ll need to be careful to space the words “Blue” and “Recipes” correctly to fit in “Ribbon” on the new layer. It may help to use your grid to line up the words exactly.

Next, I applied the same gradient as I used on the ribbon before to the word “Ribbon”:
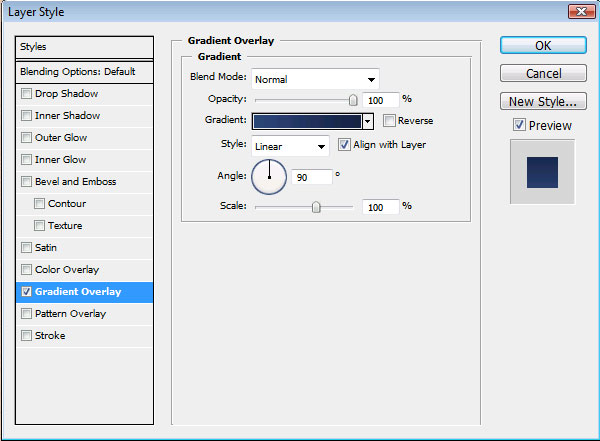
step48-word-ribbon-gradient

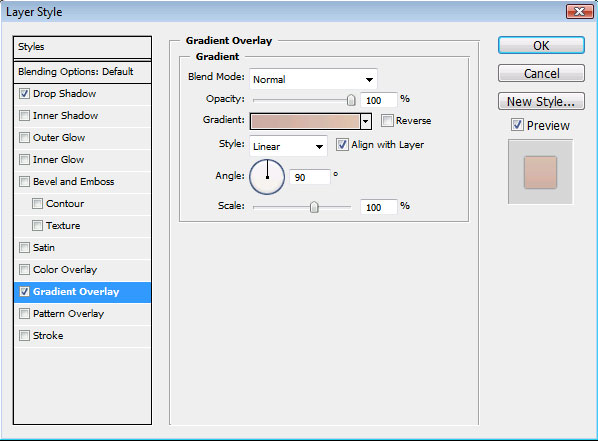
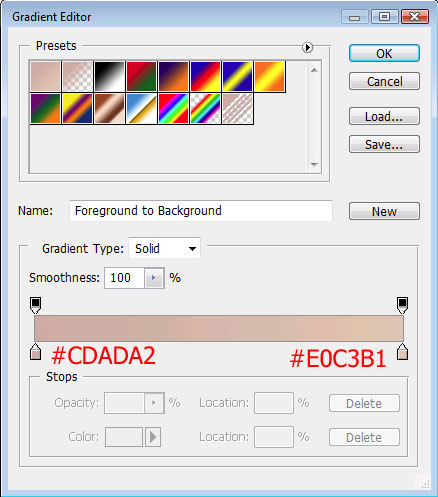
step49-word-ribbon-gradient-settings

I then created a new layer and, using black and white, rendered clouds, chromed them, and clipped them down to the word ribbon:

step50-word-ribbon-chromed-clouded

And set the chromy clouds to “Soft Light”:
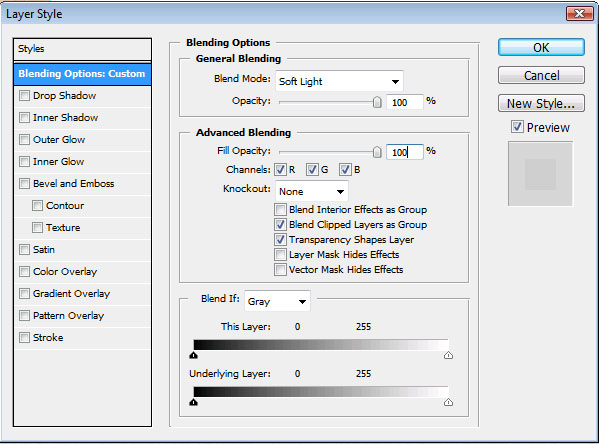
step51-ribbon-soft-light

Next, take some time to use the move tool and make sure that the words in the site name are exactly positioned just the way you want, then merge those layers together and apply these layer styles:
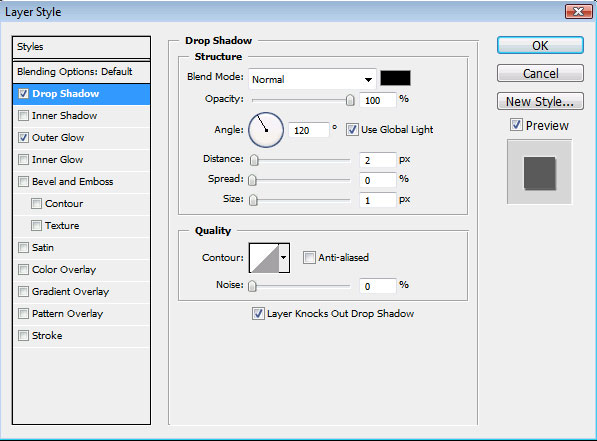
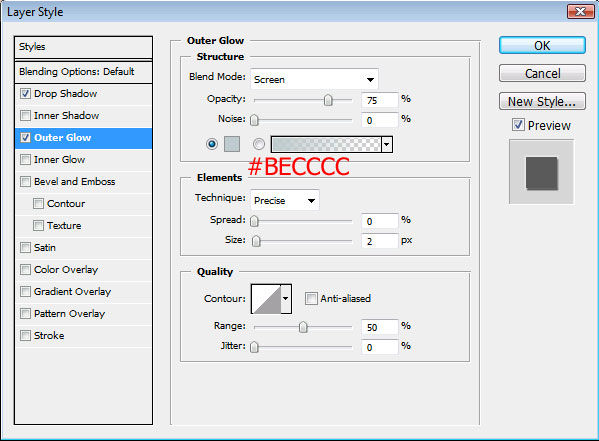
step52-site-name-drop-shadow

step53-site-name-outer-glow

Here is how my site name turned out:

step54-finished-site-name

Onto the Navigation Bar. First, I applied these layer styles to my navigation bar:
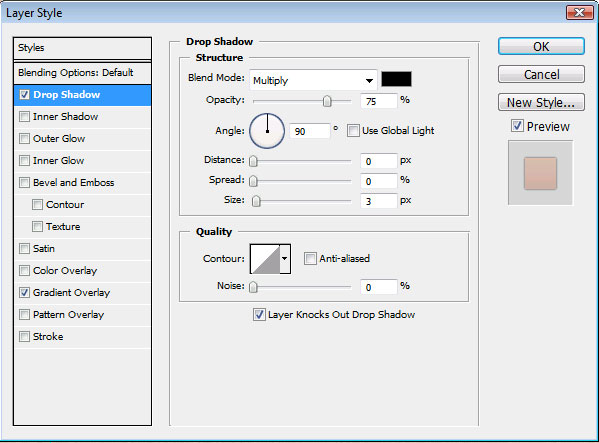
step55-navigation-drop-shadow

step56-navigation-gradient

step57-navigation-gradient-settings

I then used Tahoma Font with color #0B1F44 and filled in the primary links with my Type Tool. Once those were filled in, I applied these layer styles to my links:
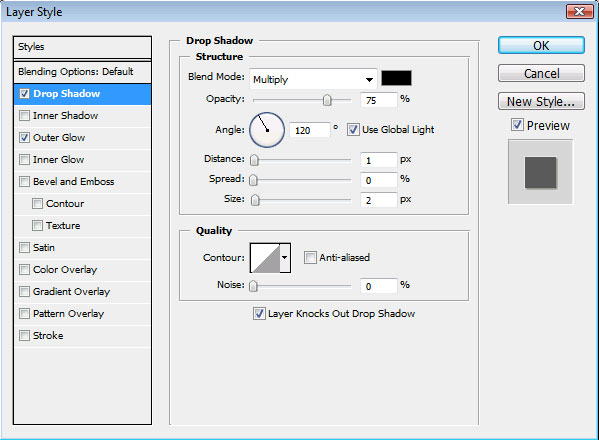
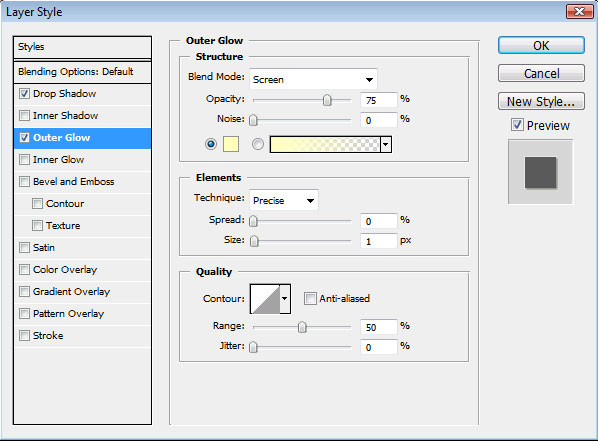
step58-links-drop-shadow

step59-links-outer-glow

For the separators, I found a silverware icon at iconspedia and downloaded the 32 pixel size; then I placed one between each link. Here is my completed navigation:

step60-completed-navigation

Moving onto the banner, I copied the layer styles from the Navigation bar and pasted the same layer styles to the banner shape, giving me something that looks like this:
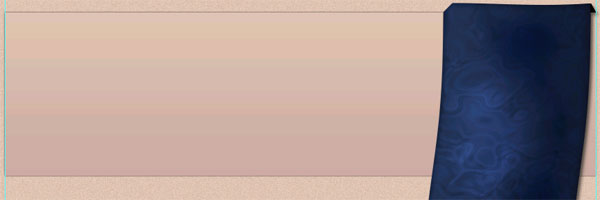
step61-banner-area-with-styles

For the featured recipe picture, I used a photo of one of my all-time favorite recipes, Cinnamon Raisin Pull-Apart Muffins from Annie’s Eats. I’ve made this recipe dozens of times, and my husband has as well – they never last long in our house. Anyway – must concentrate… I sized the photo and set it into my banner:
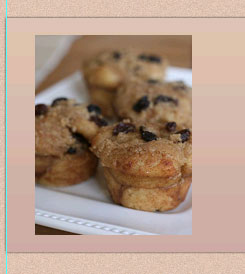
step62-add-recipe-photo

Then I used Tahoma Font with color #0B1F44 to type in the title of the banner area. I applied the same layer styles to this title as I had to the links in the navigation bar:

step63-added-title-to-banner

Using the line tool set to 3 pixels wide, I created this shape beneath the banner title:

step64-add-line-shape

Then I rasterized the line layer and chose “Hide All” for the layer masks:
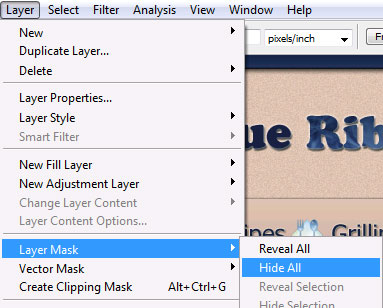
step65-hide-layer-mask

Once you hide the layer mask, you should see the line disappear from your layout and in your layer palate you’ll see a new layer mask thumbnail linked to your title bar:
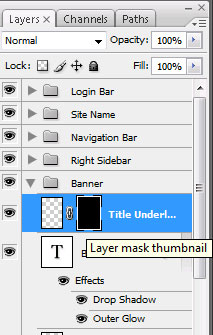
step66-view-of-layer-mask

Make sure you click on the Layer mask thumbnail and then choose the gradient tool set to the default settings for black and white. Then drag your mouse across to apply a faded effect for the line:

step67-apply-gradient

This makes the line fade out nicely:

step68-finished-faded-line

I continued to fill in more information using the type tool with color #0B1F44 and the Tahoma font. For the star ratings, I used the Polygon Tool set to create a five-point star with no fill and 1 pixel stroke:
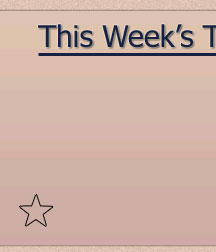
step69-star-shape

I then duplicated this layer 4 times, giving me 5 stars all together and applied this gradient to each star:
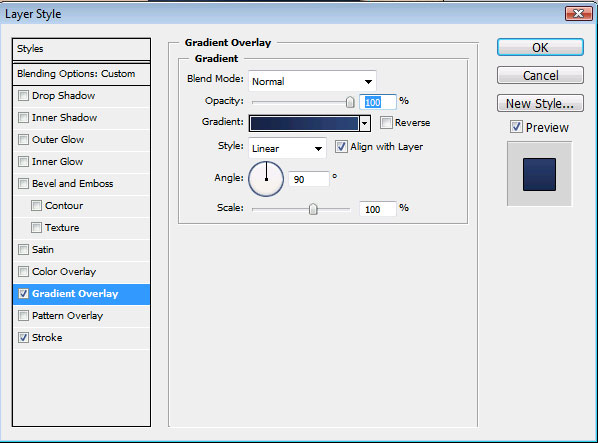
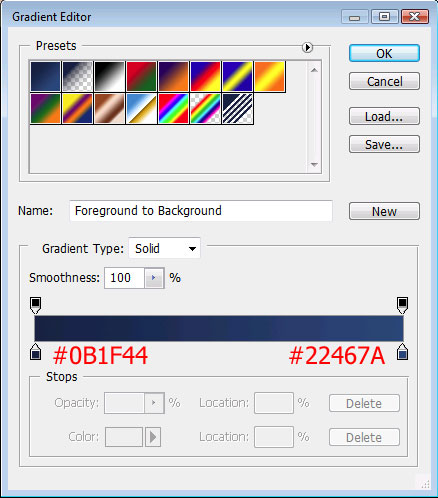
step70-stars-gradient

step71-stars-gradient-settings

For the caption on the photo, I added these layer styles to the text:
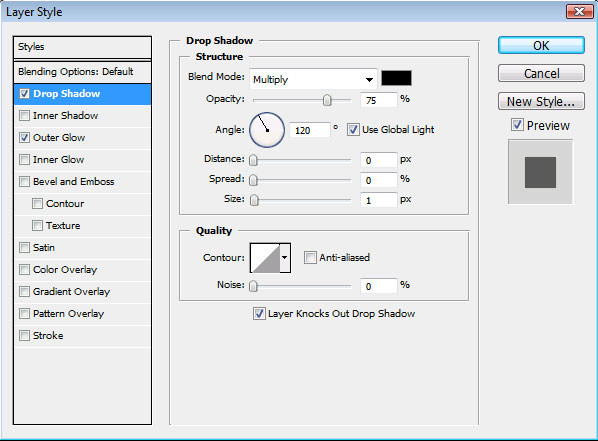
step72-photo-caption-drop-shadow

step73-photo-caption-outer-glow

I also duplicated the line that we placed under the banner title and used it as a separator between the recipe teaser and the star ratings. Finally, here is how my completed banner area looks:

step74-finished-banner-area

For the left sidebar, I used the Rectangular Marquee tool to select an area about the size of the ribbon (at least the ribbon’s width before we applied the wave):
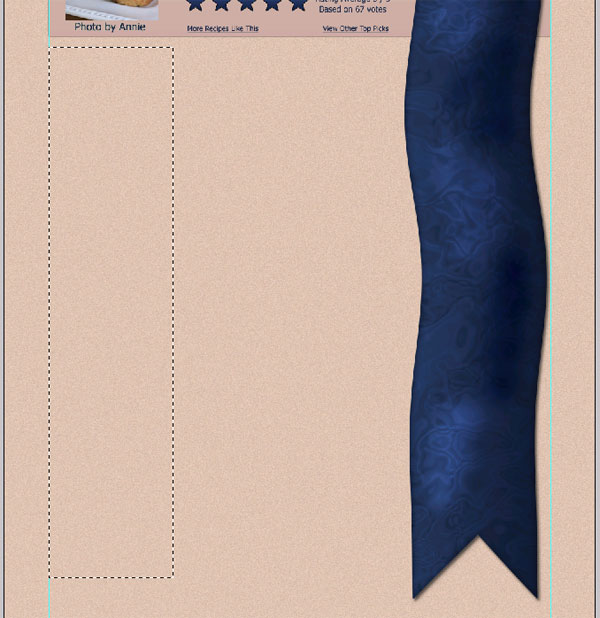
step75-select-left-sidebar-area

I then filled in this selection with white. It’s not going to stay as this, but I wanted to use this as a guide for my block titles that go along the left side bar:
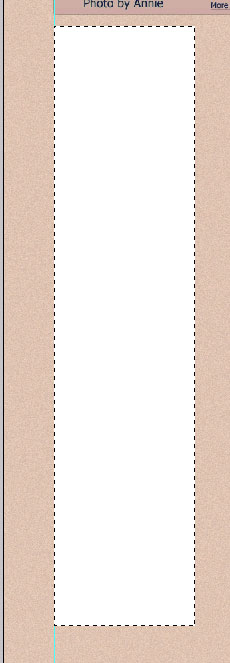
step76-fill-selection-white

Next, I created these shapes along the left sidebar using the Rectangle Tool:

step77-sidebar-title-shapes

Finally, I copied the layer styles from the navigation bar and pasted those layer styles onto each of these shapes, leaving me with this look:
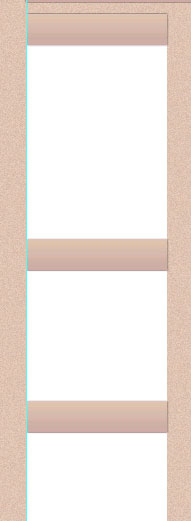
step78-sidebar-title-layer-styles

I then filled in the rest of my information along the left sidebar using the type tool set with Tahoma Font and color #0B1F44. I also applied these layer styles to my titles along the sidebar:
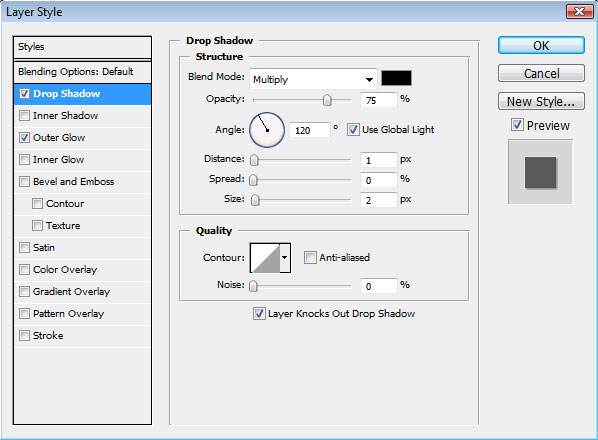
step79-sidebar-title-drop-shadow

step80-sidebar-title-outer-glow

Once my text was laid out correctly, I was able to delete that white layer that I had used as a guide for spacing, leaving my left sidebar looking like this:

step81-finished-left-sidebar

The main content area was done very similarly to the left sidebar, but I added the search area near the top so that my content titles could be slightly off-line:
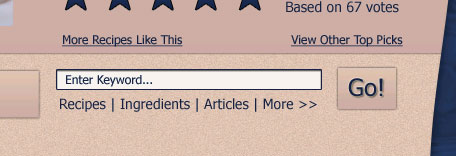
step82-search-bar

I finished out the main content area using the same techniques as I used for the left side bar and using the same separators as I had used for the banner area between the search bar and the content:
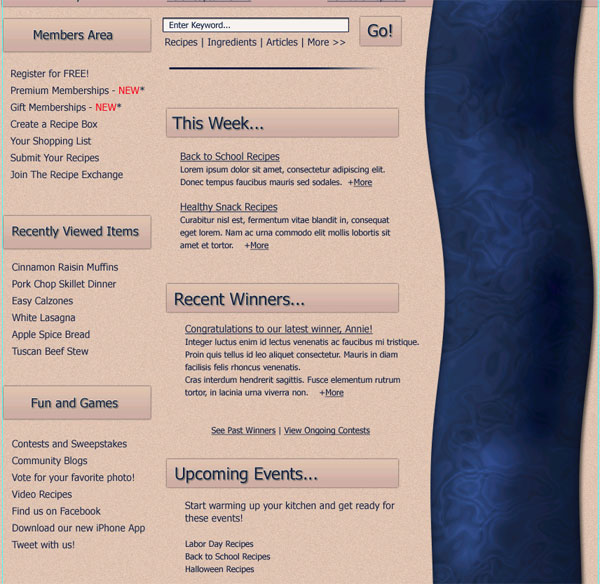
step83-finished-main-content

And now we can finally get back to filling out that ribbon. I used the Type Tool with color #CDADA2 to fill in the text along the length of the ribbon:

step84-content-on-ribbon

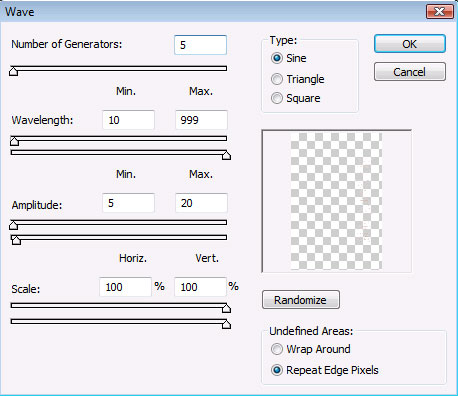
But of course, this looks really bad right now, right? Because the ribbon has that nice wave to it and the text doesn’t. So, we are going to select the layer with the text on it and apply the same wave as we did on the ribbon:
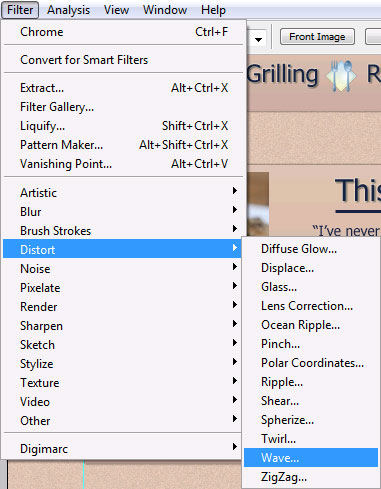
step85-filter-distort-wave

step86-wave-settings

You may need to use the move tool on your text to make sure that the wave effect lines up nicely with the wave of the ribbon. Here is my result:

step87-finished-ribbon-content

Last but not least, I used the Type Tool to add in the secondary links and copyright information along the bottom of the site. And here is the finished layout:
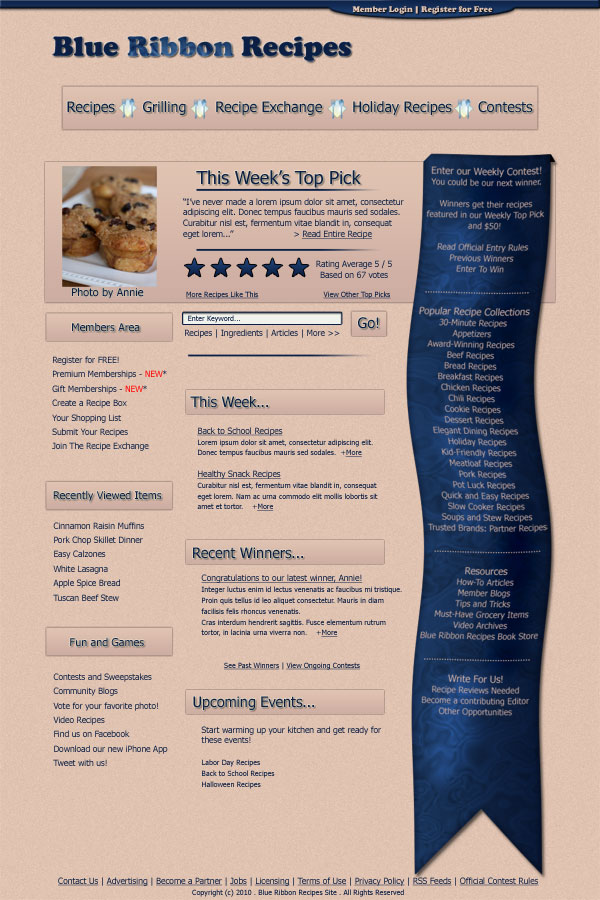
Your ads will be inserted here by

AdSense Now!.

Please go to the plugin admin page to paste your ad code.

Respray Tutorial

Your ads will be inserted here by

AdSense Now!.

Please go to the plugin admin page to paste your ad code.

Your ads will be inserted here by

AdSense Now!.

Please go to the plugin admin page to paste your ad code.

Your ads will be inserted here by

AdSense Now!.

Please go to the plugin admin page to paste your ad code.

Shiney Folder Tutorial

Your ads will be inserted here by

AdSense Now!.

Please go to the plugin admin page to paste your ad code.


Create a new document 400×300 with a white background, create a new layer called “folder”. Select the “pollygonal lasso tool” and make a selection like this.

Fill the selection in black then add these layer styles.

You should be left with this.

Create a new layer and name it “shine”, select the “rectangular marquee tool” and draw a selection like this.

Fill it with a white gradient.

Your ads will be inserted here by

AdSense Now!.

Please go to the plugin admin page to paste your ad code.

Now with the “shine” layer still selected hold “ctrl” and click your folder layer. Now goto “select > inverse” and hit the delete key, you should be left with this.

Lower opacity to about 50-60%.

Select the “rectangular marquee tool” again and draw out a small rectangle UNDER YOUR FOLDER LAYER.

Fill with the color black, then “right-click” your “folder layer” and goto “copy layer style”. Then right click your new rectangle layer and goto “paste layer style” you should be left with this.

Press “ctrl + T” to free transform your rectangle, select the bottom middle anchor point and drag towards the right whilst holding “ctrl” on the keyboard. You should be left with this.

Thats it all done.

Your ads will be inserted here by

AdSense Now!.

Please go to the plugin admin page to paste your ad code.

category-articles-page-8-

Your ads will be inserted here by

AdSense Now!.

Please go to the plugin admin page to paste your ad code.

Your ads will be inserted here by

AdSense Now!.

Please go to the plugin admin page to paste your ad code.

Your ads will be inserted here by

AdSense Now!.

Please go to the plugin admin page to paste your ad code.

Quickie: Book Tutorial

Your ads will be inserted here by

AdSense Now!.

Please go to the plugin admin page to paste your ad code.

Hello, welcome to another tutorial by hv-designs, currently number 182. In this tutorial il show you how to create a “non-realistic” book from scratch. You can download the PSD file for FREE by using the button below.

Lets get started. Create a new document, start off with something biggish about 850×600 pixels with a nice light background. Select the rectangle tool and draw out two big rectangles both on seperate layers.

Goto “edit > transform > warp” click the middle square at the bottom of the grid and move up. Do the same with the top middle square on the grid.

Do this process with both rectangles.

Move the rectangles closer together, merge both layers together and add these layer styles.

Your ads will be inserted here by

AdSense Now!.

Please go to the plugin admin page to paste your ad code.

Now goto “edit > transform > perspective” drag the bottom anchor points towards either the left or right, the free transform it to fit onto the canvas nicely. You should have something like this.

Duplicate OR repeat the steps above to make more pages, each page needs to be slightly smaller than the last one, eventually you’ll have something like this.

On the biggest rectangle which should be located at the bottom, add a brown gradient overlay.

Underneath all your rectangles add an ellipse using the elliptical marquee tool. The ellipse should be situated underneath the part of the book that looks as if its being bent, fill the ellipse with the color black. Add the ellipse on both sides of the book.

Fill the ellipse’s with the color black then goto “filter > blur > guassian blur” blur by about 8 – 8.5 pixels. Adjust the opacity of the shadows to suit. You should end up with something like this.

Select the type tool and add a large paragraph to your book. Right-click your text layer and goto “rasterize”. Goto “edit > transfrom > warp” warp the text paragraph the same way you did your book pages. The end result will look something like this.

Your ads will be inserted here by

AdSense Now!.

Please go to the plugin admin page to paste your ad code.

category-photoshop-tutorials-page-8-

Your ads will be inserted here by

AdSense Now!.

Please go to the plugin admin page to paste your ad code.

Your ads will be inserted here by

AdSense Now!.

Please go to the plugin admin page to paste your ad code.

Your ads will be inserted here by

AdSense Now!.

Please go to the plugin admin page to paste your ad code.

Interior Design Layout

Your ads will be inserted here by

AdSense Now!.

Please go to the plugin admin page to paste your ad code.

Learn how to create a sleek looking interior design layout from scratch.

Create a new document 850×1300 pixels, fill your background layer with the color black. Select the rectangular marquee tool and create two rectangles on top of each other using the colors #2e2e2e and #202020.

Leave a 1 pixel gap inbetween each rectangle, place the rectangles at the very top of your canvas, merge both rectangles into one layer. Now goto “filter > noise > add noise” use the settings below.

Now add a layer mask to your layer, set forground and background to black and white, select the gradient tool using a linear gradient start from the bottom of the rectangle and drag up. Right-click your mask on the rectangle layer and goto “apply layer mask”. Repeat the steps above only this time from the top of the rectangle.

Continuing using the same process as above only this time select a reflected gradient, set forground color to white and this time drag from the middle of the rectangle towards the edge either left or right, choice is yours. You should then have something like this.

Add your site title and logo, the pink color i used is #ff0072 and the font is used is “swatch it”.

Underneath your background jazz and site title add your navigation text. On this navigation im going to use a two tier one, so i add a rectangle around one of the navigation items then add a long rectangle underneath.

The little arrow on the 2nd navigation was made using the pen tool. For this next part your going to need some interior design stock images. Add a nice looking interior design stock image underneath your navigation, add a 1 white pixel stroke to the image.

Your ads will be inserted here by

AdSense Now!.

Please go to the plugin admin page to paste your ad code.
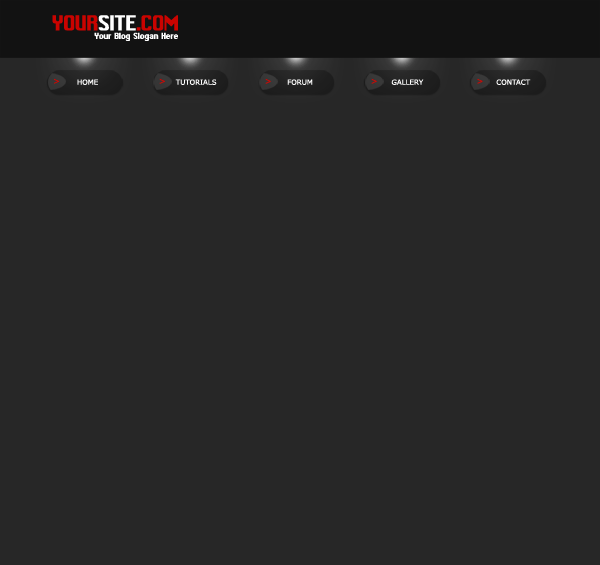
On top of our big image add two black rectangles towards the bottom. Also add a 1 pixel white stroke to each of the rectangles then lower the “fill” to 60%.

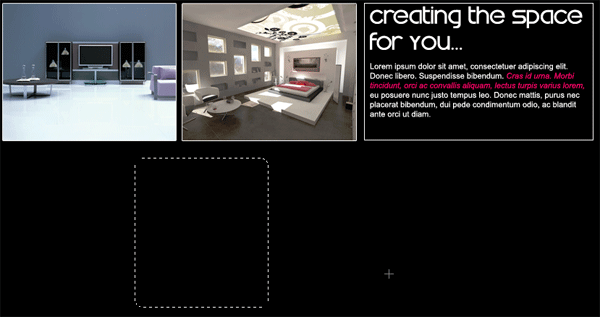
Fill these boxes with some information of your choice. Underneath the big image add a further two interior design style images and then a black square at the end, add a 1 pixel white stroke to each of them.

In the end box add some more information, then select the rounded rectangle tool and create an equal square rectangle.

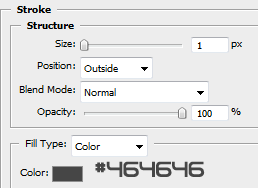
Fill your rectangle with the color black then add these two layer styles.

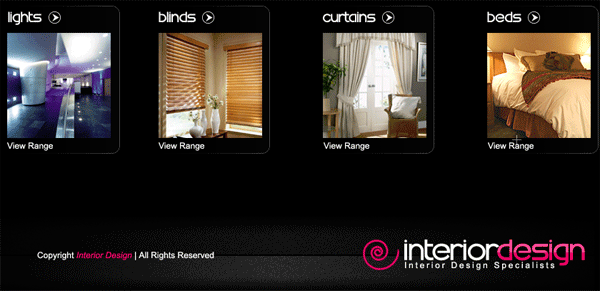
Now hide ALL YOUR LAYERS apart from the rectangle one, create a new blank layer above it then goto “layer > merge visable” make sure you have the rectangle layer selected. UNHIDE all your other layers. Add a layer mask to your rectangle and blend it in from the left side. Now duplicate your rectangle layer 3 times and place like the image below.

Fill these rectangles with some products related to interior design. Now for the footer duplicate your background jazz, site title and logo then move right the bottom of your canvas, add your copy right information.

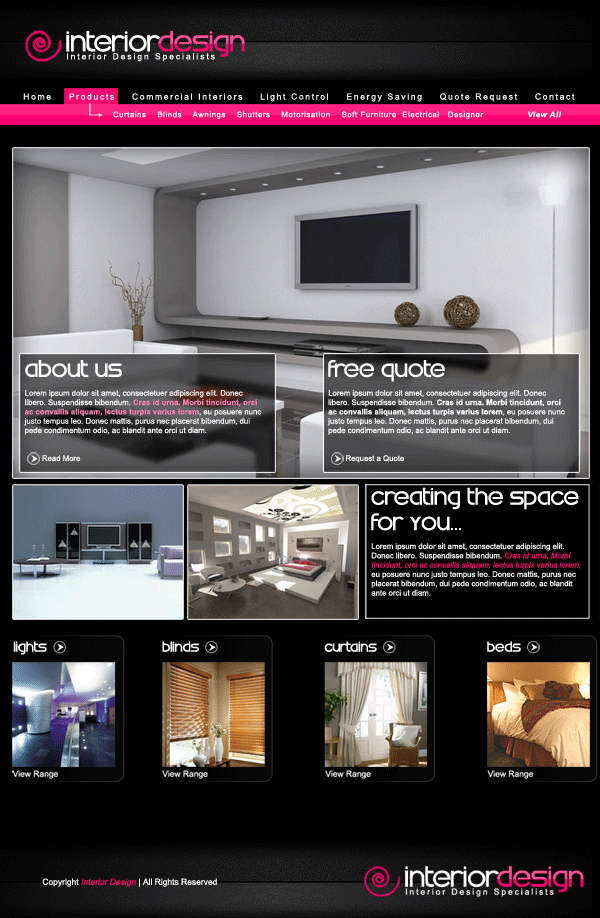
Your end product should looke something like this.

Your ads will be inserted here by

AdSense Now!.

Please go to the plugin admin page to paste your ad code.

category-photoshop-tutorials-page-10-

Your ads will be inserted here by

AdSense Now!.

Please go to the plugin admin page to paste your ad code.

Your ads will be inserted here by

AdSense Now!.

Please go to the plugin admin page to paste your ad code.
Your ads will be inserted here by

AdSense Now!.

Please go to the plugin admin page to paste your ad code.
Snow/Rain Tutorial

Your ads will be inserted here by

AdSense Now!.

Please go to the plugin admin page to paste your ad code.

Open up your image you want to add snow to, create a new layer and fill with the color black. Then goto “filter > noise > add noise” use settings below.

Next goto “filter > blur > guassian blur” set radius to about 1.5 pixels.

Now goto “image > adjustments > levels” OR “ctrl + L” use settings below.

Your ads will be inserted here by

AdSense Now!.

Please go to the plugin admin page to paste your ad code.

Now set your snow layer to “screen mode” heres how your picture should look.

you can also turn your snow into rain just follow steps above after step3 just goto “filter > blur > motion blur” when the window opens adjust angle of the rain and set distance to about 15 pixels depending on how fast you want the rain.

Your ads will be inserted here by

AdSense Now!.

Please go to the plugin admin page to paste your ad code.

product #1 here

Your ads will be inserted here by

AdSense Now!.

Please go to the plugin admin page to paste your ad code.

Your ads will be inserted here by

AdSense Now!.

Please go to the plugin admin page to paste your ad code.

Your ads will be inserted here by

AdSense Now!.

Please go to the plugin admin page to paste your ad code.

Pixelated Text Tutorial

Your ads will be inserted here by

AdSense Now!.

Please go to the plugin admin page to paste your ad code.


Start a new document 500×200 pixels, pick to colors one for your forground and one for your background, im using to types of blue, then goto “filter > render > clouds>”, then select the text tool and the color white then type what ever it is you want to pixelate, heres how mine looks.

Now duplicate your text layer and drag your duplicated layer underneath the original and goto “filter > blur > guassian blur” photoshop will tell you that the text layer needs to be rasterized just click ok, now guassion blur it by 4 pixels, heres how mine looks.

Your ads will be inserted here by

AdSense Now!.

Please go to the plugin admin page to paste your ad code.

Now goto “filter > pixelate > mosiac” and type in 12 click ok. looks abit blurry so we need to sharpen it, goto “filter > sharpen > sharpen” do this twice.

Now add a small drop shadow under your original text layer. DONE!


Your ads will be inserted here by

AdSense Now!.

Please go to the plugin admin page to paste your ad code.

2012-02-22-zyma-hosting-giveaway-requirements-

Your ads will be inserted here by

AdSense Now!.

Please go to the plugin admin page to paste your ad code.

The results of our hosting giveaway are in! I want to first thank all the entrants for their participation and we will be setting up more giveaways to thank you guys for your support! So, now to what you really care about, the WINNER!

Your ads will be inserted here by

AdSense Now!.

Please go to the plugin admin page to paste your ad code.

The winner of our giveaway is Lawrence777. We have replied to your tweet. To claim your prize please send us an email to the admin email on the contact page so we can get you the details of your hosting account! Congratulations again, and be sure to keep watching the site for more excellent tutorials and big giveaways.

Your ads will be inserted here by

AdSense Now!.

Please go to the plugin admin page to paste your ad code.

PSD > HTML/CSS

Your ads will be inserted here by

AdSense Now!.

Please go to the plugin admin page to paste your ad code.

Your ads will be inserted here by

AdSense Now!.

Please go to the plugin admin page to paste your ad code.

Your ads will be inserted here by

AdSense Now!.

Please go to the plugin admin page to paste your ad code.