CSS Menu With Icons
Hello, welcome to another tutorial by the hv-designs team, today we’ll be making a CSS menu with icons.
Firstly lets create our navigation in photoshop, create a new document 600×200 pixels with a black background. Create a rectangle 600×40 pixels with rectangular marquee tool, you can create specific sizes by changing the style to “fixed size”.
![]()
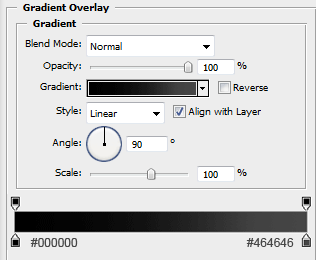
Fill your navigation with the color black then add these layer styles.
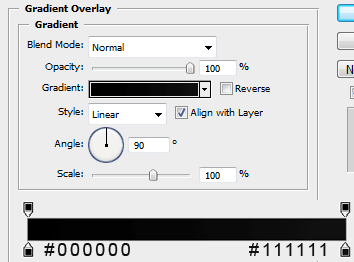
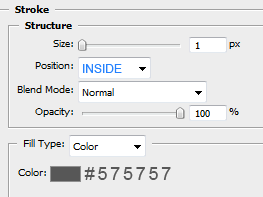
You should have something like this.

Select the rectangular marquee tool again and create a selection like this.

Fill with the color white, then click on your naviagtion layer whilst holding down the ctrl key on the key board to make a selection.

Once you have made the new selection goto, “select > inverse” then hit the delete key. You should be left with this.

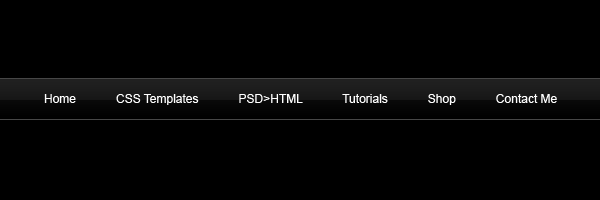
Lower the opacity to about 5% then add your naviagtion text.
Now select the rounded rectangle tool and create a small rectangle next to your navigtation text. The icons should be no bigger than 32×32 pixels. Althou you can make them bigger if you want you just need to adjust the CSS code when we come to code it. Add these layer styles to each of your round rectangles.
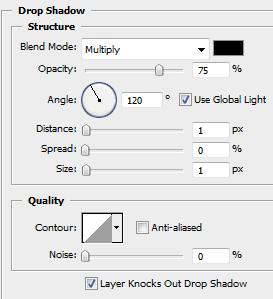
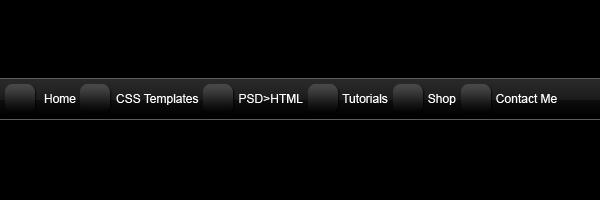
Your navigation should now look like this.
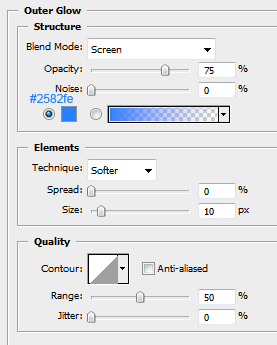
Inside the round rectangles we want to add our icons, im going to use some preset shapes in the custom shapes libary that came free with photoshop. Once you have chosen your icons and added them inside the rectangles add this outer glow.
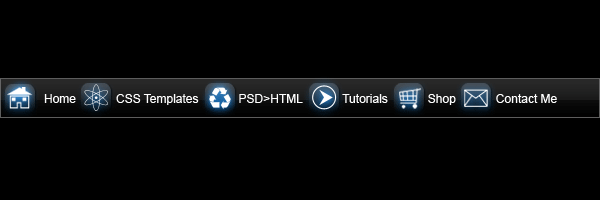
Your navigation should looks something like this.
Looks abit cramped up, but it doesnt matter as we can set the spacing of each item in css. For this bit we need to zoom in abit, select the pen tool with the color #008aff, draw a line underneath your 1st item.
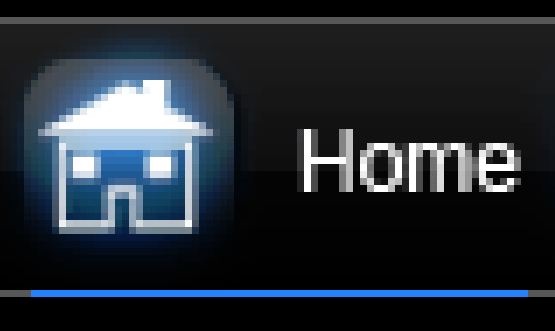
Now add this layer style to your line.
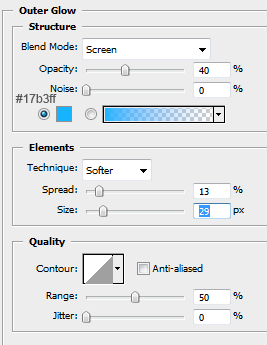
Thats it for your naviagtion, you end result should be something like this.
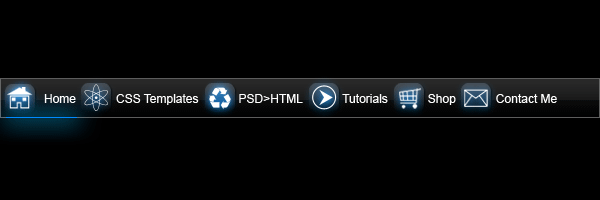
Now that we’ve finished we need to slice our navigation up, so go ahead and create a new folder on your desktop called navigation, then inside that folder create another 2 folders called “icon_images” and “navigation”. Inside the “icon_images” folder we need to save each icon as seperate images dont forget they need to be 32×32 pixels and on a transparent background, save each of them as .PNG files. Heres mine.

We also need 2 chunks of our navigation one being the main background and the other one being the mouseover. Head back over to your naviagtion which should still be in photoshop, hide all your layers apart from your main navigation and the mouse over.

Make each seperate image 300 pixels wide, you may need to stretch your mouse over line over more so it fits like the image below. Save these 2 files as “nav_background” and “nav_hover”.
![]()
![]()
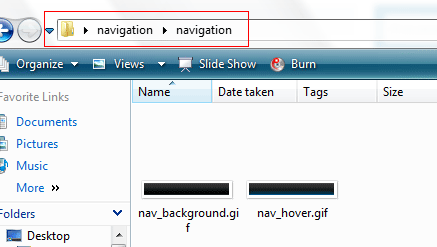
Next you need to create an empty text file and save it as styles.css in your root naviagtion folder. After you’ve done that its time to open dreamweaver. Create a new html document and straight away save it as index.html or whatever you want to call it save the file in your root folder with your styles.css file. Edit your title text and link your style sheet.
<!--CTYPE html PUBLIC "-//W3C//DTD XHTML 1.0 Strict//EN" "http://www.w3.org/TR/xhtml2/DTD/xhtml1-strict.dt-->
After this bit of code we need to map out our navigation using the standard UL and LI tags which looks like this.
<ul class="navigation"> <li class="current"><a href="http://www.hv-designs.co.uk"><em class="home"></em><strong>Home</strong></a></li> <li><a href="http://www.hv-designs.co.uk/hv_shop"><em class="templates"></em><strong>CSS Templates</strong></a></li> <li><a href="http://www.sb-designs.co.uk"><em class="psd"></em><strong>PSD>HTML</strong></a></li> <li><a href="http://www.hv-designs.co.uk"><em class="tutorials"></em><strong>Tutorials</strong></a></li> <li><a href="http://www.hv-designs.co.uk/hv_shop"><em class="shop"></em><strong>Shop</strong></a></li> <li><a href="http://www.hv-designs.co.uk"><em class="contact"></em><strong>Contact Me</strong></a></li> </ul>
You will notice that next to each link there is a “EM CLASS” this will refer to our icons in the style sheet. You will also notice like the 1st navigation tutorial we have set “LI CLASS CURRENT” which basically means the link on the navigation will stay in mouseover state for that certain page.
So you HTML code should look like this.
<!--CTYPE html PUBLIC "-//W3C//DTD XHTML 1.0 Strict//EN" "http://www.w3.org/TR/xhtml2/DTD/xhtml1-strict.dt--> <ul class="navigation"> <li class="current"><a href="http://www.hv-designs.co.uk"><em class="home"></em><strong>Home</strong></a></li> <li><a href="http://www.hv-designs.co.uk/hv_shop"><em class="templates"></em><strong>CSS Templates</strong></a></li> <li><a href="http://www.sb-designs.co.uk"><em class="psd"></em><strong>PSD>HTML</strong></a></li> <li><a href="http://www.hv-designs.co.uk"><em class="tutorials"></em><strong>Tutorials</strong></a></li> <li><a href="http://www.hv-designs.co.uk/hv_shop"><em class="shop"></em><strong>Shop</strong></a></li> <li><a href="http://www.hv-designs.co.uk"><em class="contact"></em><strong>Contact Me</strong></a></li> </ul>
Thats all the HTML code we need, so now head over to your styles.css file. At the top of your css file add a comment code, which looks like this /* NAVIGATION ELEMENTS */ after that we start to add our navigation css rules.
.navigation { padding:0 0 0 20px; margin:0; list-style:none; height:40px; background:#1841c8 url(navigation/nav_background.gif); }
padding:0 0 0 20px = A shorthand property for setting all of the padding properties in one declaration.
margin:0 = A shorthand property for setting the margin properties in one declaration.
list-style:none = removes the bullets from the list.
height:40px = height of our navigation bar.
background:#000000 url(navigation/nav_background.gif) = sets our naviagtion background color to black, and also sets the background of our navigation which refers to our image we created in photoshop.
Our next bit of css code is.
.navigation li { float:left; } .navigation li a { display:block; float:left; height:40px; line-height:40px; color:#FFFFFF; text-decoration:none; font-family:arial, verdana, sans-serif; text-align:center; padding:0 0 0 10px; font-size:11px; } .navigation li a b { float:left; display:block; padding:0 16px 0 8px; }
float:left = The float property sets where an image or a text will appear in another element. In our case left.
display:block = The element will be displayed as a block-level element, with a line break before and after the element.
line-height:40px = The line-height property sets the distance between lines.
color:#FFFFFF = Color #ffffff is white.
text-decoration:none = Defines normal text.
The next bit of css defines our “current” class and “mouseover” image.
.navigation li.current a { color:#FFFFFF; background:url(navigation/nav_hover.gif); } .navigation li a:hover { color:#00CCFF; background: url(navigation/nav_hover.gif); } .navigation li a em { display:block; float:left; width:30px; height:40px; }
Take note of the background: URL as the links relate to our mouse over image we created in photoshop. Also double check your image paths which is something i should of mentioned ealier, if you images dont show when we text in the browser then more than likely it will be the image path.
The last bit off css code is for our icons. Again dont for get to comment code /* ICON ELEMENTS */.
/* ICON ELEMENTS */ .navigation li a em.home { background-image: url(nav_icons/home.png); background-repeat: no-repeat; background-position: center center; } .navigation li a em.templates { background-image: url(nav_icons/templates.png); background-repeat: no-repeat; background-position: center center; } .navigation li a em.psd { background-image: url(nav_icons/psd.png); background-repeat: no-repeat; background-position: center center; } .navigation li a em.tutorials { background-image: url(nav_icons/tutorials.png); background-repeat: no-repeat; background-position: center center; } .navigation li a em.shop { background-image: url(nav_icons/shop.png); background-repeat: no-repeat; background-position: center center; } .navigation li a em.contact { background-image: url(nav_icons/contact.png); background-repeat: no-repeat; background-position: center center; }
Were only setting 3 simple rules for each of our icons as most of the important stuff is inherited from the other CSS RULES. The most important again is our individual images or icons that we made previously. If you look at our HTML code in our links you will see each icon has its own individual class that relates to there own snippet of code in the css file.