Your ads will be inserted here by
AdSense Now!.
Please go to the plugin admin page to paste your ad code.
Today I will be showing you how to create a simple coming soon page in Photoshop. We will be using Adobe Photoshop CS4 and will be using the very basic tools of Photoshop to create this tutorial.
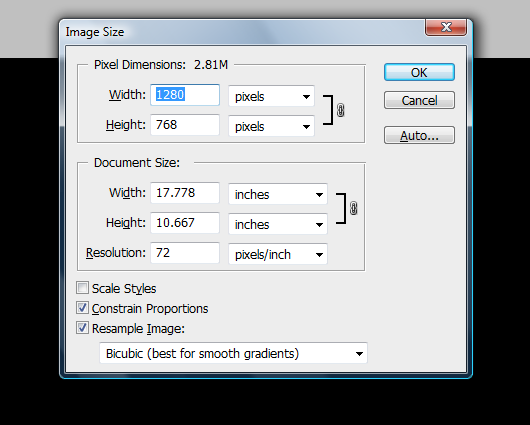
First we start off with a new document. This document needs to be 1280 x 768 and filled with Black.
For the next step you will need to download these Fibre Styles from DeviantArt.
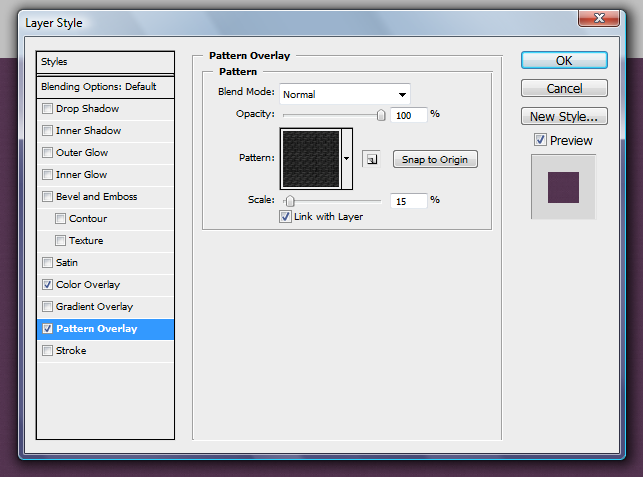
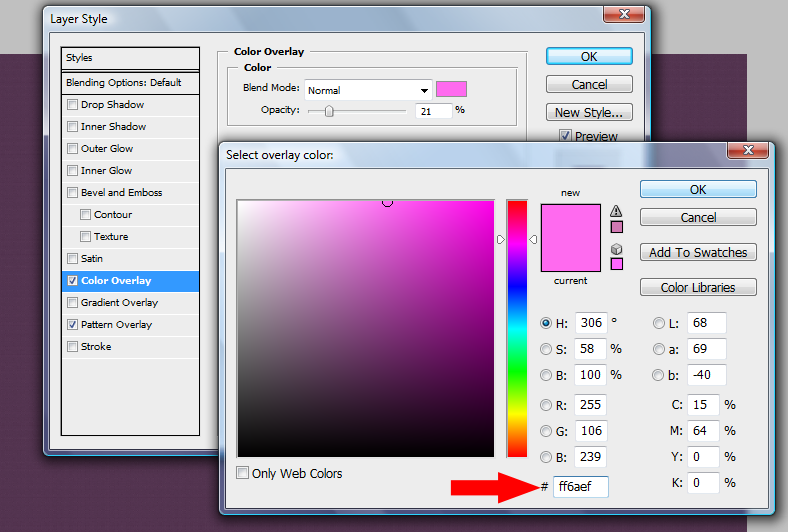
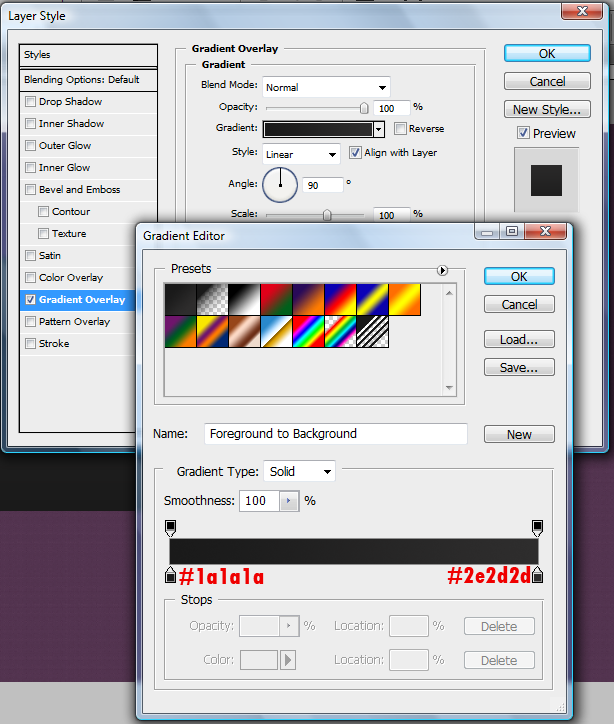
Now access the Blending Options of the main background layer and add the following styles.
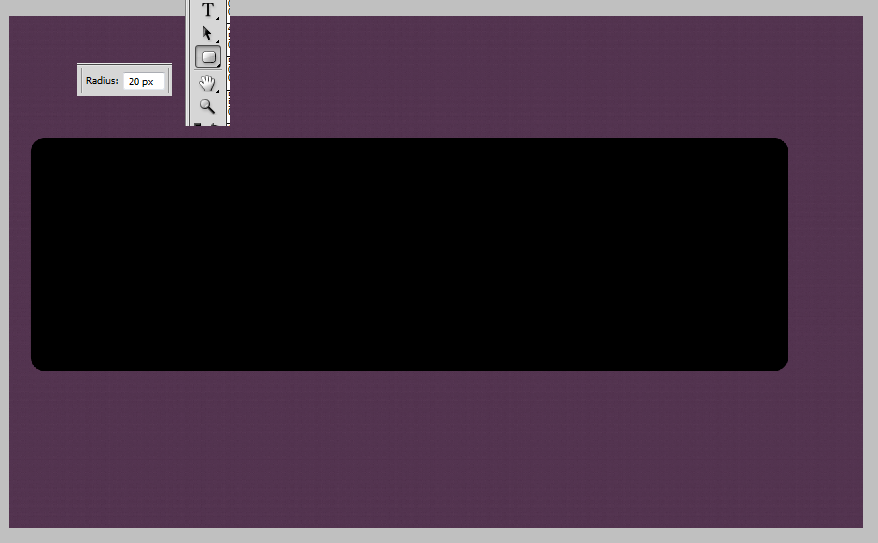
Now we are going to create a rounded rectangle to host our information. Drag out a rectangle, with an radius of 20px, our to 1135 pixels wide by 350 pixels tall. Center the rectangle vertically and space it 35 pixels from the left of the screen.
It is now time to style our rectangle. We will be giving it a simple gradient overlay (as shown below)
Now to add our character to the Coming Soon Page. You will need to download THESE icons.
We will be using the singular green character for our coming soon page, though of course you can use any of them.
Place your green character on the screen 143 pixels from the top of the screen and 17 pixels from the right (measuring from the tentacle).
Now we need to remove the coloring between the eyes and mouth to make the character look more friendly. Use the magic lasso tool to select the purple coloring for the eyes and mouth.
Your ads will be inserted here by
AdSense Now!.
Please go to the plugin admin page to paste your ad code.
Click the delete key on your keyboard to remove the selection. Use the eraser tool to get rid of any extra coloring that was not deleted. You should have only the background of the rectangle now instead of the purple and teeth.
Now we will use the magic lasso tool again to remove the white shadow underneath our character. Select the shadow and press the delete key to remove it.
Now select your magic lasso tool again. Select the space in the eyes and mouth one more time. When you have them selected, choose the rounded rectangle layer and hit the delete key so that only the background is showing through the eyes and mouth.
Now use the eraser tool, still selecting the rounded rectangle tool, and erase the extra pars of the rectangle, below the tentacles.
Now its time to add the content. For the first part of the content we will be using the font face Cooper Black and size 72pt. For the remainder of the content we used the same font face but used a 30pt size. This is our content, which you can use, or add your own. Be sure that, if you are adding your own, you leave enough space for the sign up bar.
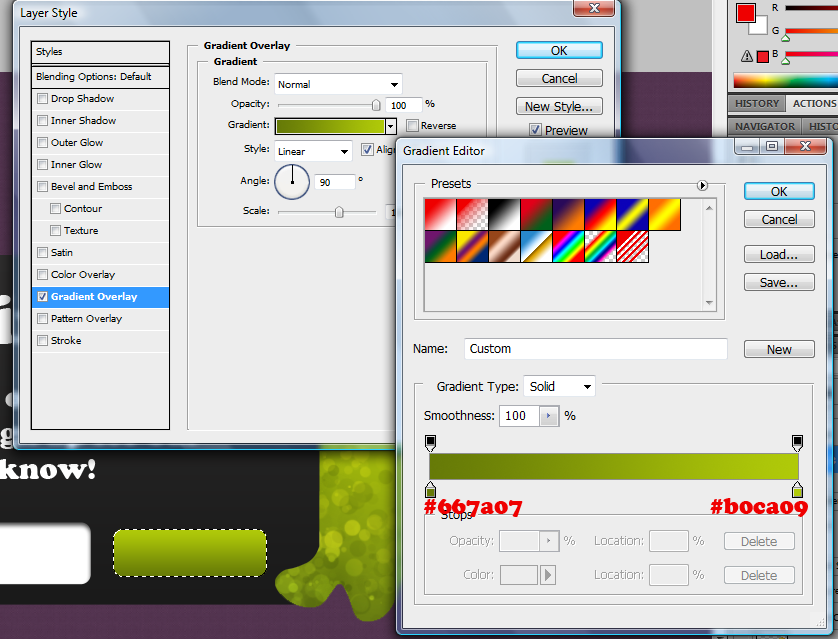
Now its time to add our sign up bar. We will be using the rounded rectangle again, this time with a 10px radius using White. Draw the rectangle out to be 548px wide by 63px tall. You need to space it 33 px from the left side of our black rectangle and 20px from the bottom. Now we are going to add some styling to our sign up bar. Use the following styles.
Now using the rounded rectangle again, with a 5px radius. Space it 22 pixels from our sign up bar. Drag it out to be 154px wide by 48px tall. Now lets add some styling to our sign up button. Use the following styles:
Now using the font face Eras Bold ITC, at a size of 30pt, and using black for the color. Type out the word Sign Up and center it, both horizontally and vertically, on your button.
Now, using the basis from THIS tutorial we are going to place our Social Navigation on our page to finalize the tutorial. You are dong with your photoshop document of the Coming Soon Page. You should have something like this:
Now, using the basis from THIS tutorial we are going to place our Social Navigation on our page to finalize the tutorial. You are dong with your photoshop document of the Coming Soon Page. You should have something like this:
Your ads will be inserted here by
AdSense Now!.
Please go to the plugin admin page to paste your ad code.
